Let's start with a little thought experiment. For a moment, close your eyes and think about 'autumn'
Give your mind a moment to roam through the images stored in your mind. What did you see?
If you're like me, that would be gorgeous, golden and orange looking trees, orange pumpkins, red apples, puddles, chunky knits... But even more so than the specific 'things' autumn in my mind is all about colour - quite a specific colour palette - and textures.
Colours hold a strong place in our subconscious. We don’t think of it a lot, but colours are culturally coded into our brains and have a strong significance to us.
When we think of autumn, we immediately picture a warm, saturated palette. We picture the oranges, browns, crimson reds, dark, purply reds, shimmery gold. Not the shiny and fresh greens, not the blue cold light.
That's why in this first lesson, in our Autumn Photo Bootcamp, I want you to think long and hard about colours and how to incorporate them in your images so that they literally SCREAM Autumn.
And we will do that by paying close attention to colour, to context, but also to light. Because without light my friends, colours are nothing.
Working with Colour
Before we go further into considering colour, I want to talk you about a tiny bit about the energy of colours and how they affect the image. Because not all colours are created equal. Some colours will always dominate and draw the eye, others are much more likely to fade away and serve as canvas. We talk about dominant and recessive colours.
Dominant and recessive colours:
Without going into too much detail, the dominant colours are those that from a purely physics point of view are visible on higher frequencies (???) and recessive ones, on lower. In plain english, think fire and ice - reds, oranges and highly saturated yellows will draw the eye and command it a lot more than calming blues, greys and greens.
So that read leaf will catch your eye a lot more than the green or pale yellow one! You can use this to emphasize things in your image that are important as you will draw the viewers eye to that place.
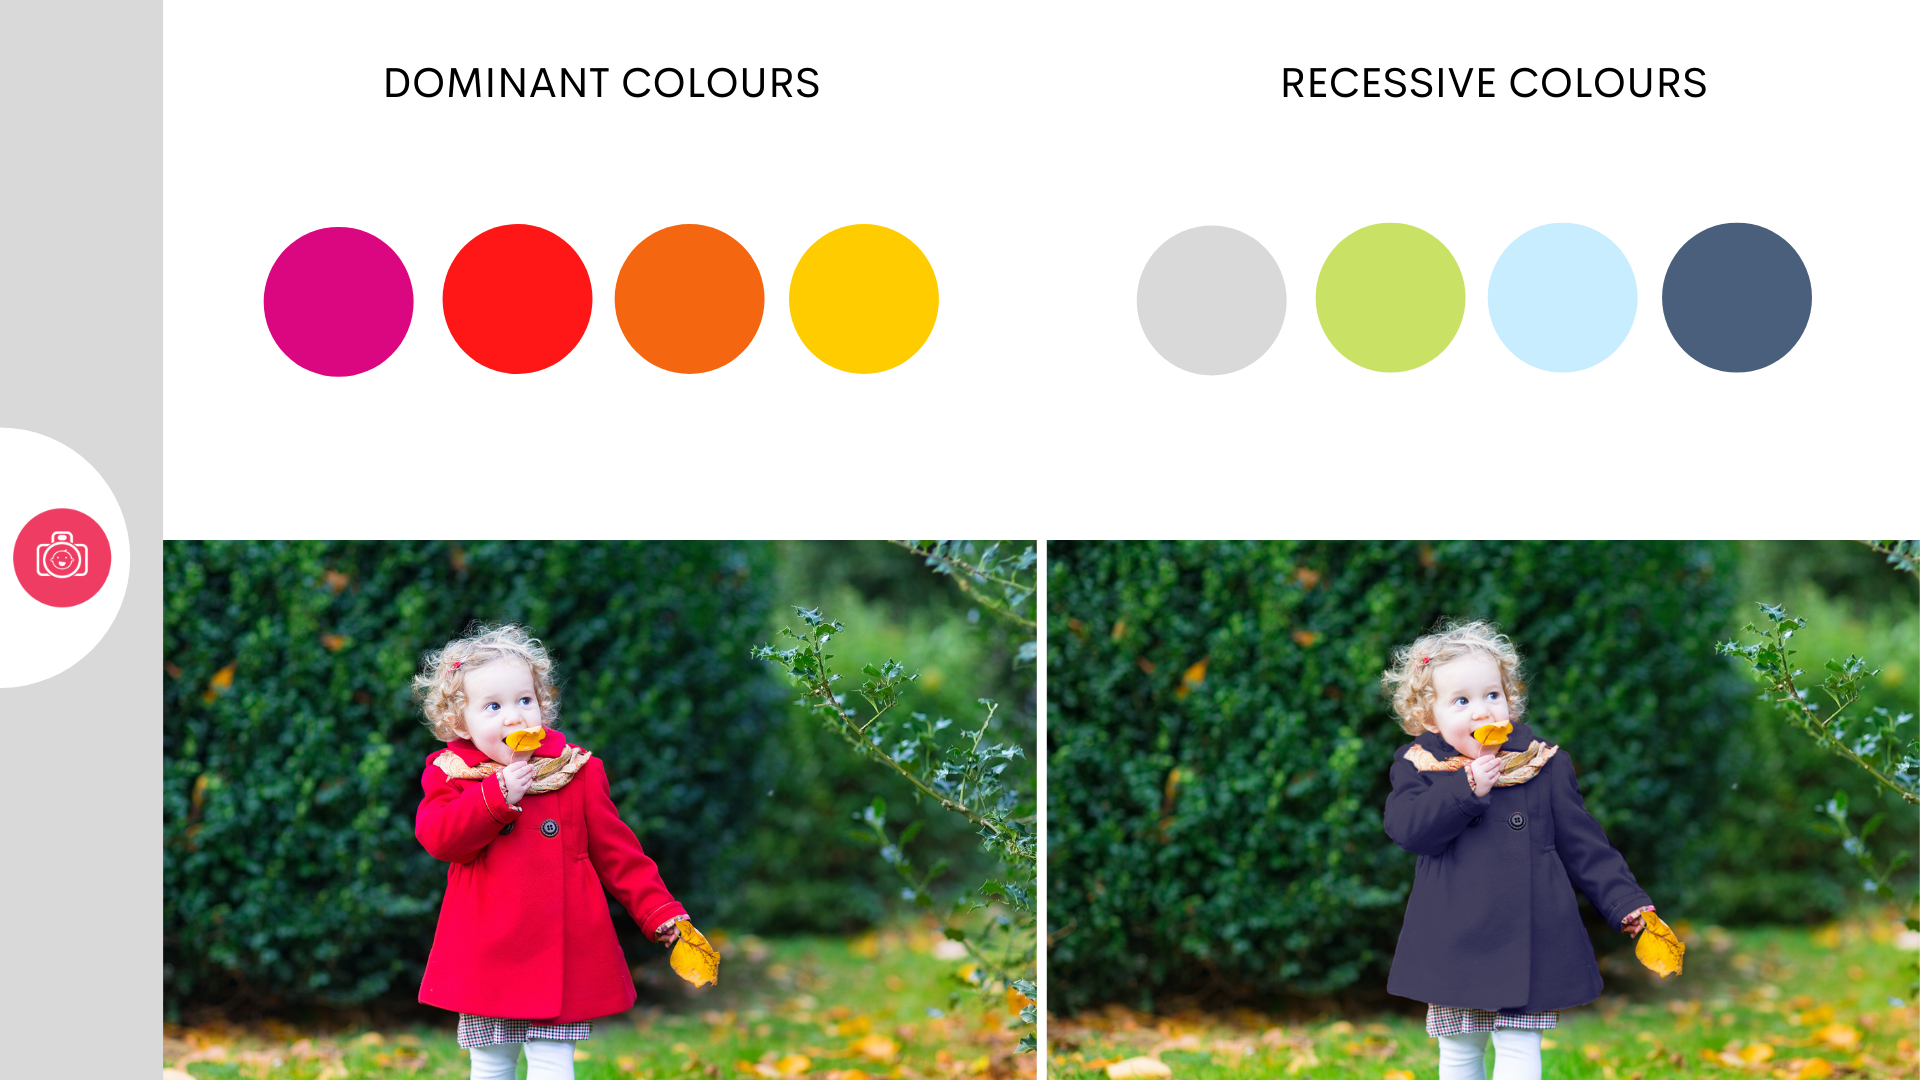
Then it's the matter of how those colours play with one another
Same – same or contrast?
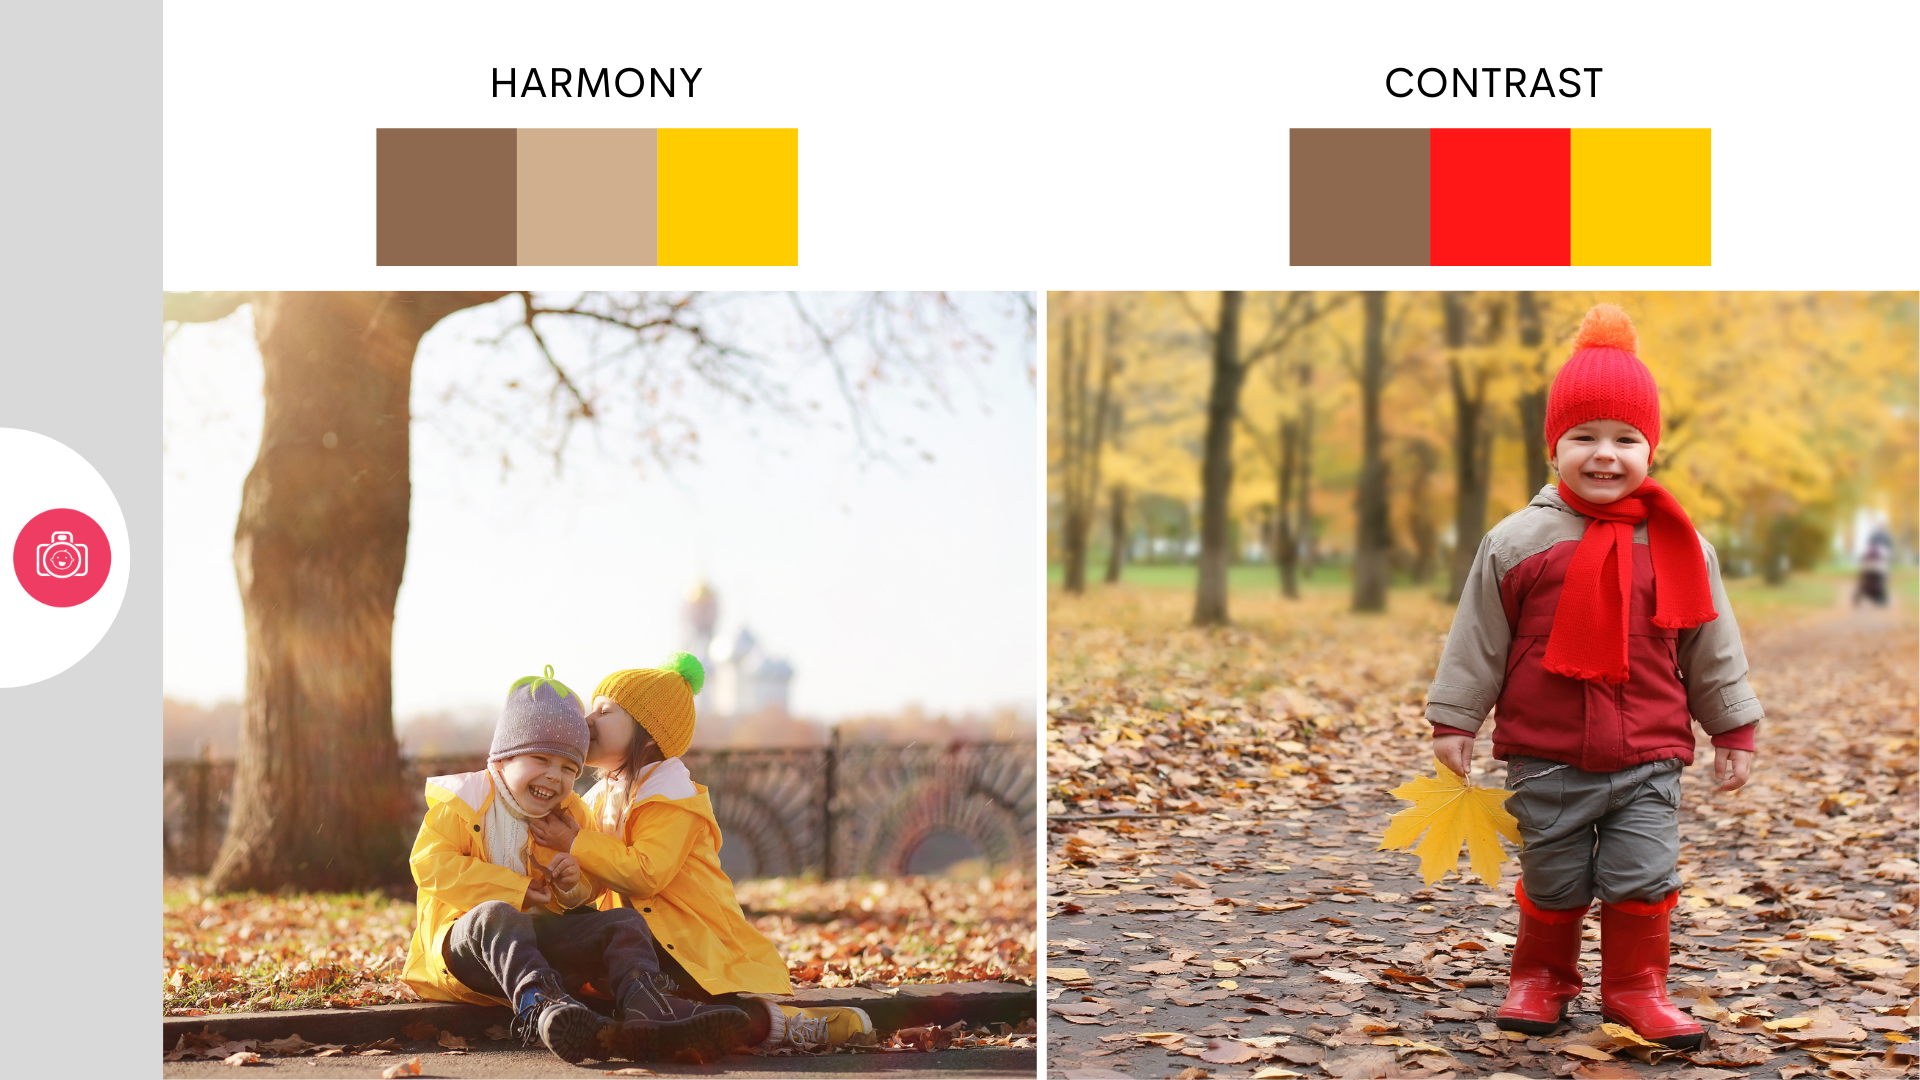
When it comes to using colour in your images, you have broadly speaking two options: Contrast or Harmony. Neither is right or wrong per se, but they can change the feel and mood of the image.
HARMONY
Placing similar colours next to one another
Whenever we see colours from the same colour palette next to one another, they help create a mood, glide the eye effortlessly around the image. Create a sense of peace and harmony. The image is more about the WHOLE as opposed to a specific element.
In the image below, the yellow of the kids coats plays nicely with the browns, beiges and muted yellow/oranges of the leaves. The image feels quite harmonious and feels like everything 'fits' together. It doesn't quite need to be this samey - samey to work, the colours simply need to fall within the same family
CONTRAST
Placing opposite colours against each other
Colour contrast always pitches one side against another and depending on which side is more dominant, it will attract the eye more. So when we see a child dressed in orange on a woodland path, to our brain, the image is all about that child, the wood is simply a backdrop
In the image below, the child is dressed in a strong dominant red. This both brings our eye directly to him, but also makes it a little hard to let it look elsewhere. The image is absolutely, completely about him, the rest is just a backdrop.
If it hadn't been a dominant colour, but perhaps a navy blue, or bright green, the contrast would still work, but in a less assertive way.
WHICH BEGS THE QUESTION : WHAT TO WEAR?
I’m going to start by saying that I absolutely do not expect you to go out and buy a new wardrobe for your kids so they ‘go’ with autumnal colours. You have the clothes you have and that’s OK, especially for the lifestyle, natural style photographer. One of my daughters went through a sparkly purple stage and there was no bribery in the world that would lift her out of those clothes. And the fact it didn’t go with mummy’s “yellow” theme? Well, tough!
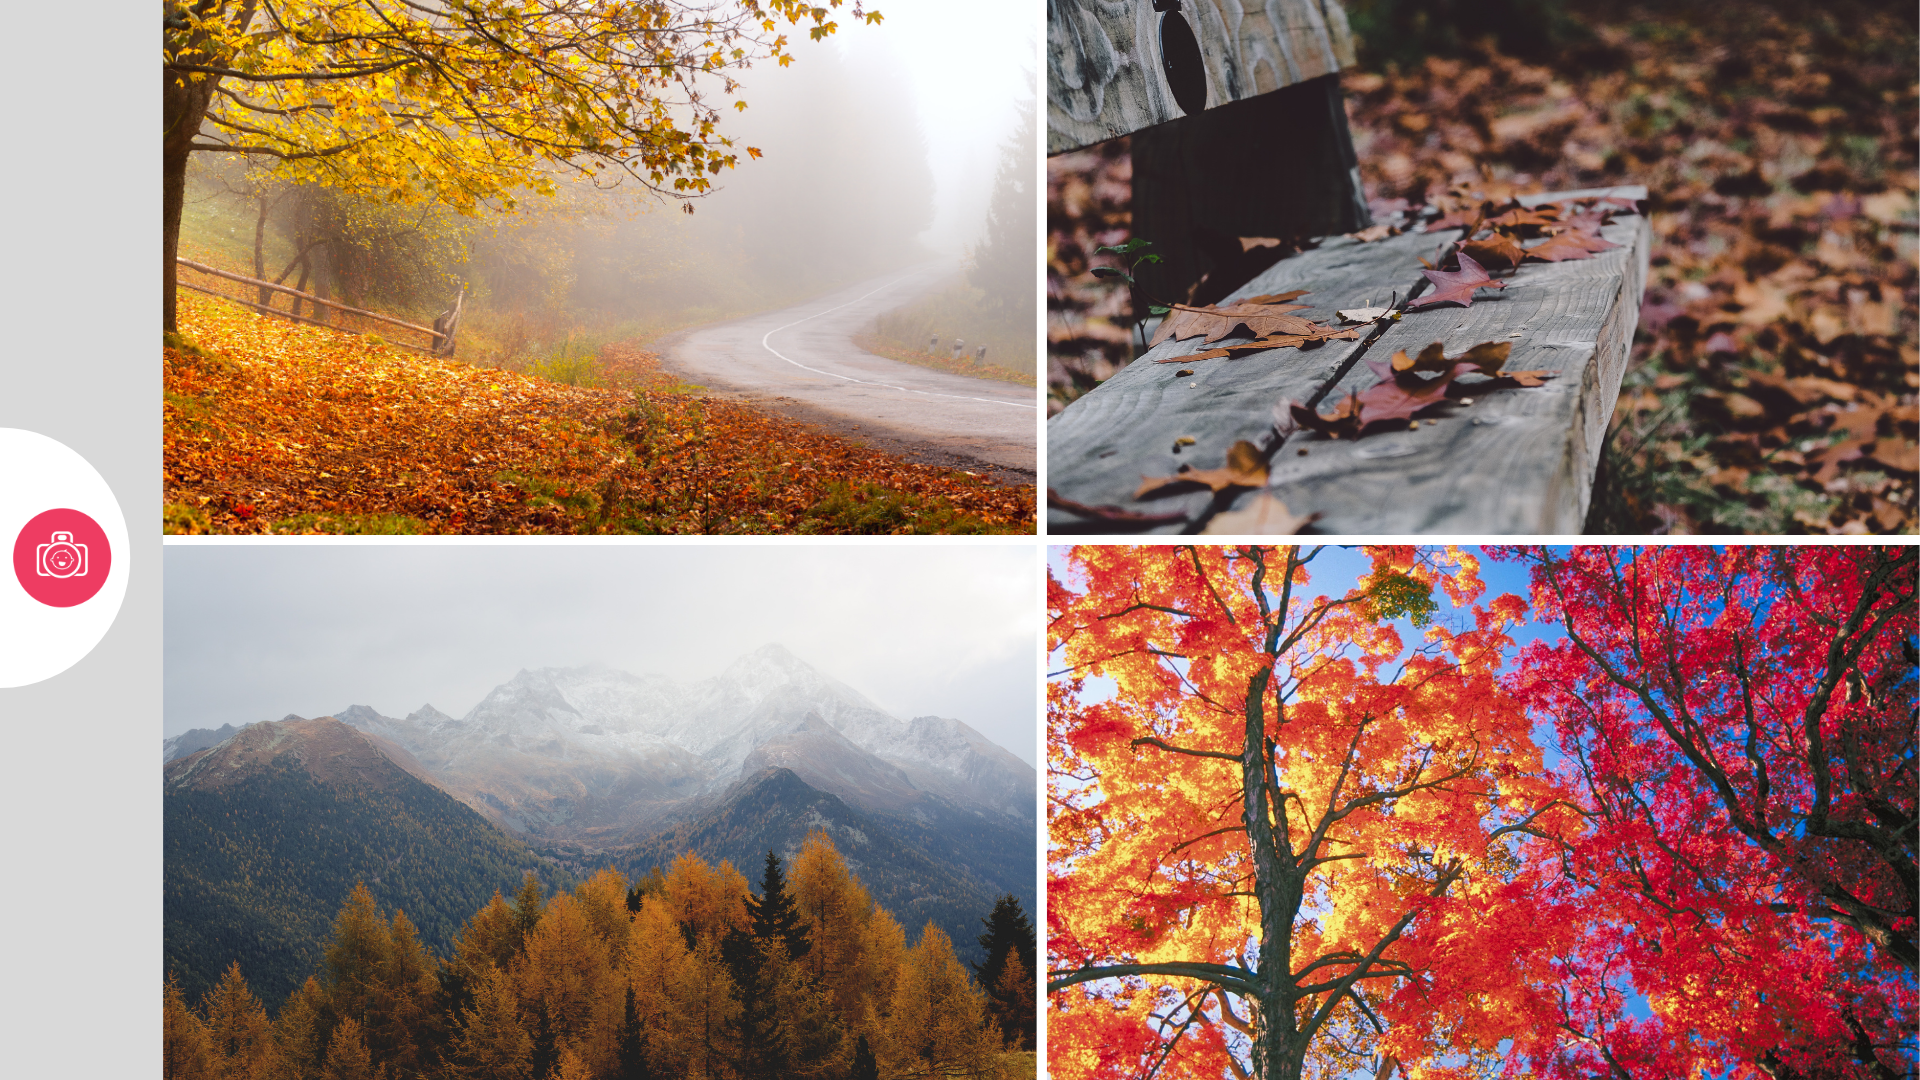
When choosing colours, take inspiration from nature
Nature's pallette
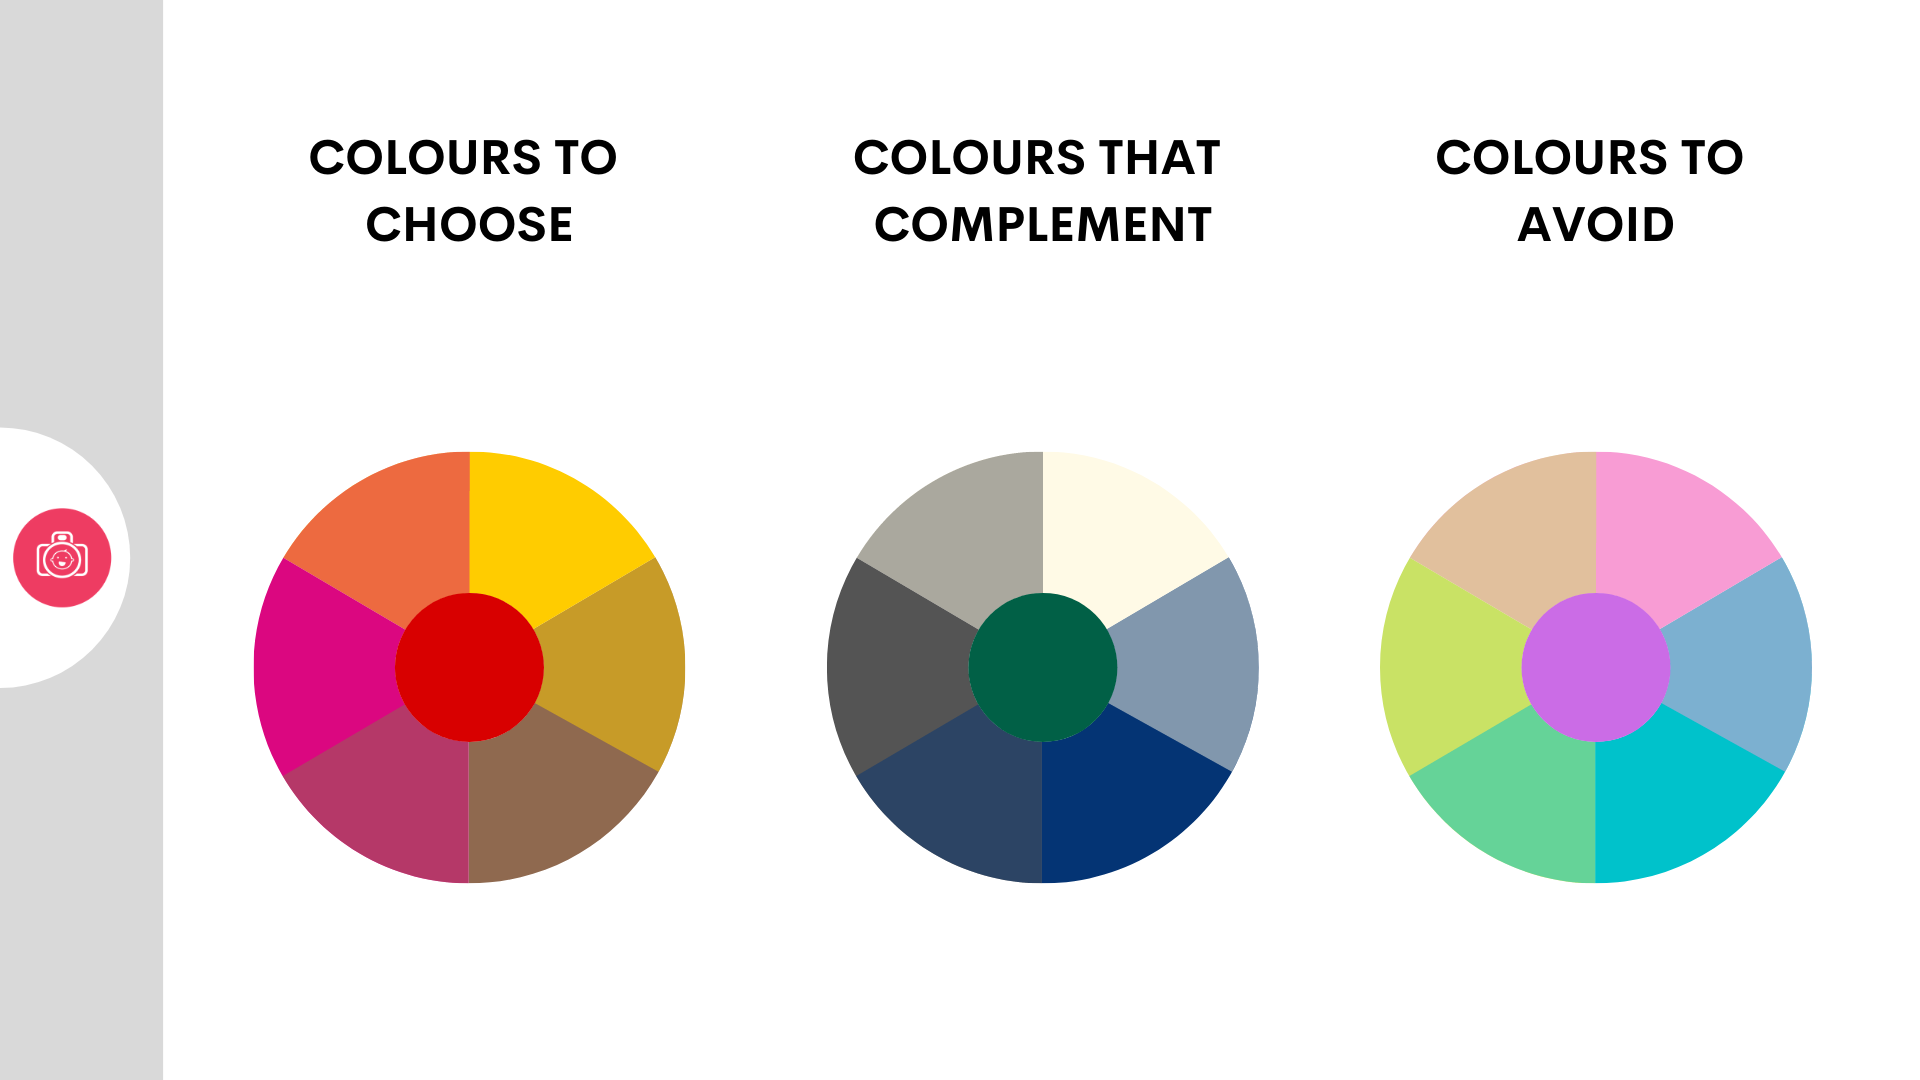
BUT if you have a choice of clothes in different colour scheme and would like for your autumnal images to have the same harmounious feel, go for the colours which you would easily find in nature at this time of the year – all kinds of yellows, reds, oranges, browns, even magenta.
Colours that complement :
Navy blue, denim and grey / charcoal as well as cream, or beige will complement these very well. They won't dominate and even if they're not from the same colour family, they will still fit in well
This leads us to this - dress your children in colours of the background or neutrals and they will melt a little into the scene. Make a statement with green wellies, red coat, navy jumper or yellow rain mac and they will stand out proudly, draw the eye, direct our gaze to them – to the thing that matters in that image.
Avoid ( within reason) :
Colours that you wouldn't expect to see in nature this time of the year: turquoise, pale pinks, pastels, bright greens, violets
Colour is nothing without light
We talked a little bit about colour, but there is one massive element which influences what it looks like. I'm talking about light. Light is what can make the same exact leaf look very different depending on what kind of light it is and where it's coming from.
BASICS OF LIGHT
Let’s start with the basics. Up to now, if you ever considered light, you probably thought about it as something that there may be too much or too little of. Is it sunny? Is it not sunny? But this week, we want you to push further and consider three other light’s characteristics. And those are:
- The quality of your light - harsh or gentle?
- The direction of Light - where is my light coming from?
There are more light characteristics, but those two will play the biggest part this week. And as Autumn means most often being outdoors, we will only be concerning ourselves with outdoor light. (inside light is a whole other beast).
Look around you, or even out the window. Try to pay attention to the light you see. How strong is it? Is it harsh or soft? Is it hitting your subject directly ( think ‘naked’ sunshine ) or is it filtered and diffused by something? ( like clouds). Does it create strong shadows or barely any?
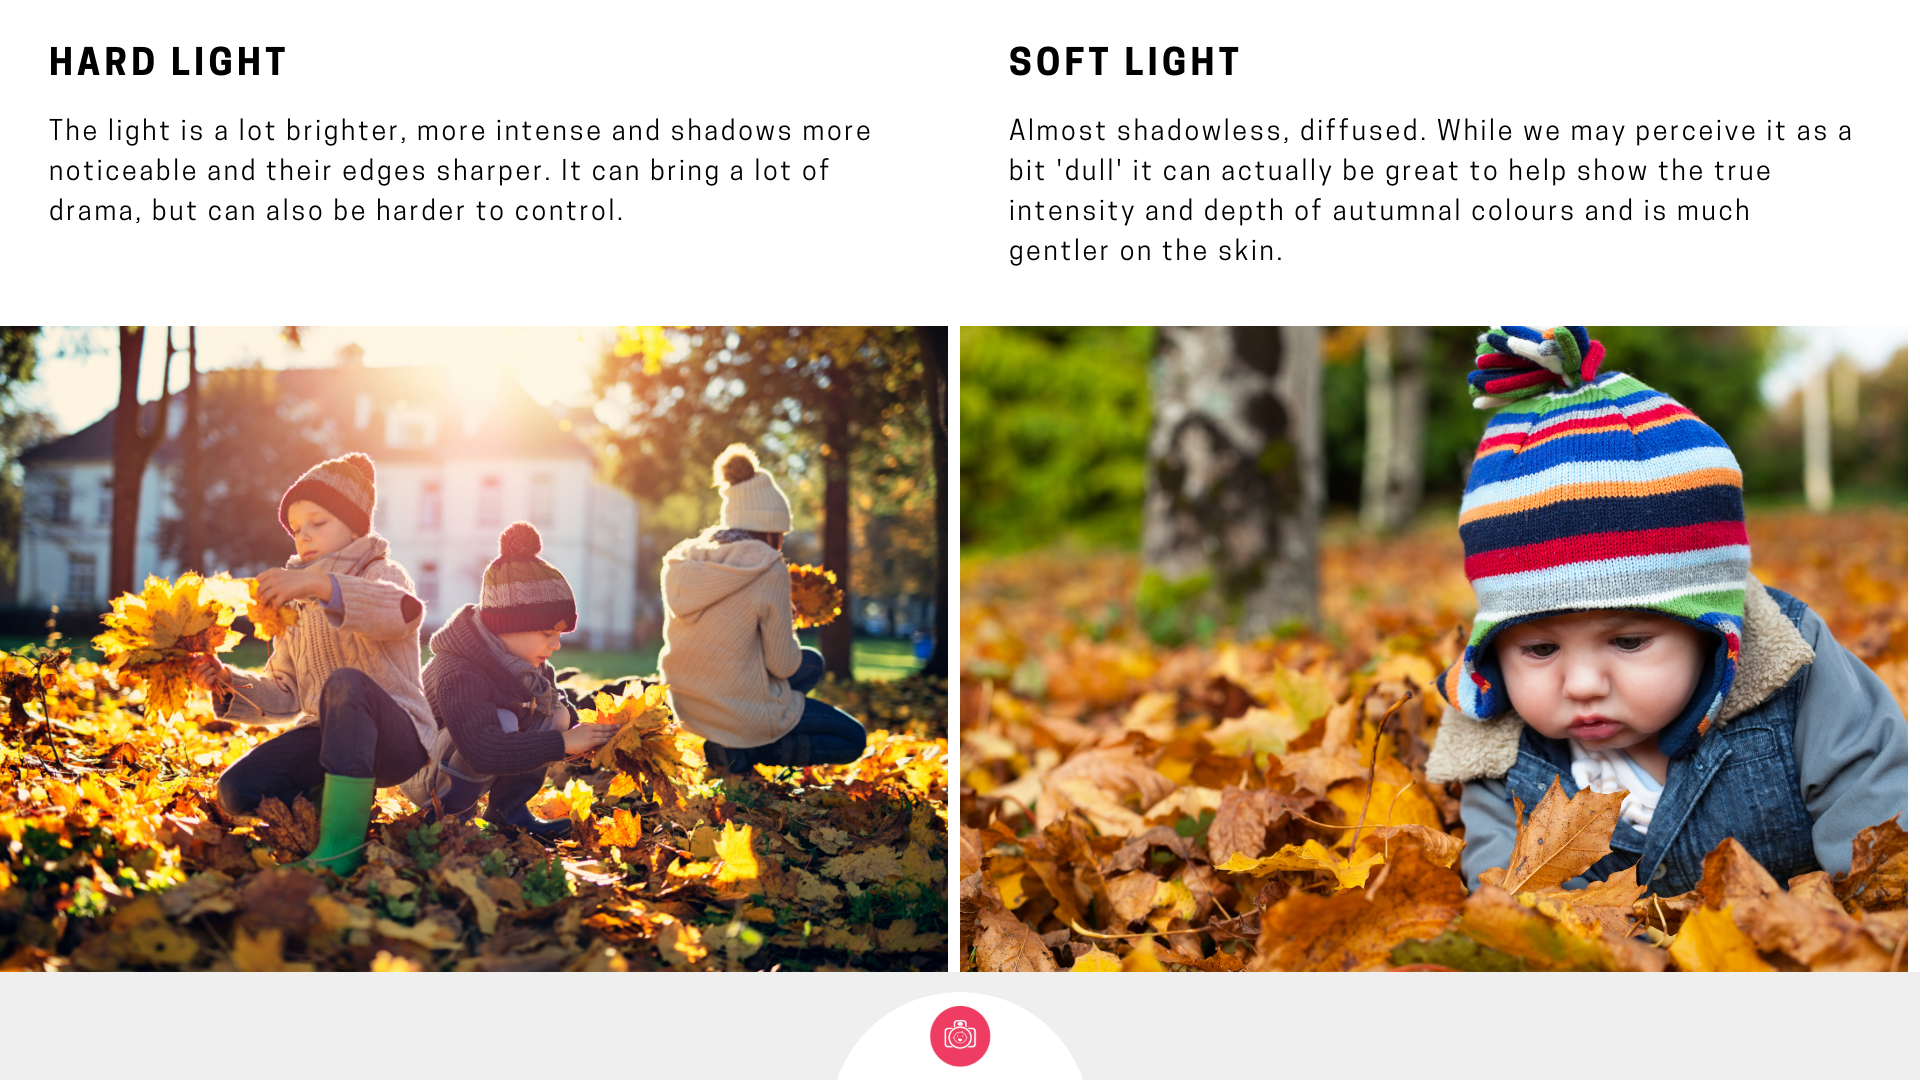
Hard light
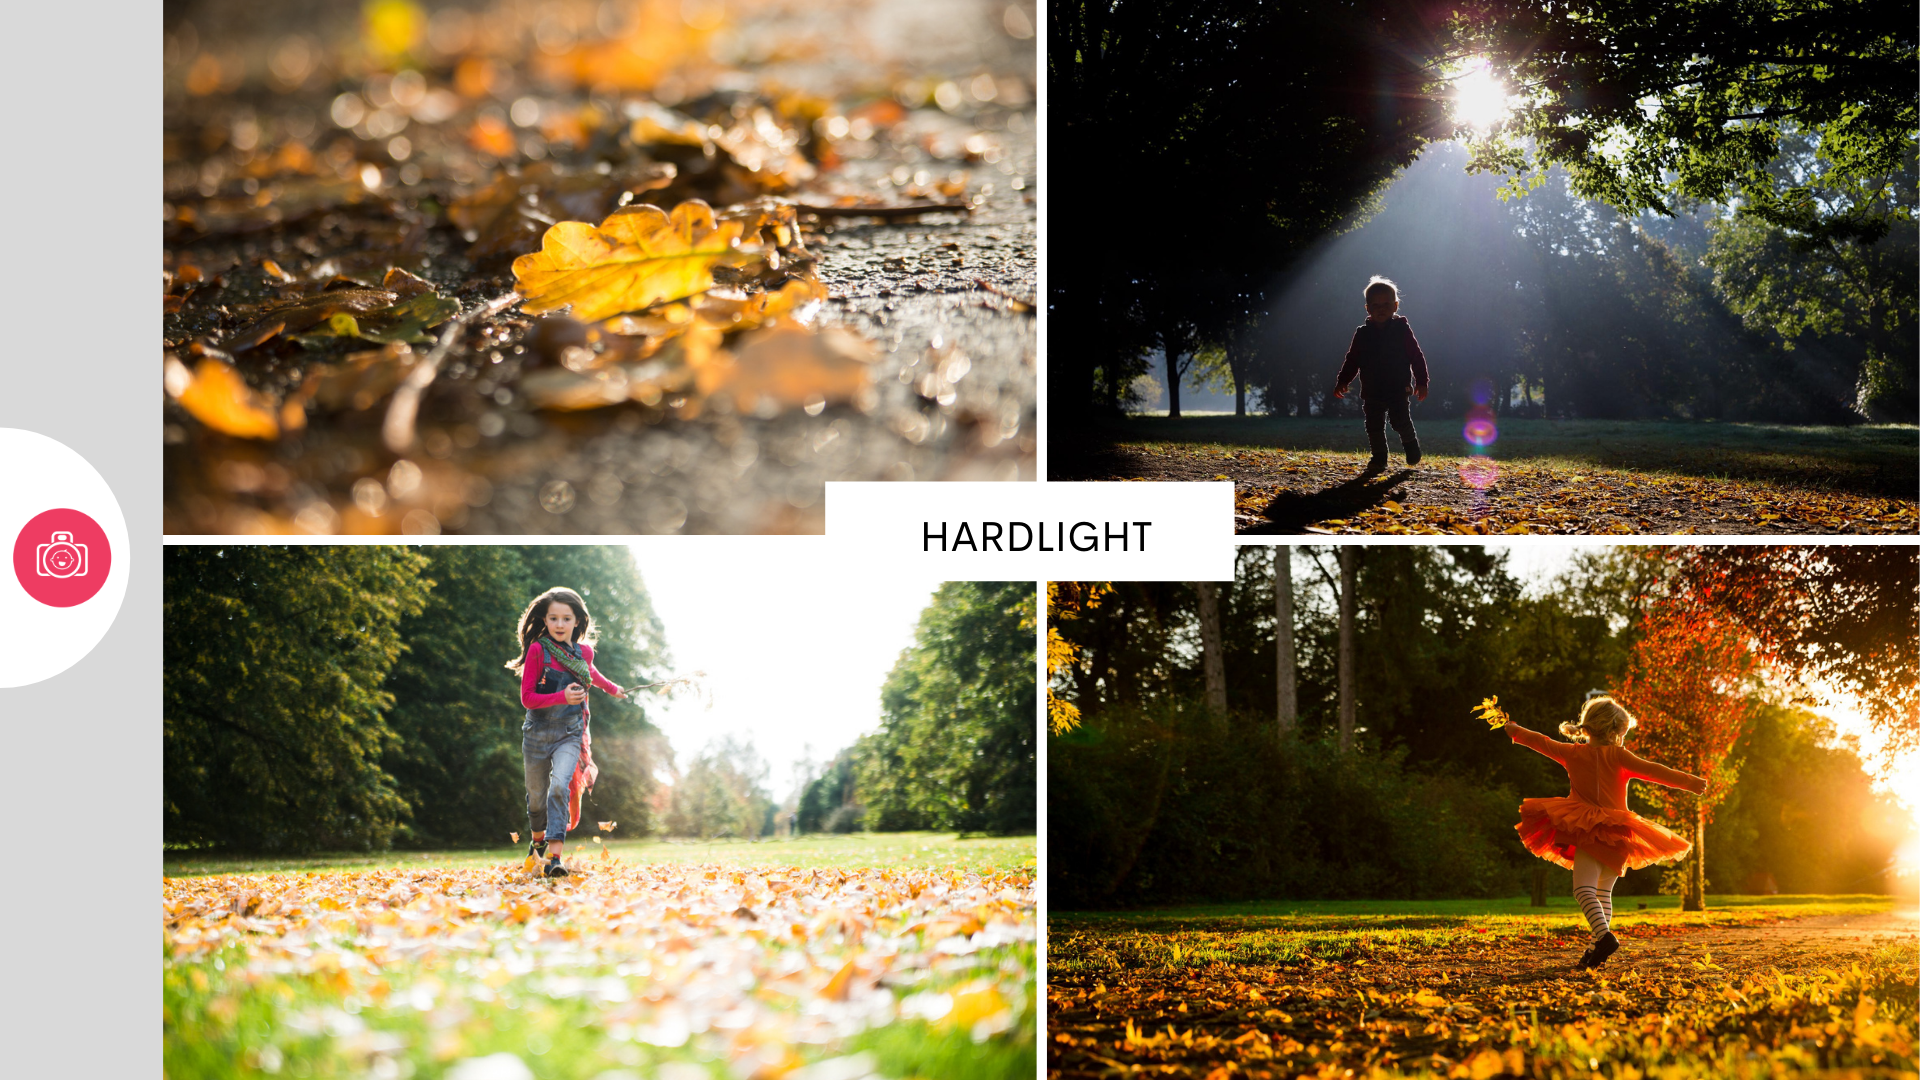
Let’s start with this infrequent phenomenon of sunny weather which often translates into hard light. Here is what’s important to recognise.
- “Naked” sunshine creates harsher, direct light which hits everything it touches with full strength. This means that when it’s bright, it’s REALLY bright. Squinty-eyes-bright. Very-bright-patches-bright.
- Bright sunshine = dark shadows. Absolutely no hiding from this. The brighter and more intense the light, the darker and denser and crisper the shadows. Now don’t get me wrong, shadows can be great, but some can be a distraction.
Hard, direct, intense light can give you fantastic results, but can also be quite challenging as it’s capable of literally ‘bleaching’ colours in your images.
So if you are out and about and enjoying the sunshine, notice, really notice how it's treating your subject - pay attention not just to the light itself, but also the shadows.
Soft light
It’s all good and nice I hear you say. But sunshine, it’s not so common here in autumn. So what if it’s overcast?
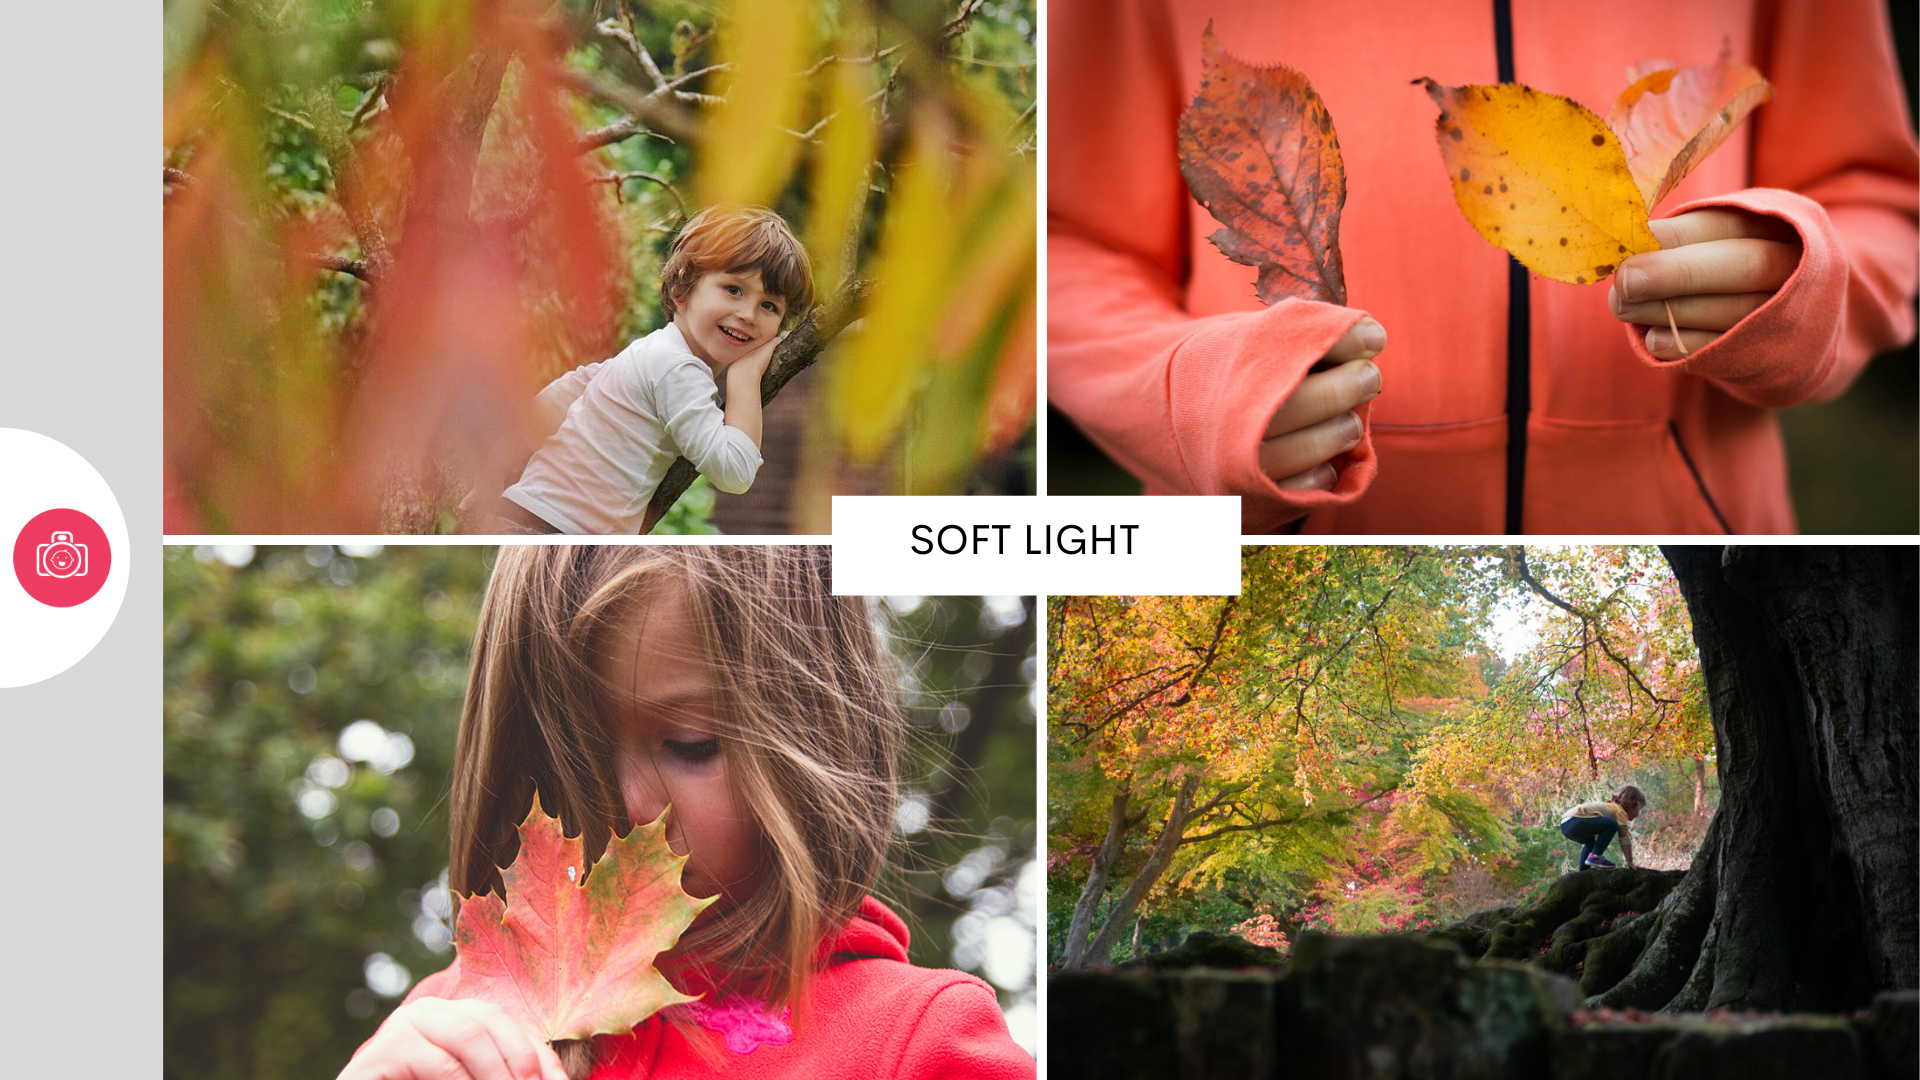
Actually, overcast weather can be beautiful in photographs too.
The light is softer, more even, more forgiving. With diffused, filtered light we lose the deep shadows, and instead, the light wraps around your subject more evenly. It sculpts everything gently, caressing your subjects with shadows which are just enough to hint at the three-dimensional nature of your subjects, but without the loss of detail which can happen with the deep dramatic shadows.
And the colours? The stunning ruby reds, vivid gold and still fresh greens stand out more. Where bright sunshine reflects off the bright and shiny leaves and makes the colours brighter, the softer light of overcast skies makes them deeper, richer, more saturated. Especially when contrasted against something darker. Add to that a little mist which coves the leaves with moisture and you have a surface which amplifies it, makes the vivid colour richer still.
Now that you know what KIND of light you have, the next question should be :
But where is it coming from?
And even more crucially, what does it do to my subject from one direction, and how ill it change if I change my position towards it?
DIRECTION OF LIGHT CHANGES EVERYTHING ABOUT THE WAY YOUR IMAGE LOOKS
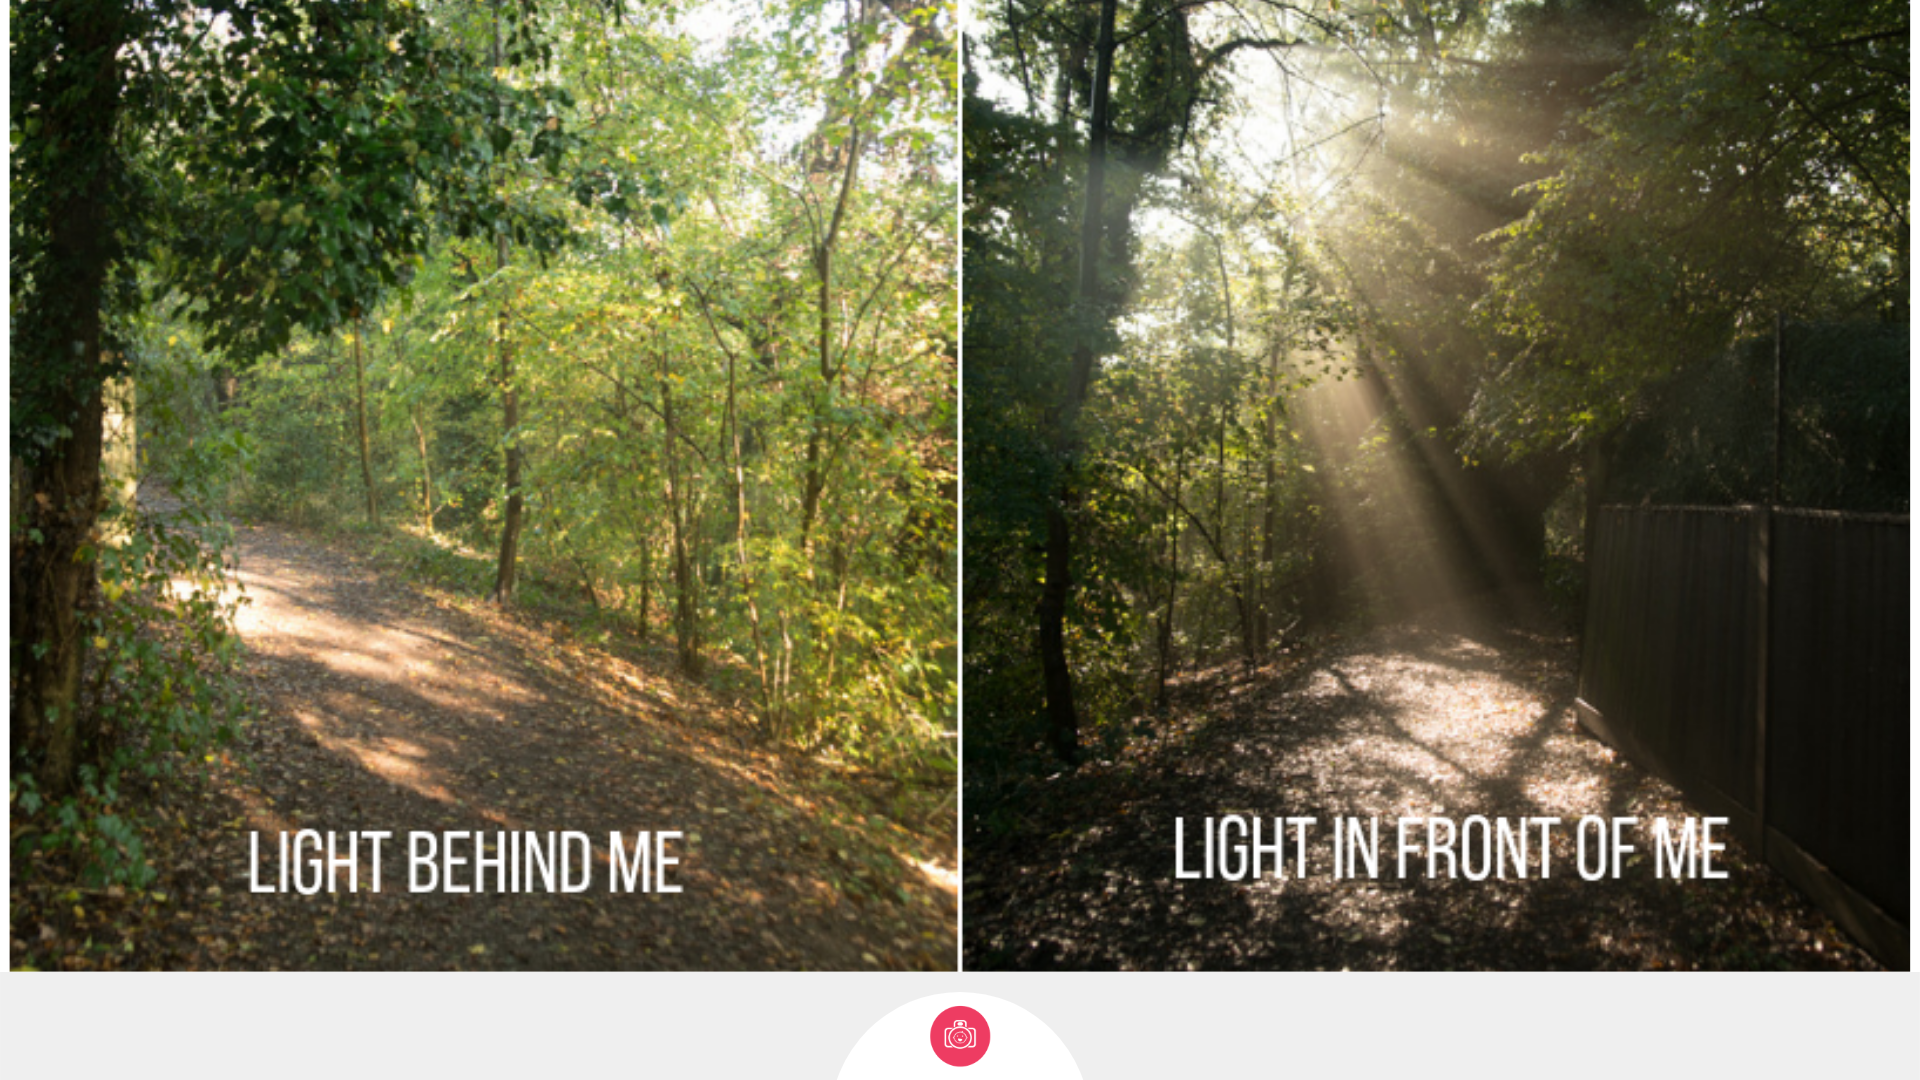
Let me tell you a story of this photo.
I took my daughter out in the morning. It had been raining the day before and I knew there was plenty of moisture in the air.
The sun in the morning was strong and direct so I was counting on it giving me plenty of photogenic light and shadows and I knew the moisture in the air would show up in the beams of light, creating those gorgeous streaks of light. That’s the perfect recipe for this kind of thing.#
But I almost missed it. I entered the woods with the sun behind us. We walked for a bit, examined plenty of sticks, mossy logs and stones and I was disappointed to see none of that lovely mist I was hoping for.
And then I turned around. And there it was. Right behind me, mocking me. We had just passed through it and I saw nothing. But it was enough to turn around and here it was.
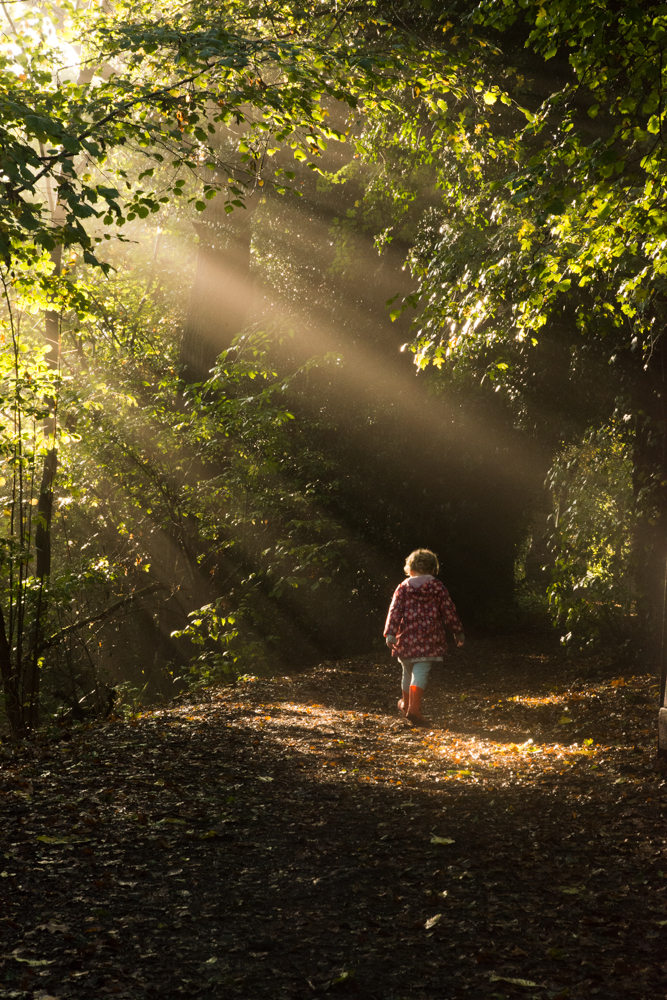
Look at the pictures below – that’s the spot I am talking about. Same exact place, just photographed from two different sides – first, with the sun behind me, hitting the path nice and frontal. The second, with the sun lighting it up from behind ( well left-behind, but close enough).
But does the direction of light influence colours?
Yes, yes it does.
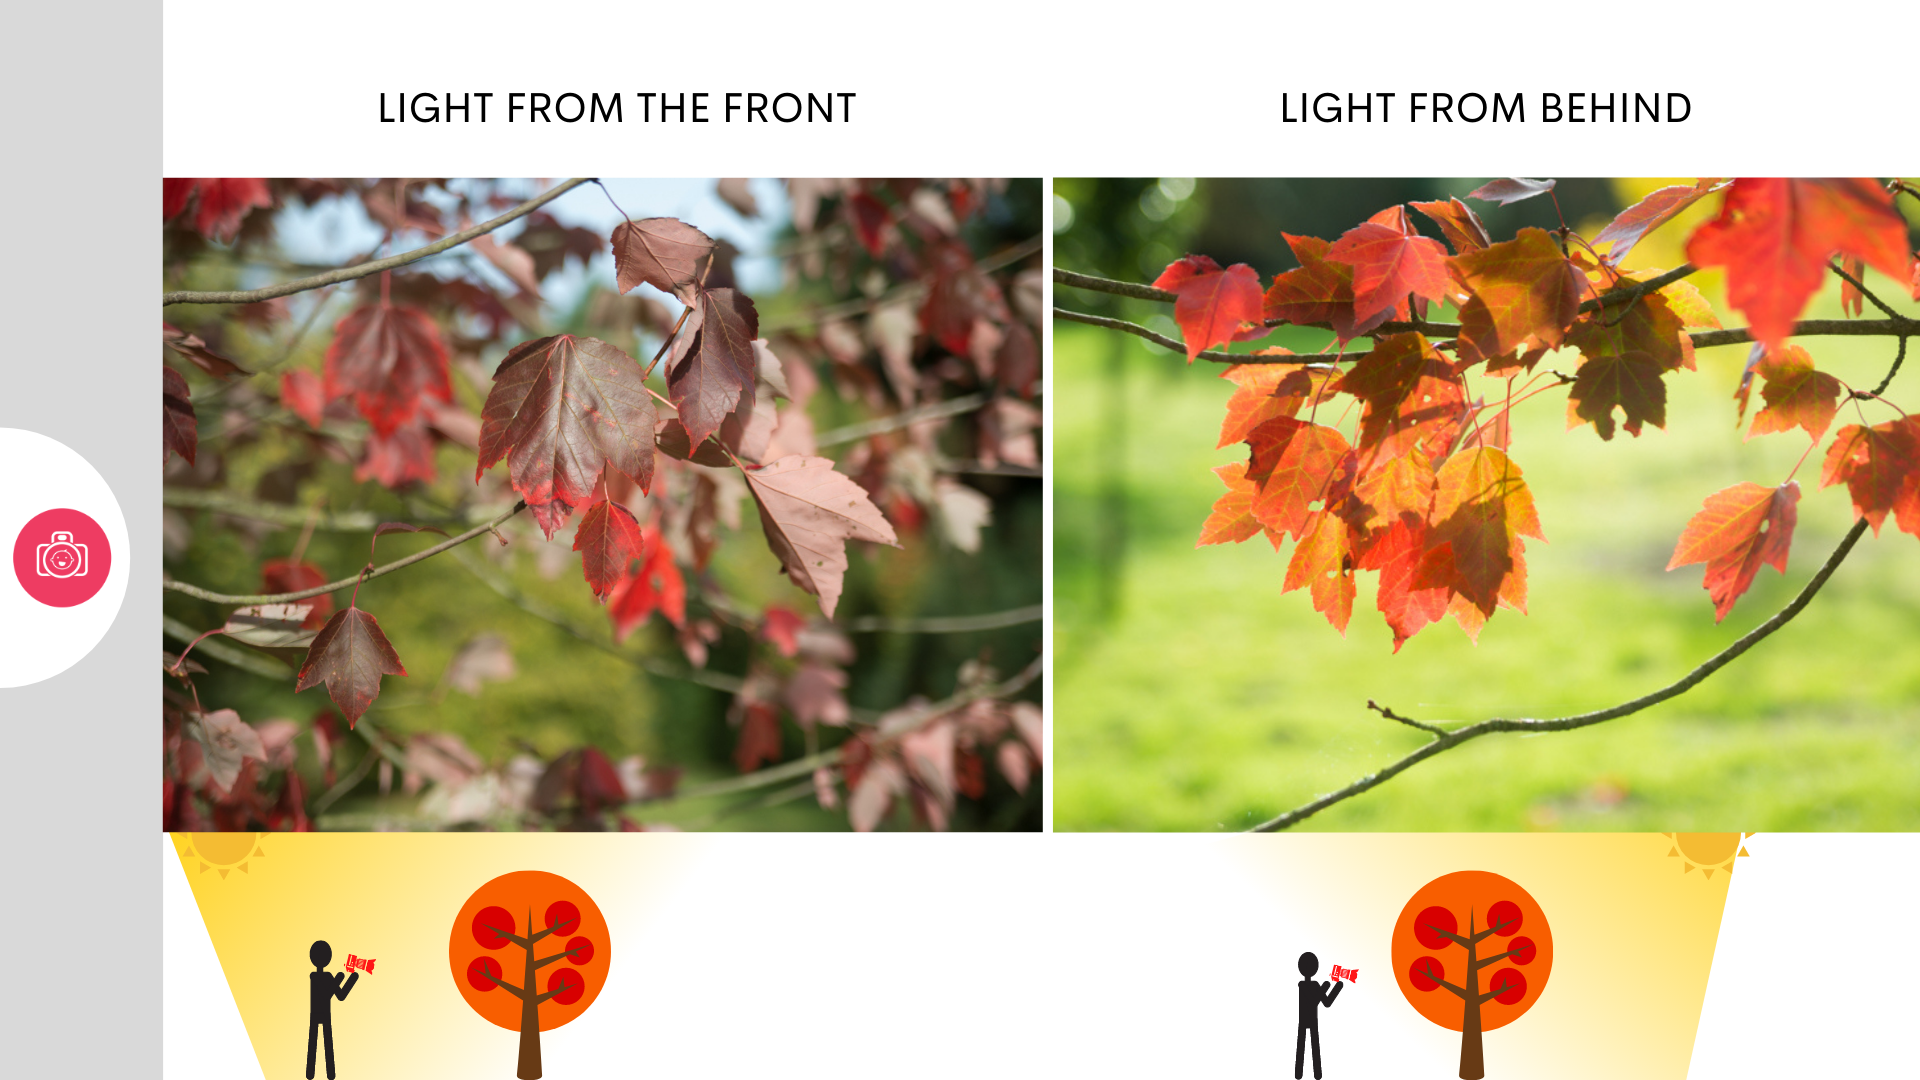
The same beautiful, autumnal tree photographed from two different angles will look very different.
The leaves, as they change colours and dry out a little, get a bit more translucent. Look at how that affects the leaves when they’re being back-lit? They’re starting to look like little jewels, shiny and bright. This works best when the sun is relatively low, morning and later afternoon. When you look at a bigger picture and want a wall of colour behind your subject, choosing front-lit tree wall may be a better idea though as en masse, they will give you a more uniform colour.
OK, that's enough for theory, let's check how to use our colour knowledge in your kids photos. Click to the next page for an Inspiration bank of images all full of stunning colours and light
Lesson 1 Challenge
Take a couple of photos of your child / children
In one of them, explore contrast - introduce a colour that will pop against the rest!
In the second, go for a little harmony - how can you achieve a little autumnal palette?