Today is the last day of our Autumn Photo Bootcamp. And given the date, I thought we could have a little fun with a slightly different take on autumn. I'd like to invite you to get a little spooky!!
Below, I have put together a few ideas for spookifying your photos. Some easier, some a little bit more difficult, but all certainly attainable.
Let's talk about spooky - what makes a photo spooky?
For me, spooky is an idea of something slightly and unnervingly wrong and therefore scary. A cognitive dissonance between things that are scary and unknown in our minds, and the familiar and safe which we've grown to know and love. It's a level of distortion - sometimes strong, sometimes just gentle, sometimes distortion of a subject and sometimes just of a concept. It's a way with light that reveals something out of the shadows we're not fully prepared for, but hides all the unknown we'd rather not know.
Spooky can be achieved in camera, but a little editing helps as well. Personally I use Photoshop and Lightroom for nearly all my editing needs, but I know that's not an option for most of us here - not because it's expensive, but because it's a steep learning curve that we definitely do not have time for here.
But I'd like to introduce you to an editing tool that you may find super useful for this task - a free editing app called Snapseed. For a freebie little phone thing it's surprisingly versatile and has sevaral fun tools that you may want to use not just for today's session, but others as well.
With that in mind, here are our spooktastic photo ideas.
Spooky is ... shape-shifting
Ghosting effect from a slow shutter speed.
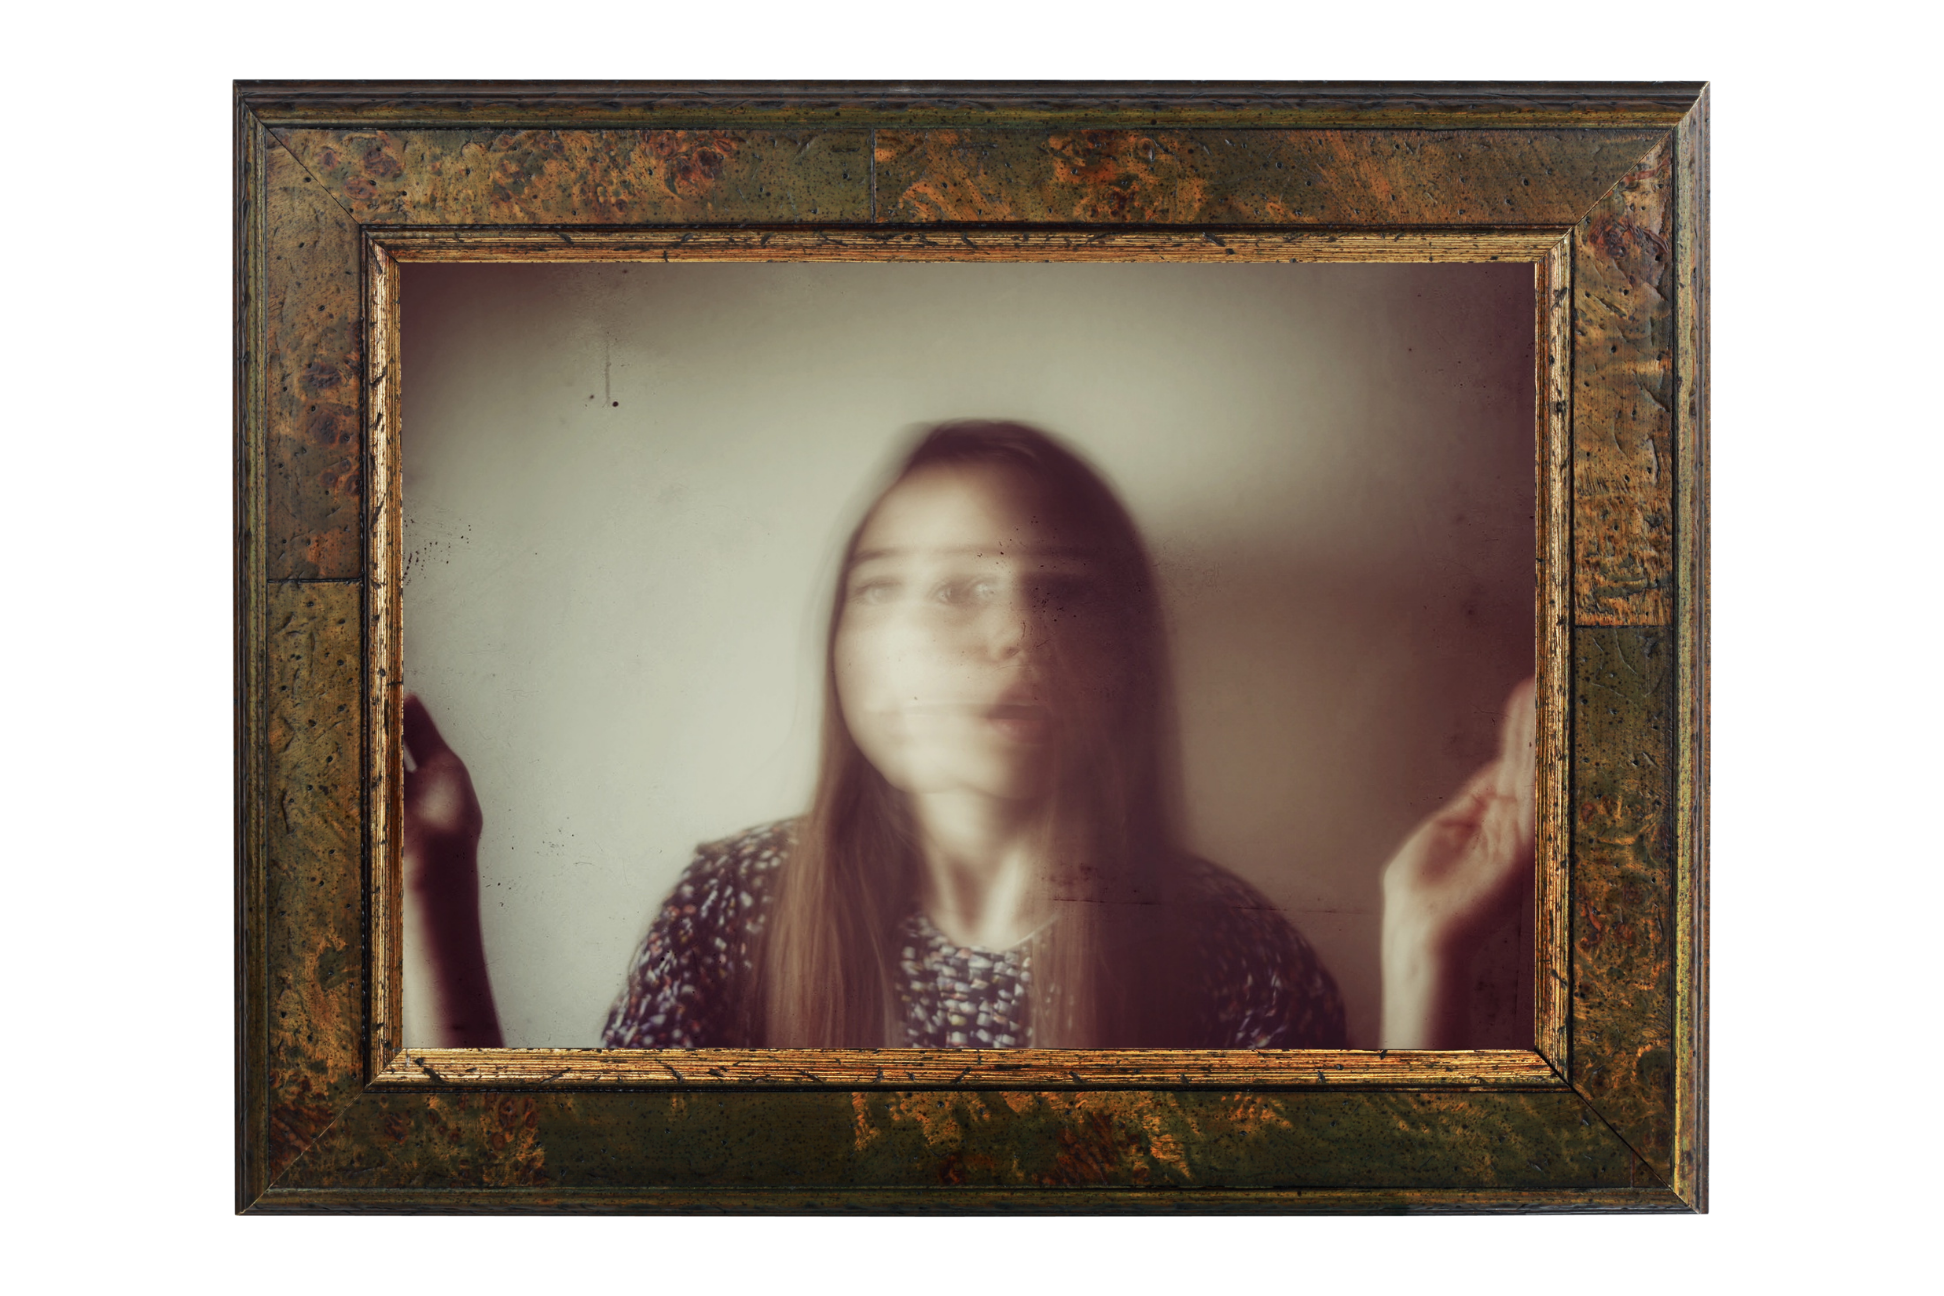
If you have been upset at your camera for struggling with light and giving you blurry images in poor light, today is the day this deficiency can shine. To capture this image I got my daughter to place her shoulders against the wall to prevent her body from moving, I set the shutter to slow and told her to shake her head from side to side.
You will need a reasonably slow shutter here - mine was around 1/15s . In order to achieve it, you will need to either manually switch your camera to Shutter priority mode ( S or Tv depending on your camera) - recommended if you're not really confident with your camera, or full manual. For once, being somewhere with relatively poor light with only help you. If you're somewhere with plenty of good light, you run the risk of overexposing your image.

Photo By Lindsay Cook
Double take
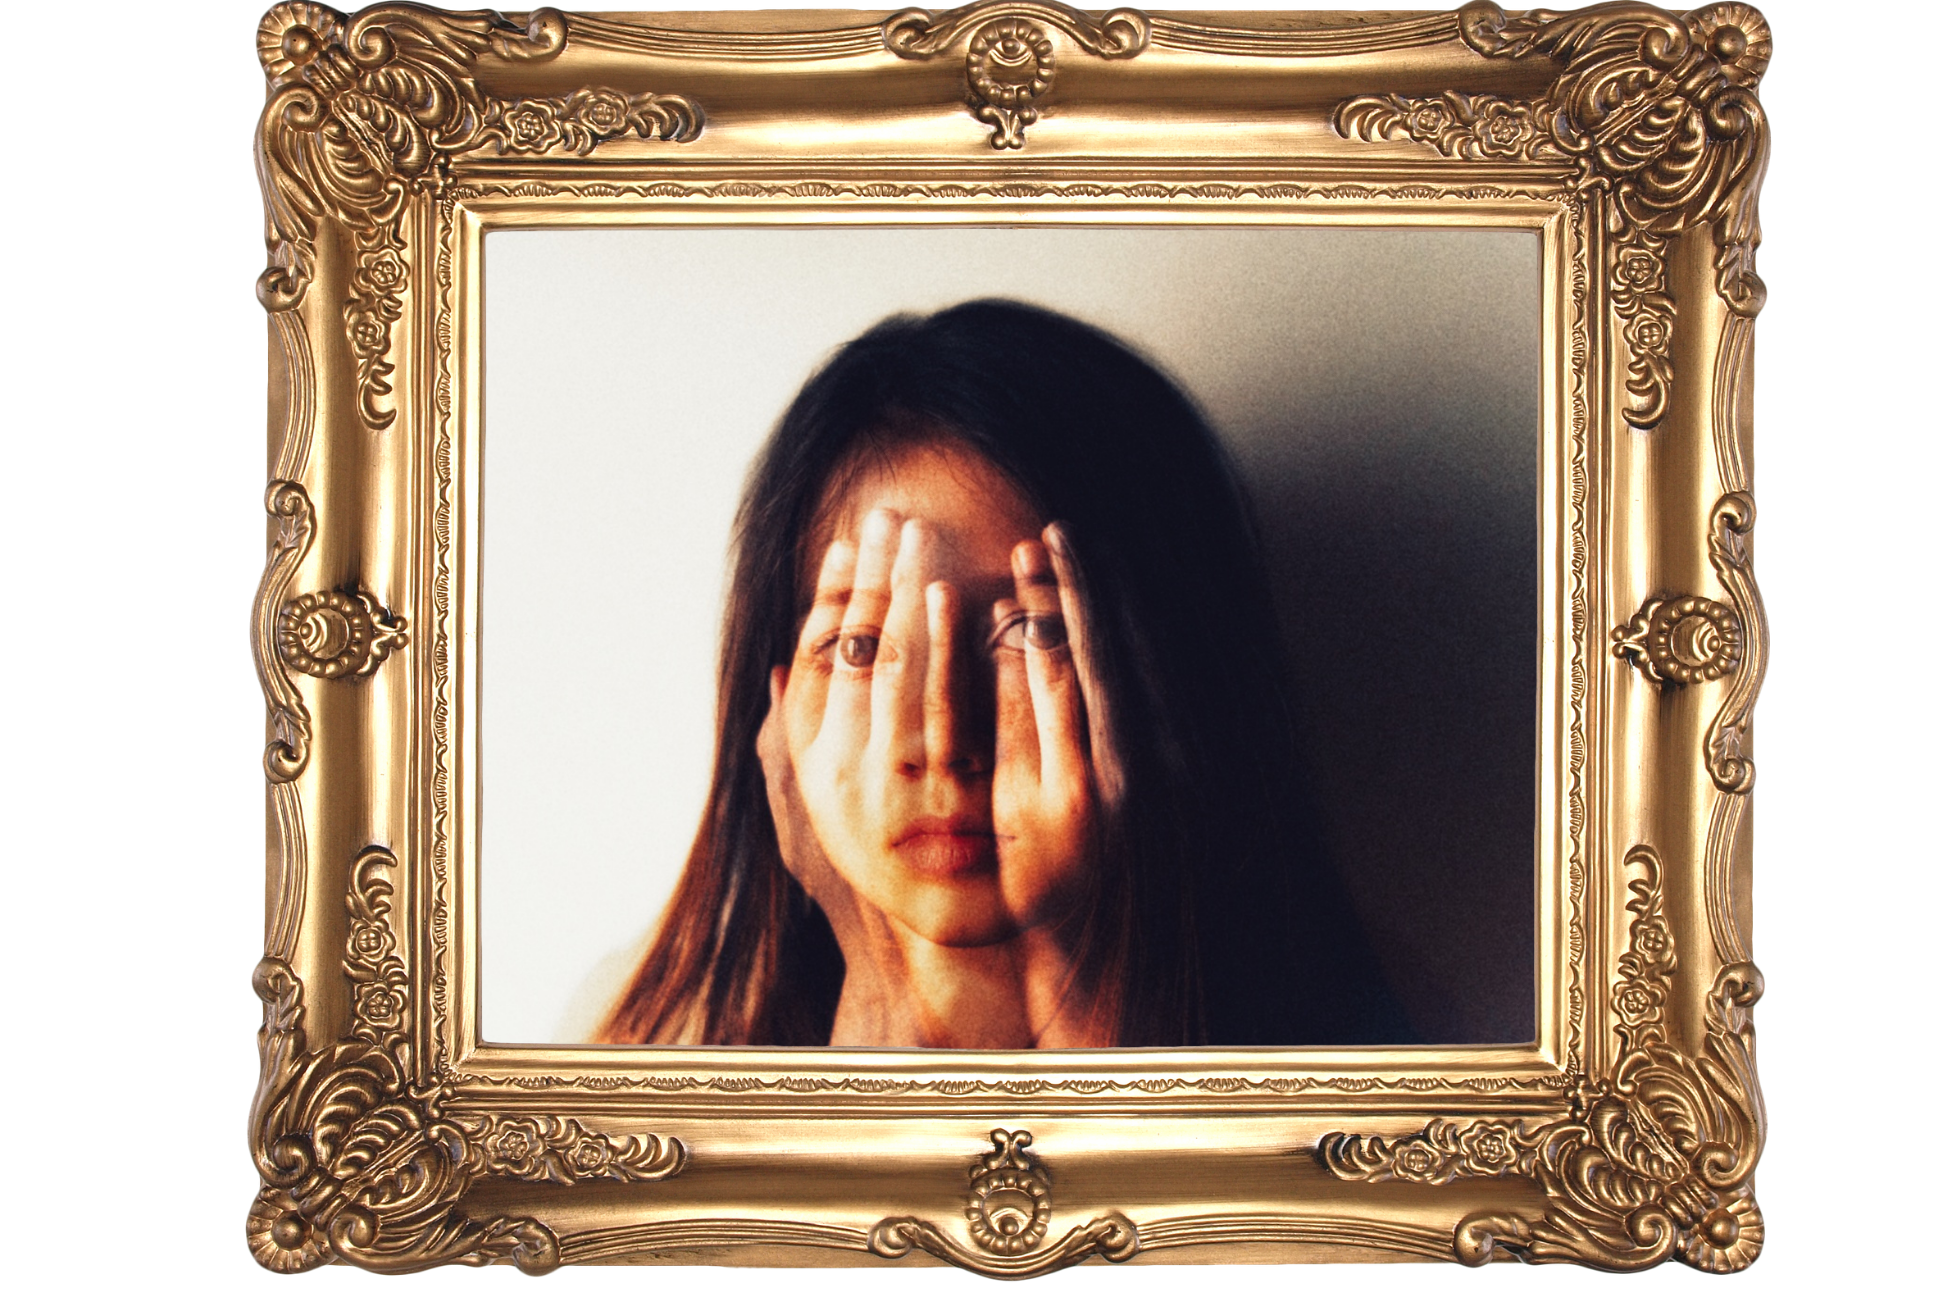

The images above were created through editing ( and on this occasion I did use Snapseed rather than my usual Photoshop to show you this can be done) although some cameras have an option of letting you create this in camera.
What you do is you essentially take two images, change their transparency and layer them one on top of the other creating this slightly unnerving outcome. The software does all the heavy lifting for you.
In Snapseed, open one of the photos you were planning on using, then go to Tools and select Double Exposure. Then click on the little image icon below to select your second image and the camera will layer the two for you. The 'samples' icon next to the Image Add icon allows you to further control the outcome. Have fun!

Spooky is ...Shadows
We are evolved to be afraid of the shadows. Shadows signify the unknown, things hide in the shadows that we can't fully see and scary, dangerous things can creep out of them. They are however a really easy way to inject a little spookiness into your images.
Classic scary stories light ( Blair Witch Project).

Photo by Caroline Amer
This image by our grad Caroline relies on the light being placed under the child's face and shone upwards. It creates unusual shadows ( our brains are usually used to light shining from above so shadows made from light from below feel a little unsettling). On top of that, by including only the one, small source of light in the image, we hide everything else in the shadows and further exaggerate the idea of scary. Oh, and a bit of make up work is obligatory!
Things that come out of the shadows
We had fun shooting this one - I placed my daughter against a blank wall ( in this case our projector screen) and used my phone torch to create a shadow of a scary claw reaching for her by using a small cardboard cutout of a scary hand and distorting the light a bit by shining it through a bottom of a glass. My camera was on a tripod, set on a self timer, so that I could create the shadow ( which required both of my hands) and take the photo. Alternatively just use your partner to either create the shapes or take the photo.

But shadows, and the contrast between darkness and light can be used in a more subtle way: Here, Helen put her kids in dark outfits and set them against a dark background, which coupled with white paint and white sceletin bones ( and a little bit of editing to deepen the shadows) allowed her to create this illusion which is a little spooky but thankfully not a lot scary.

Photo by Helen Simon
Andrea simply used the contrast between the dark woods ( additionally darkened in editing) and her child placed in a brighter clearing to create this spooky image of a scary thing hiding in the shadows in the woods.

The classic Jack'o lantern
Finally we have the classic glowing pumpkin - the key to successfully shooting this kind of image is to force the camera to pay attention to the light inside the pumpking which can best be achieved by eliminating other light and focusin on the brightest bit in the image. If you want to see your child's face in it, you need to make sure they are physically close to the pumpkin so that their face can be illuminated by the light inside the pumpkin.

Photo By Kate Munday
Spooky reflections
Reflections are another way to make us feel a bit unsettled if either they reflect something unexpected or the reflection is distorted.
Unexpected reflection
This image captured by one of our grads Clare uses mirror to show something that 'isn't there'. Clare used editing software to make this happen - doesn't it look spooky?!

Photo by Clare McEwen
Upside down reflection
This little witch, captured by our grad Aoife relies on a clever way with a puddle. By placing her daughter at the edge of a puddle and focusing on capturing her reflection, but still capturing a little bit of her feet, Aoife created an reflection that is slightly distorted by the unevenness of the ground To subvert our expectation of what is real and what isn't, the image is then flipped upside down.

Photo by Aoife Crawford Bonner
Spooky is ... distortion
Underwater
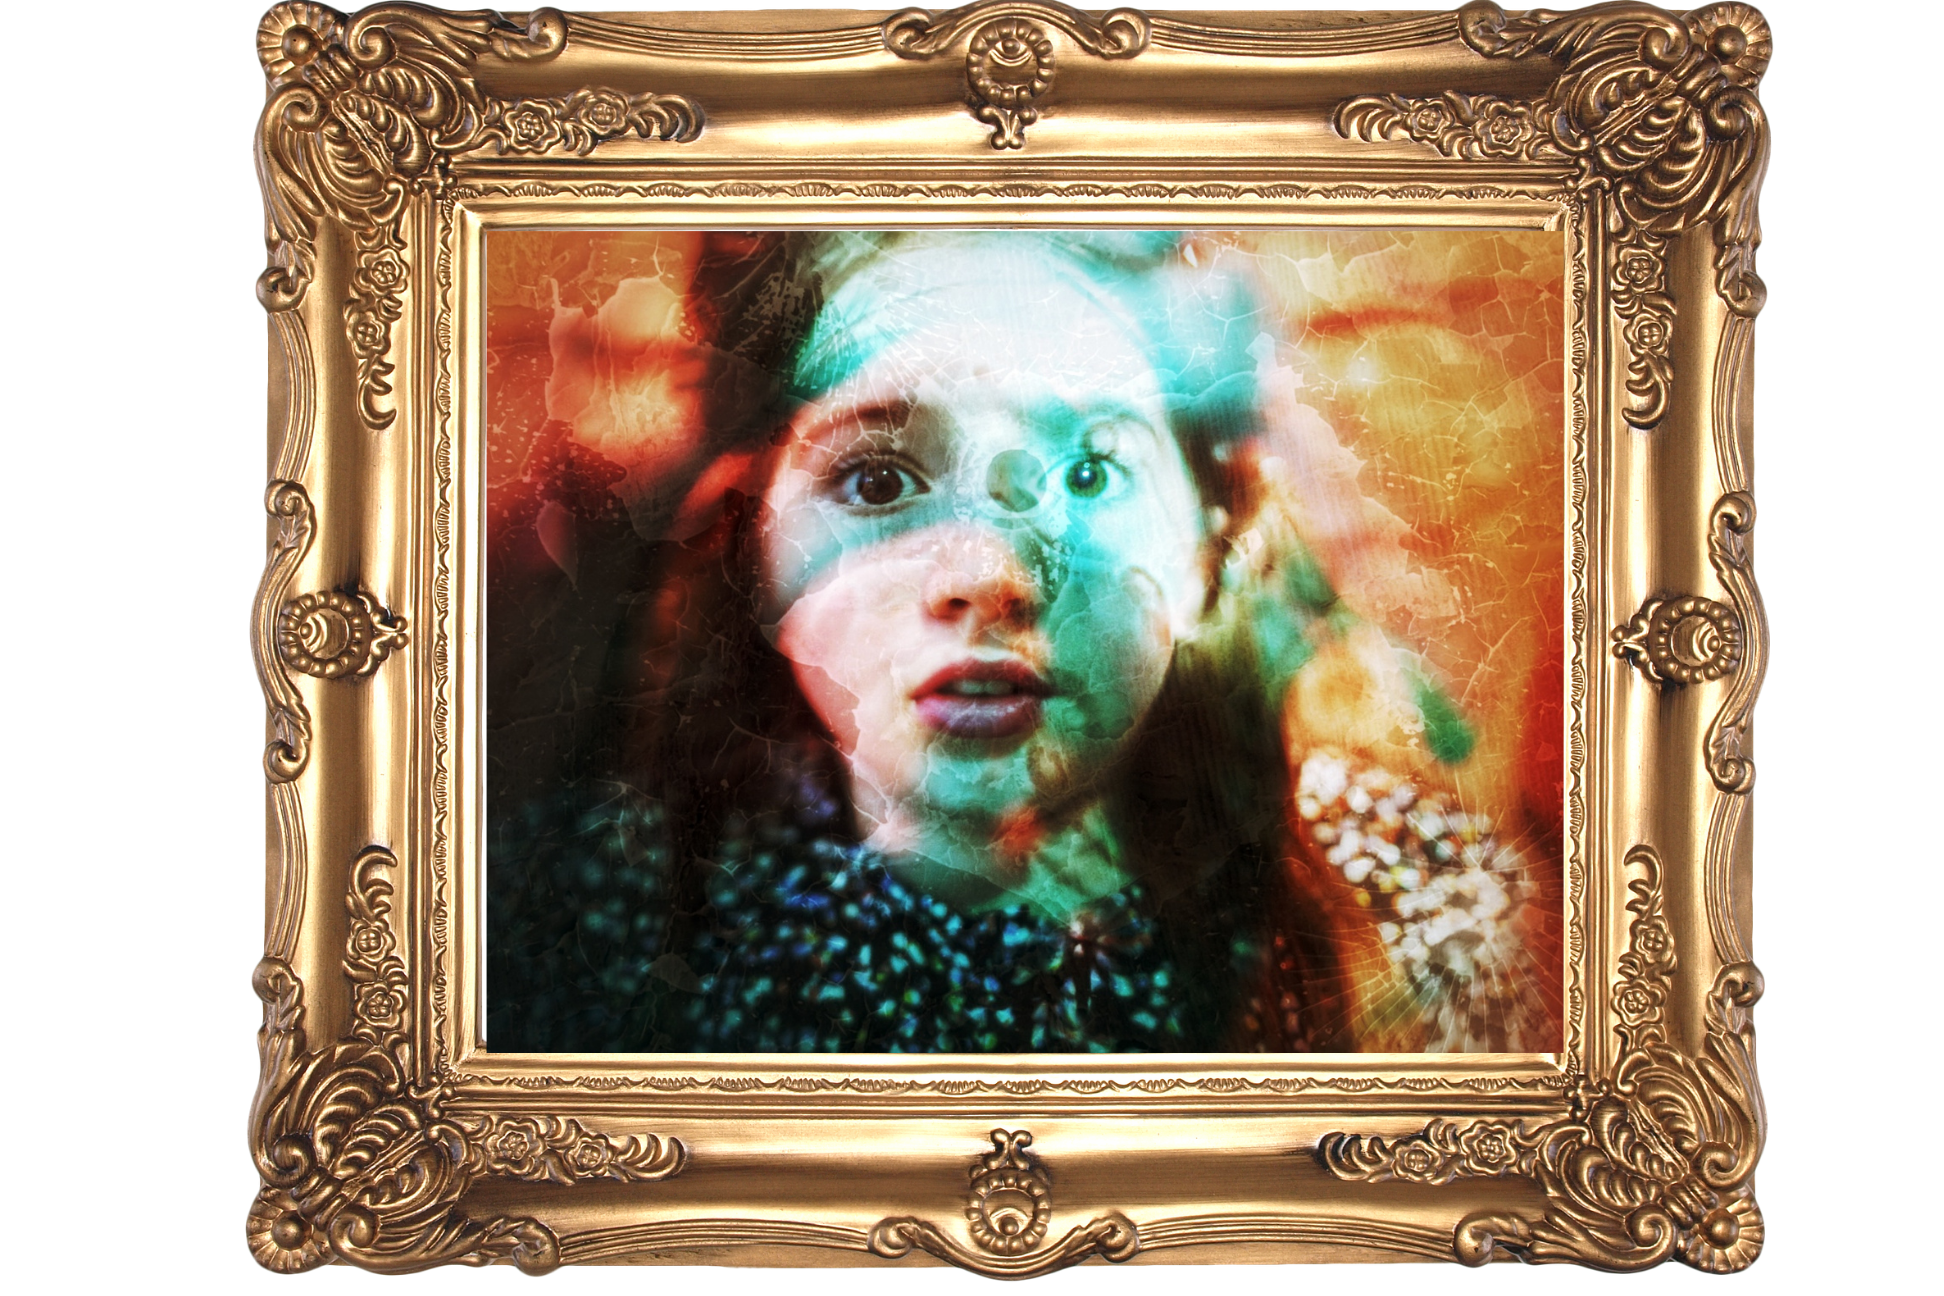
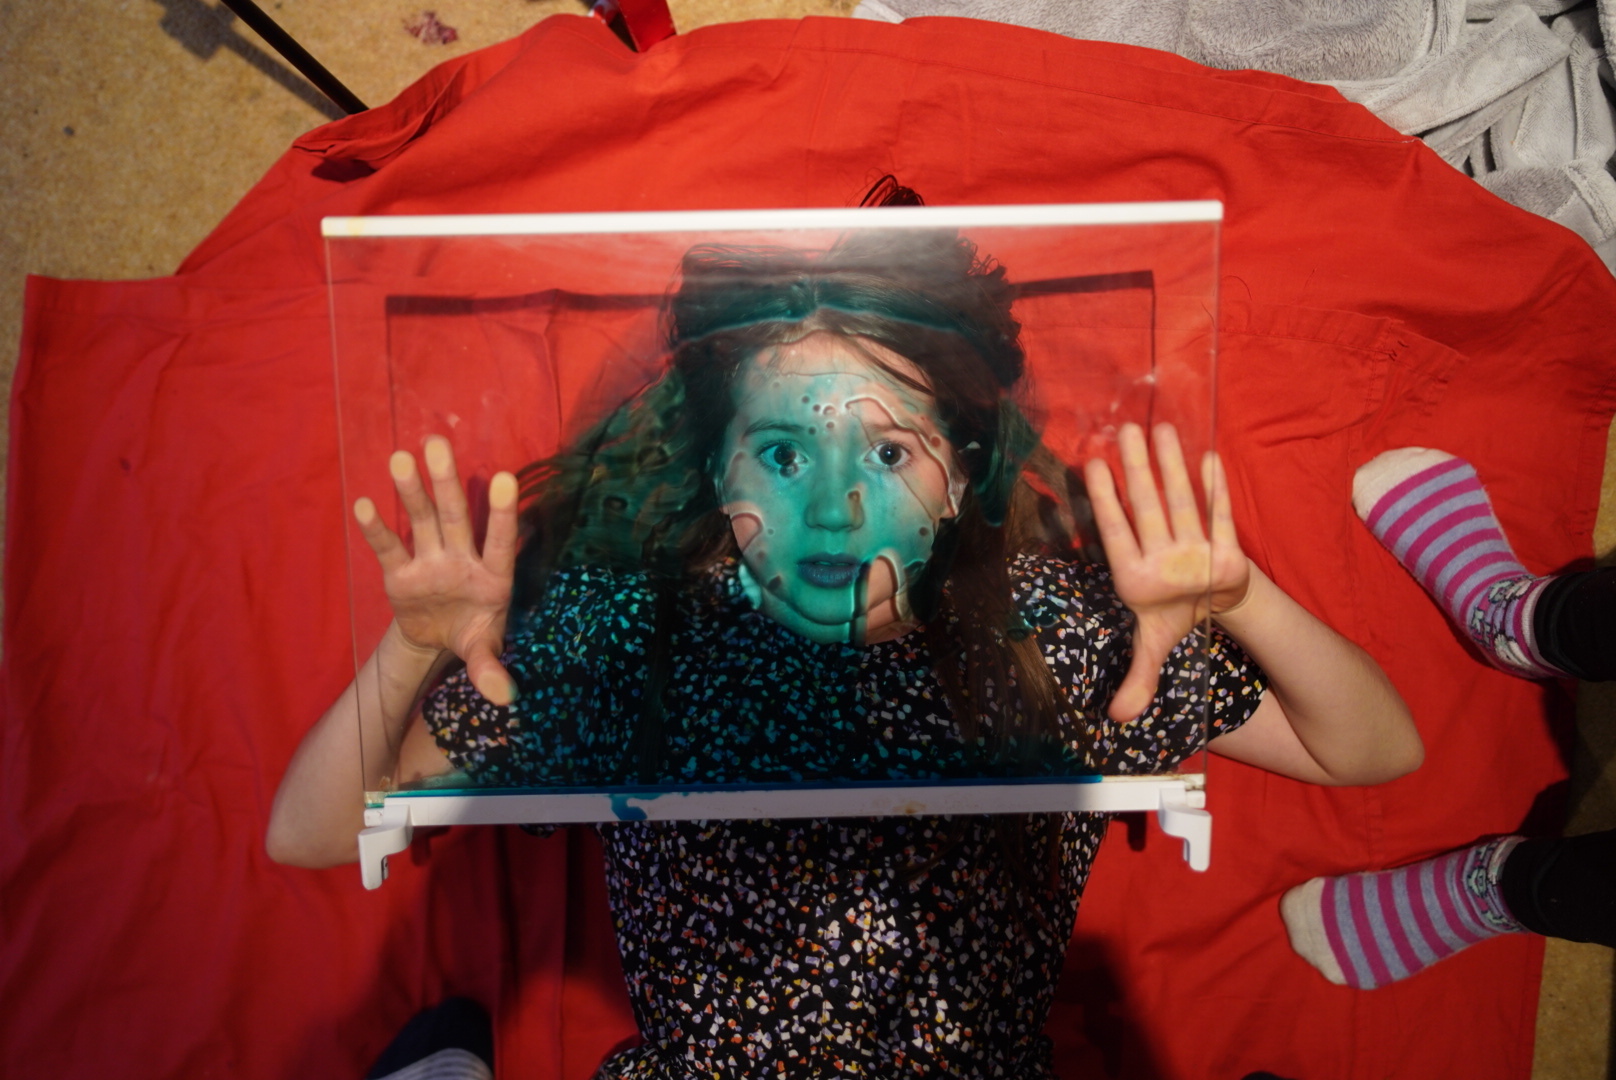
We expect faces to be 'face coloured' and shaped and creating a distortion to that expectation gives us a spooky outcome. To capture the image below I raided our fridge and baking supplies. Although she looks slightly trapped in an underwater cage, she is actually just holding up a glass fridge shelf with some slightly diluted food colouring swirling on the surface followed by a little Grunge texture added in Snapseed
Here is what the taking of this image looked like:
Vintage vibes and black and white
Although in my images I made an effort to edit in colour, there is no denying that black and white or sepia can conjure a certain oldy-worldy feel to our images and especially when given a little bit of a matte finish, those lend themselves beautifully to creating spooky imagery. Helen styled her daughter beautifully and placed her in a timeless and somewhat spooky background and edited the image in black and white to further increase the sense of timelessness. Helen is rather skilled in her editing but if you want to replicate that look, there are a myriad of filters, including those in snapseed that can help you do something like that.

Slight distortion
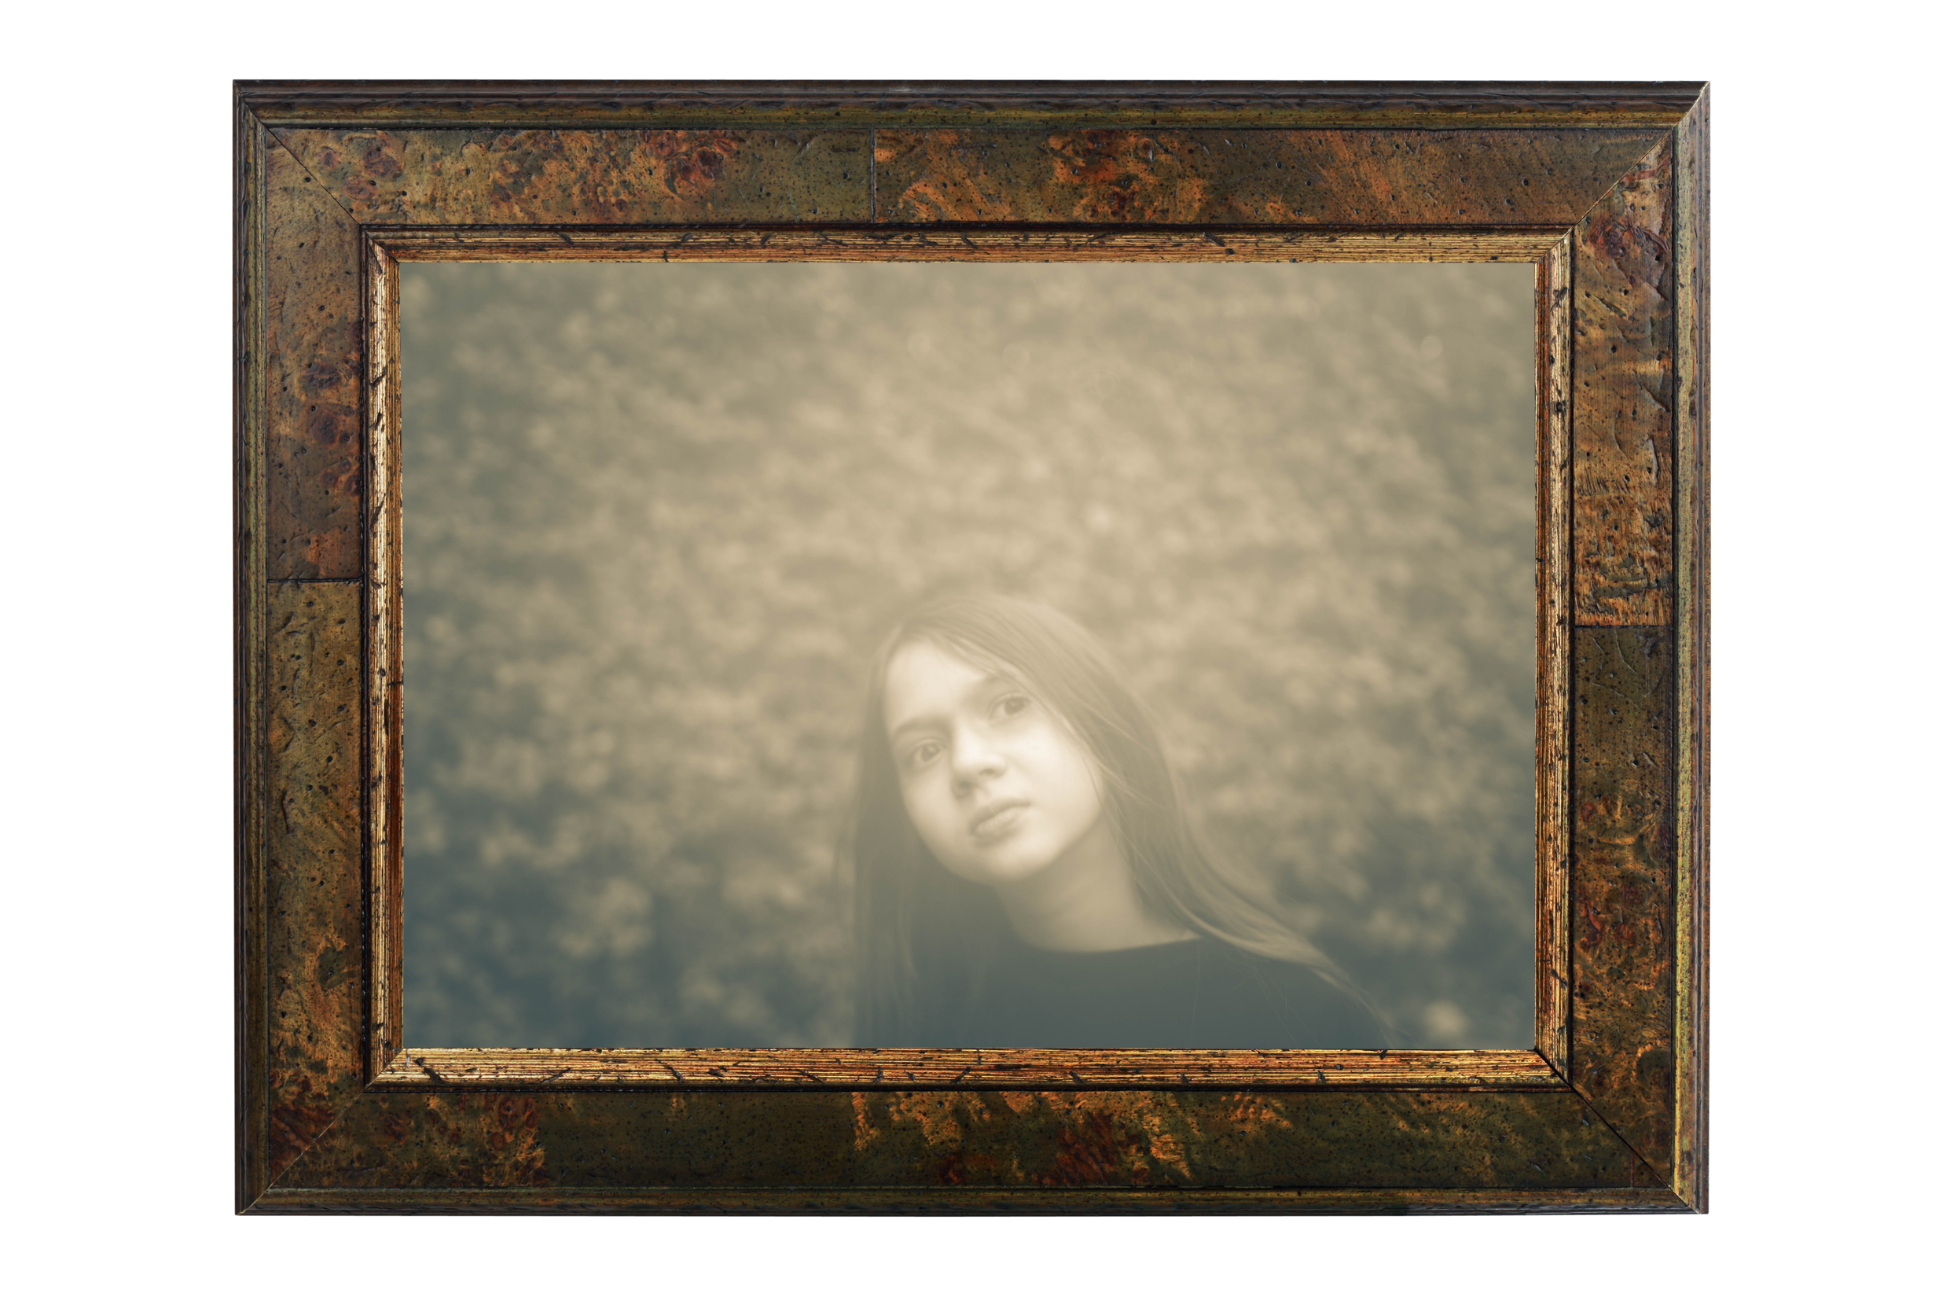
Our eyes and our brains like things that are sharp. We like clarity, we like to 'know' things. That's why we react with a little reserve when things are a bit 'soft' as if they're coming out of a mist. or when parts of the image that shouldn't, look out of focus. This can be achieved by free-lensing, by using tilt shift lenses, by editing, but I found one simple way which requires one simple prop - a pair of low den tights ( or a sock made of the same fabric). All you have to do is place it over your lens to create this instant vintage, not quite clear filter. I additionally converted the image to sepia and added a slight vignette
Lesson 5 Challenge
Pick a spooky idea and capture one image that fits into our spooky, Halloween theme. And while I'm usually advising caution around over-editing - today, go crazy and edit to your hearts content!