Autumn is most photographers' busy season ( well maybe not this year, because, you know ...*gestures generally around* )
And the most requested? A classic autumnal portrait - and for good reason: the season’s colours, textures, light, warm skin tones make it a real winner.
But you don’t always have a professional photographer on hand – although I would recommend getting someone to take a family portrait of you from time to time – just so you can make it into the frame too. However not having the photographer on hand should’t stop you taking some great portraits of your family yourself. So I’m here to help you with that. We’ll break it down to the key elements and hopefully help you capture your family beautifully.
So what makes a GREAT autumnal portrait?
- It’s about the person, first and foremost. Portraits are unapologetically about just capturing the person, their face, their facial expression, smile or no smile. Everything else in the frame is there to support them. They should be standing out from the background so that the viewer knows they should be looking at them, not what’s behind them.
- The light – make it even and gentle to not distract with bright patches or hide details in the shadows. You want plenty of light to be able to keep them lovely and sharp too.
- The background – and / or foreground – if it’s an autumnal portrait you’re after, you need to make sure we see some contextual clues which make it clear – and I don’t mean pinning leaves to your children, but simply using the colours of the background which will make this clear.
And that’s pretty much it, simple, right? Let’s break it down further.
It’s about the person.
You’ve got to make them stand out of the background
The easiest way to make someone stand out from the background is to make the background look blurry. Our eyes always go to what’s sharp in the image so as long as you get your subject sharp, it should ensure they will stand out of the background.
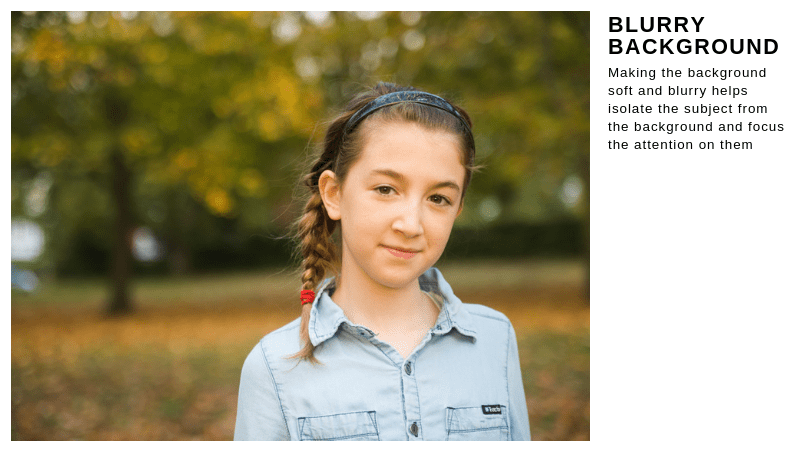
But a word of warning first:
If you’ve drooled over those kind of portraits on Insta and other social media where the person is superbly sharp against a moody, background, blurred out to the point of just being a near homogenous patch of colour – let me tell you right here – you wont get that. The fact that those photographers can, is a result of heavy, long lenses with ££££ price tags and photoshop. Your lenses just cannot compete, but it does’t mean you cannot get a degree of that effect with what you have.
Creating a blurry background:
1. Aperture / Portrait mode
There are a few conditions which make the background blur more achievable – one of them is the ability for the photographer to control the aperture either in Manual mode or Priority mode – those of you who already know how to do it, set it to the widest setting possible ( smallest number) . But if you’re new to photography, simply set your camera on to the portrait mode. It’s pre-set to help you get a similar effect. I won't go deeper into it in here because it goes beyond the remit of this course and we go over this in great detail in the camera know-how part of our course
If you are shooting on your phone, you may also have a Portrait mode which will help you achieve a similar effect by selectively blurring the backkground and if you're taking photos on your phone in this bootcamp, you should use it . I just want to let you know that the two are not the same. While the blur effect in camera-camera is achieved through optical properties of your lens, in phone cameras, this is done through software manipulation. Essentially, after you have taken a photo, the phone detects the edges of the sharpest item / item you focused on, and selectively blurs the rest. Depending on your camera make and model, the effect can look great or a bit on a 'fake' side so just be aware of what your phone does.
2.Zoom
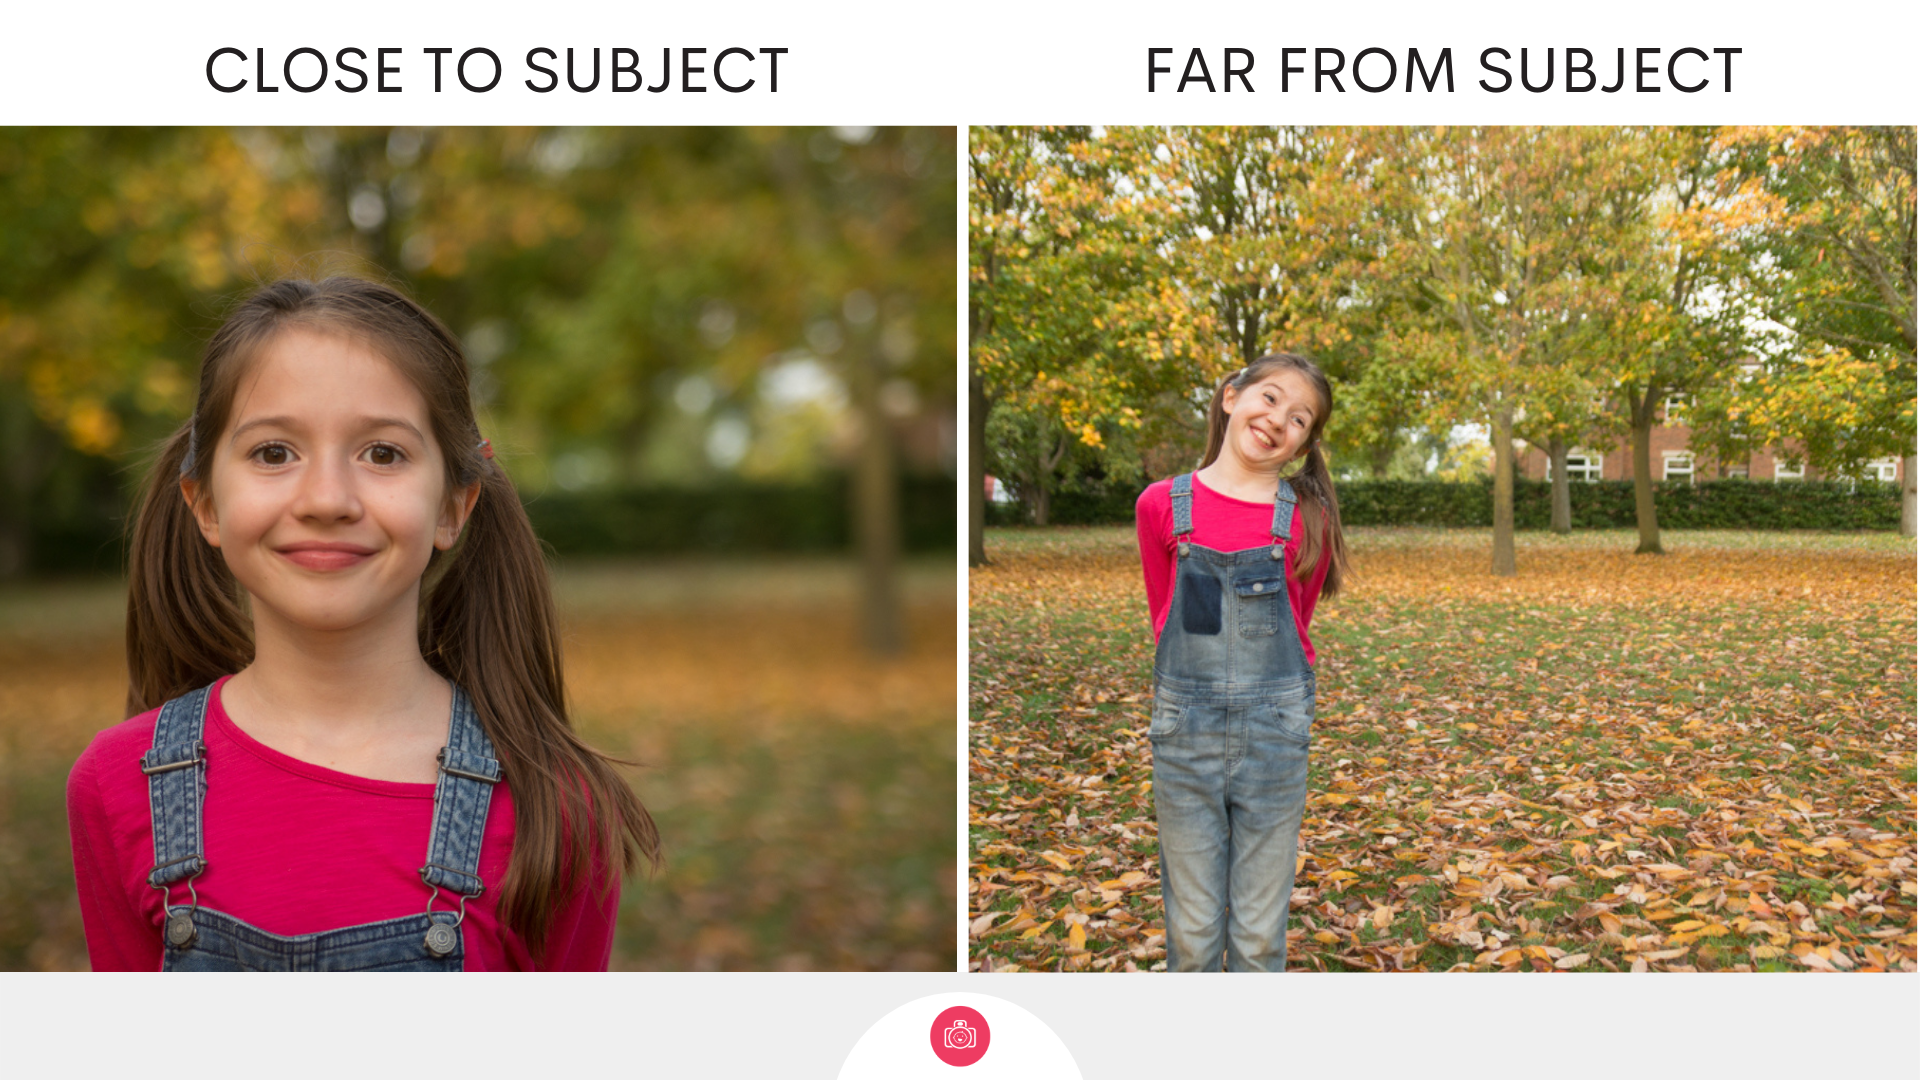
The second condition is zoom – it’s on your camera not just to bring things which are far away closer, it also helps compress the space in your image, making that blurry background more achievable.
Notice how in the first image below, the background is all 'pulled in' and appears denser and more uniform, whereas in the second image, more gets into the background, but it looks sparser and definitely sharper - we donlt get to see that delicious blur.

3.Proximity to subject
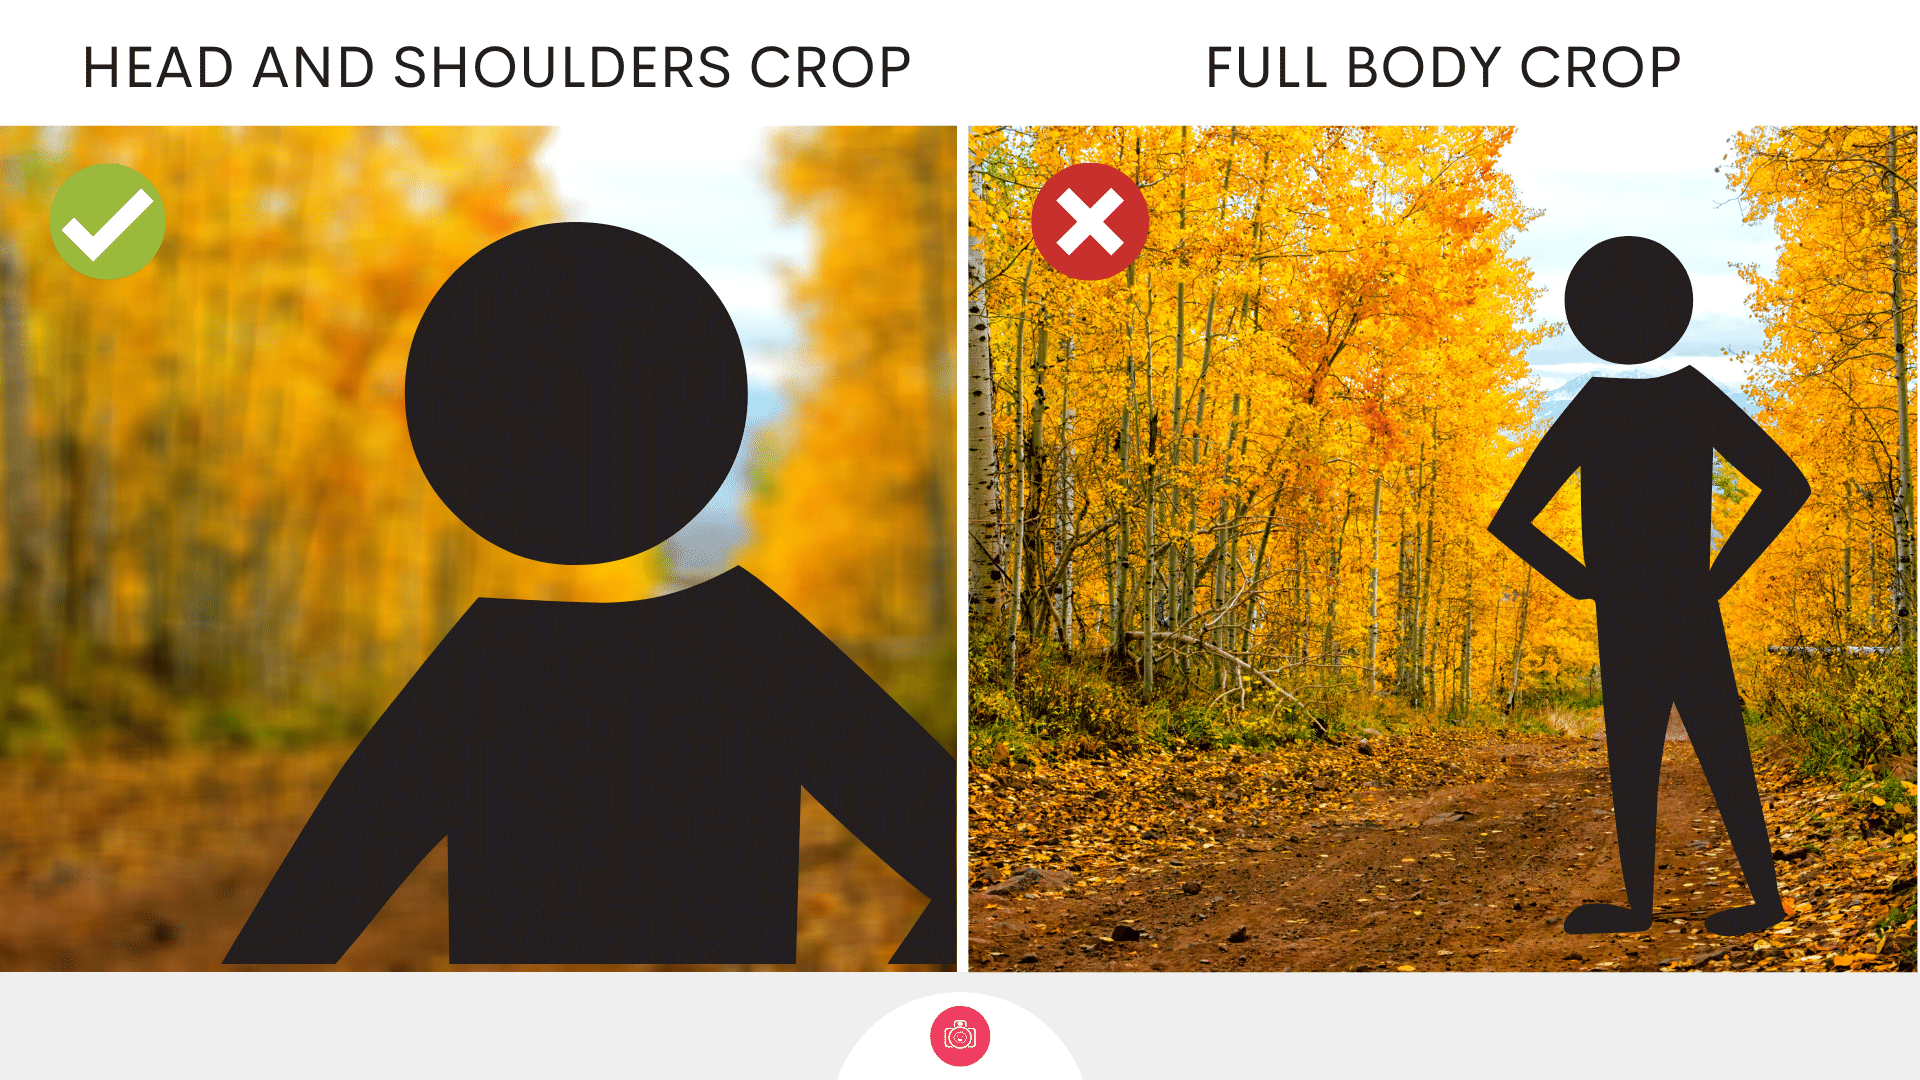
The third condition is proximity – you need to get pretty close to your subject. To give you an idea of how close – you want at least 50 % of your frame to be taken up by your subject. This means that you’re less likely to get that effect with full body shots – aim for head and shoulders or half-body shots instead. The closer you can get, the more of that blur you’ll be able to see.
Think of your angles.
With children you want to be shooting either at their height ( which means you need to lower yourself down) or elevated just a tiny bit above them, just enough to force the to lift their chin a little bit and catch more light in their eyes. If you’re shooting with your camera pointing down, pay attention to what you’re seeing on the ground – a carpet of colourful leaves may be just as great as a wall of trees.
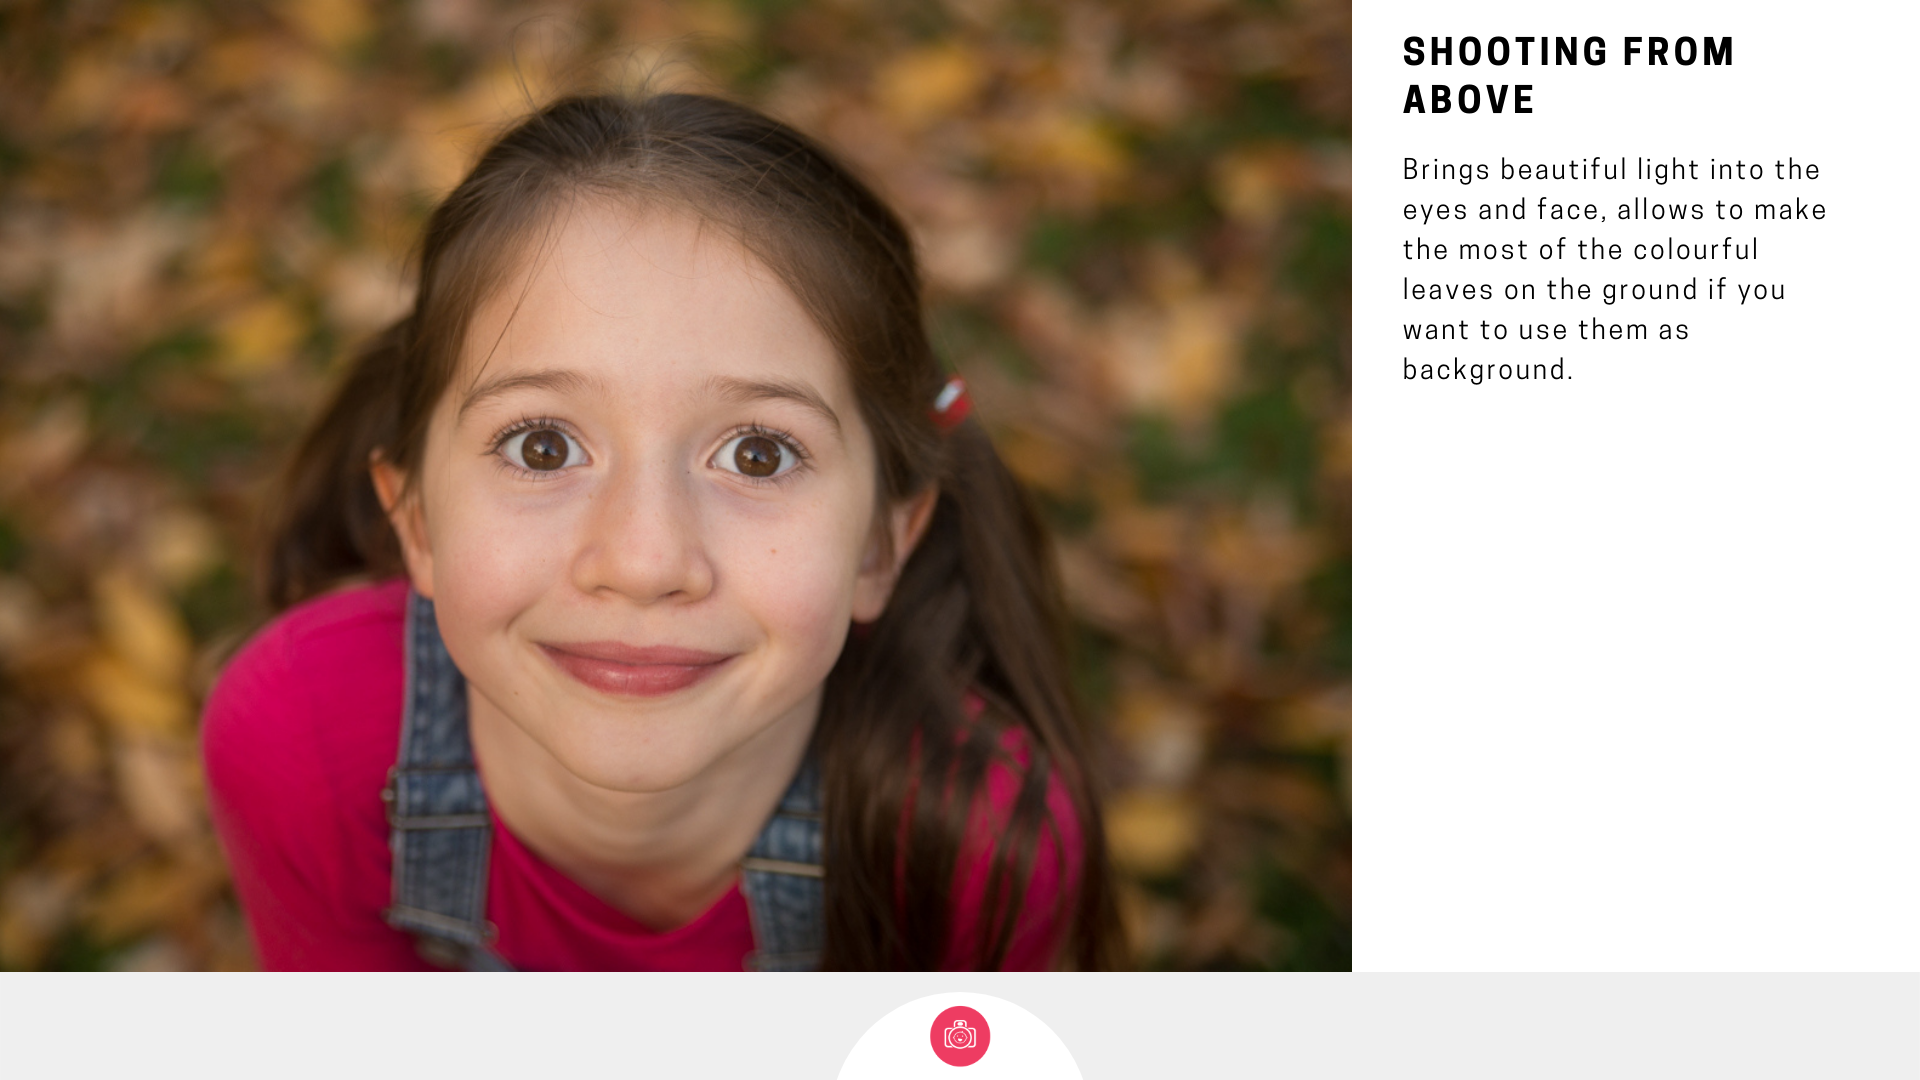
If your subject is sitting down, get them to lean forward rather than resting back – it’s always a bad look in photos. I sometimes whisper something in the kids direction so they have to shift their position to lean towards me.
A subtle body tilt ( when you have older kids who can follow those directions) will make the images even better – and I’m talking subtle – I usually sit them down facing me straight on, and then move myself to the side so that they need to turn their head a bit to face me. It works with my 9yo, not so much with my 2yo.
Cropping your photos
If you want to maintain that blurred background, you need to crop your image to a head and shoulders composition ( cropping right above the armpit height or around half way point between the armpits and the waist). There is nothing wrong per se with a full body portrait, but you won't be able to achieve that blurriness without either a serious lens or some photoshop.
Try not to ‘crowd’ the frame too much either – leaving a little ‘breathing space’ in the frame is always good.
Avoid cropping your little ones hands and feet or at any point of the body which tends to bend. It just looks awkward.
Getting the light right
For a portrait, you don’t want anything to distract from your subject so go for gentle, soft light – that means staying out of direct sunshine ( if you can even find it!) .
Where can you find soft light? – on a sunny day, head for the shade. For best results, position your subject right on the edge of the shade, with the light behind you, but not directly behind you ( you’ll blind them) – try to keep it behind either your right or left shoulder.
If you’re taking photos on an overcast day, find the direction where your light is coming from ( yes, even if it’s fully behind the clouds) and make sure your child is facing that way. If you’re noticing shadows forming under their eyes ( you will see that if you’re shooting when the sun is at its peak) get them to lift their chin a little bit, it’ll help bring a little extra light in their face.

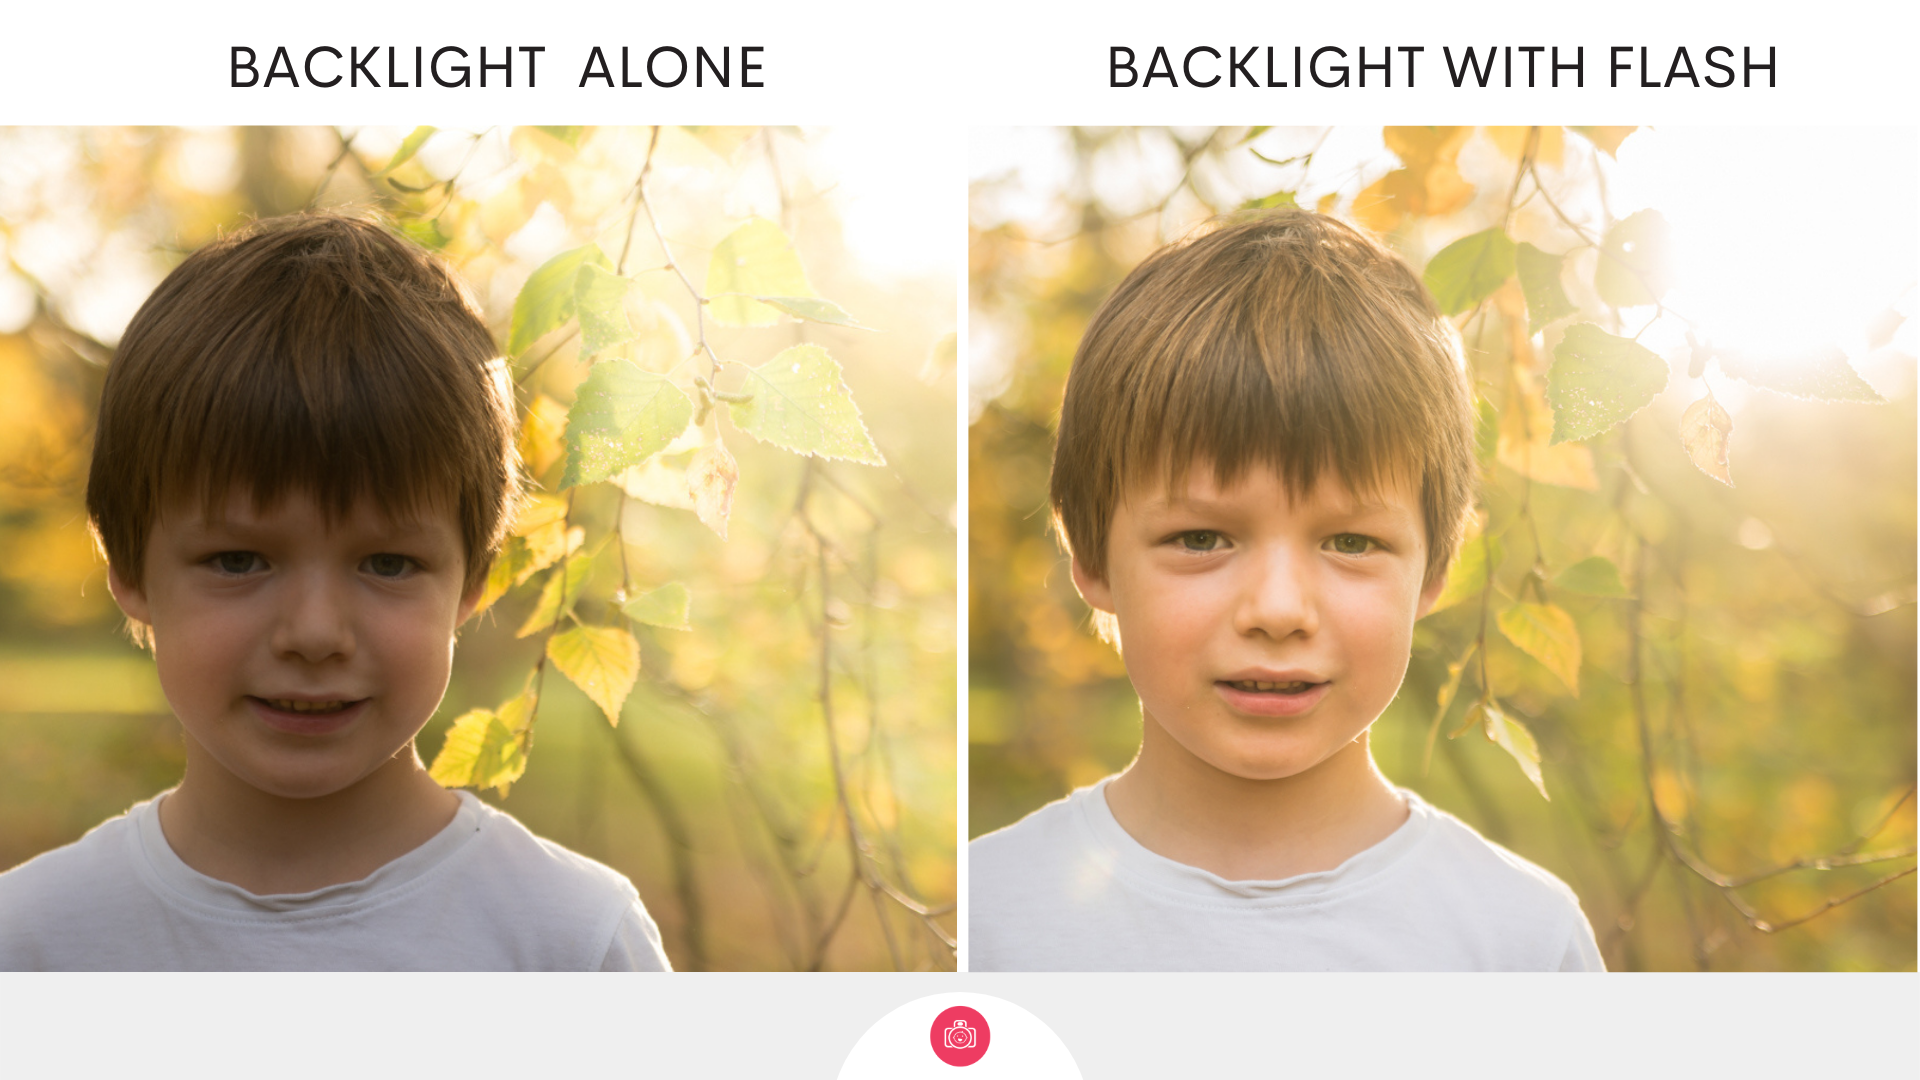
As much as I love backlight to help bring your subject out and create a bit of that rim light, it usually means your child’s face will be in a shade.
However, if you really want to do this, you could try using flash to fill some of the shadows too – if your subject is not very close to the background, it shouldn’t influence the light there, but it’ll brighten up their face. Don’t worry, in most cases, the camera will know it already has plenty of light available so the flash will not be very strong.
Getting the background right
Your background is the thing that will make it clear that you are shooting an autumnal portrait, so make sure the colours and textures support that.
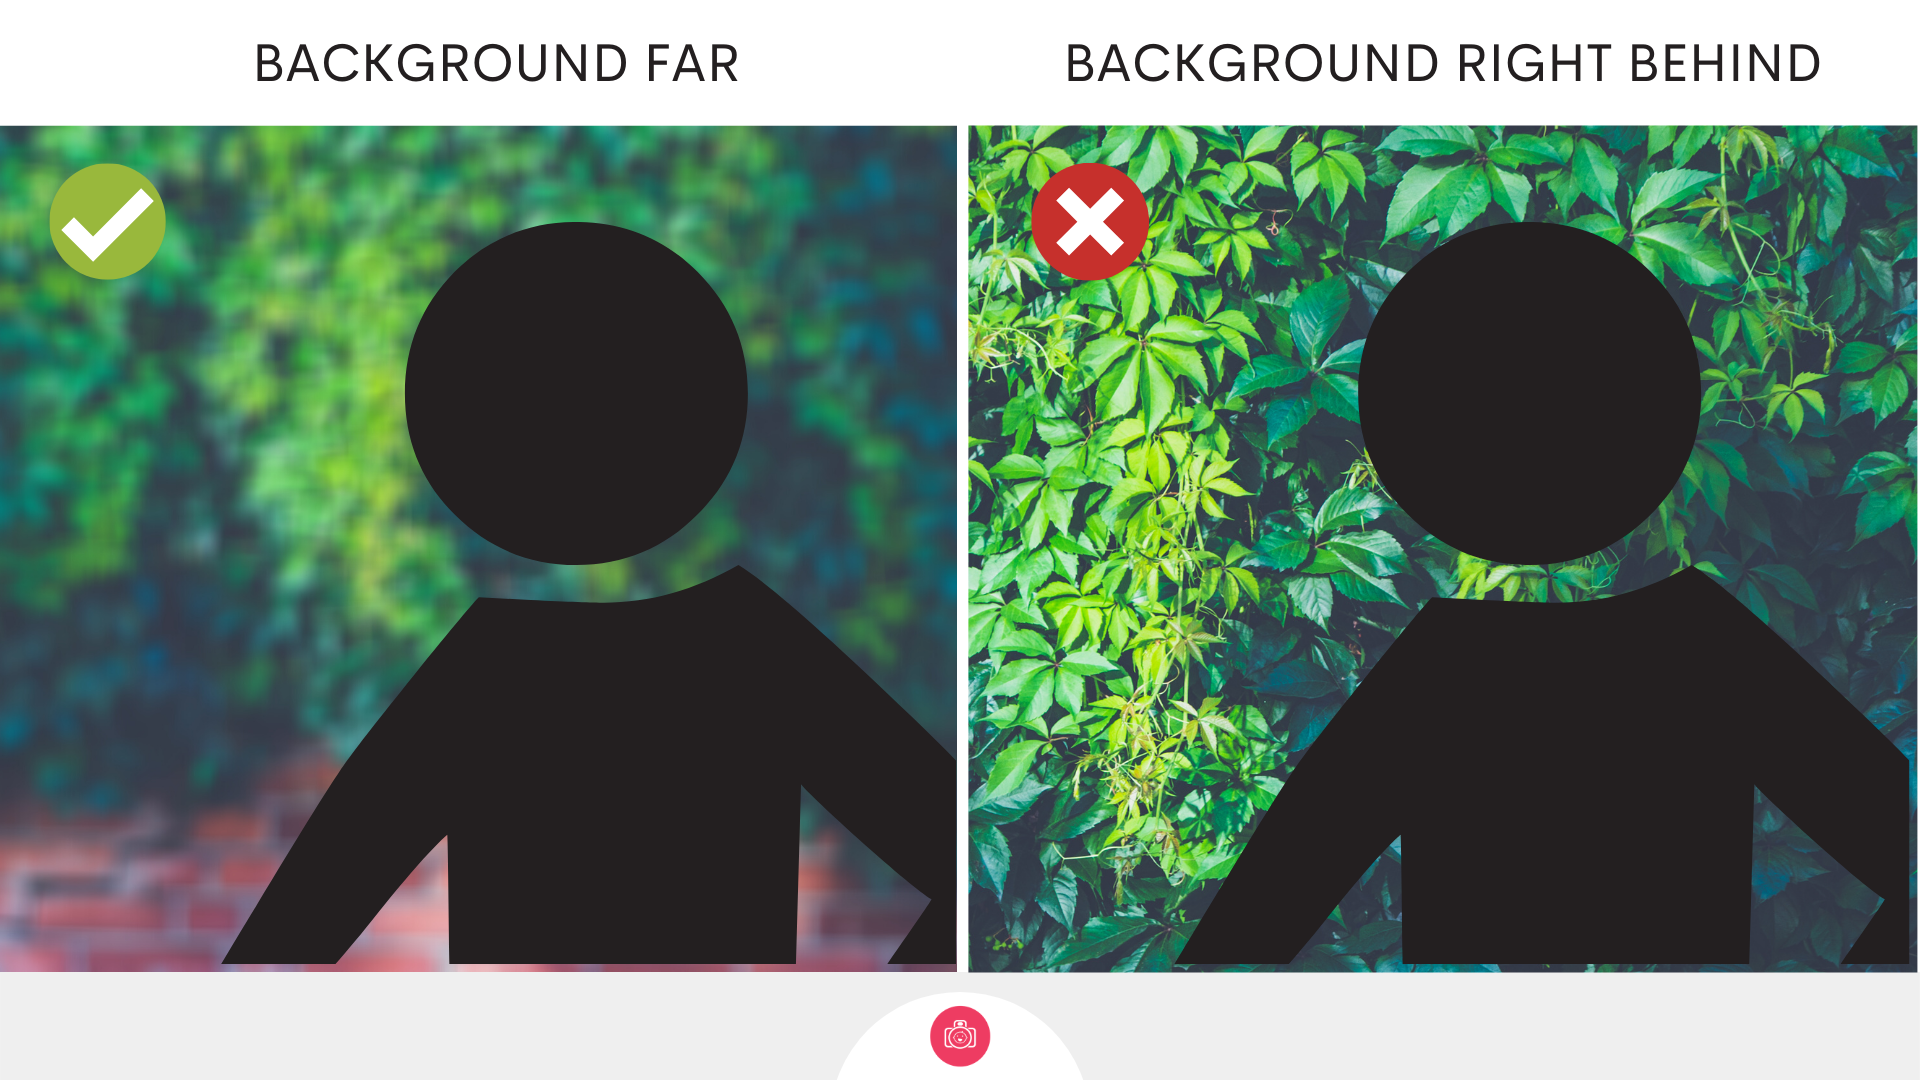
Make sure your child is not too close to the background ( or it will not get blurry enough). Go for a background that’s well illuminated and relatively uniform. When you have strong patches of brightness or dark identifiable shapes, it will distract from your subject as well.
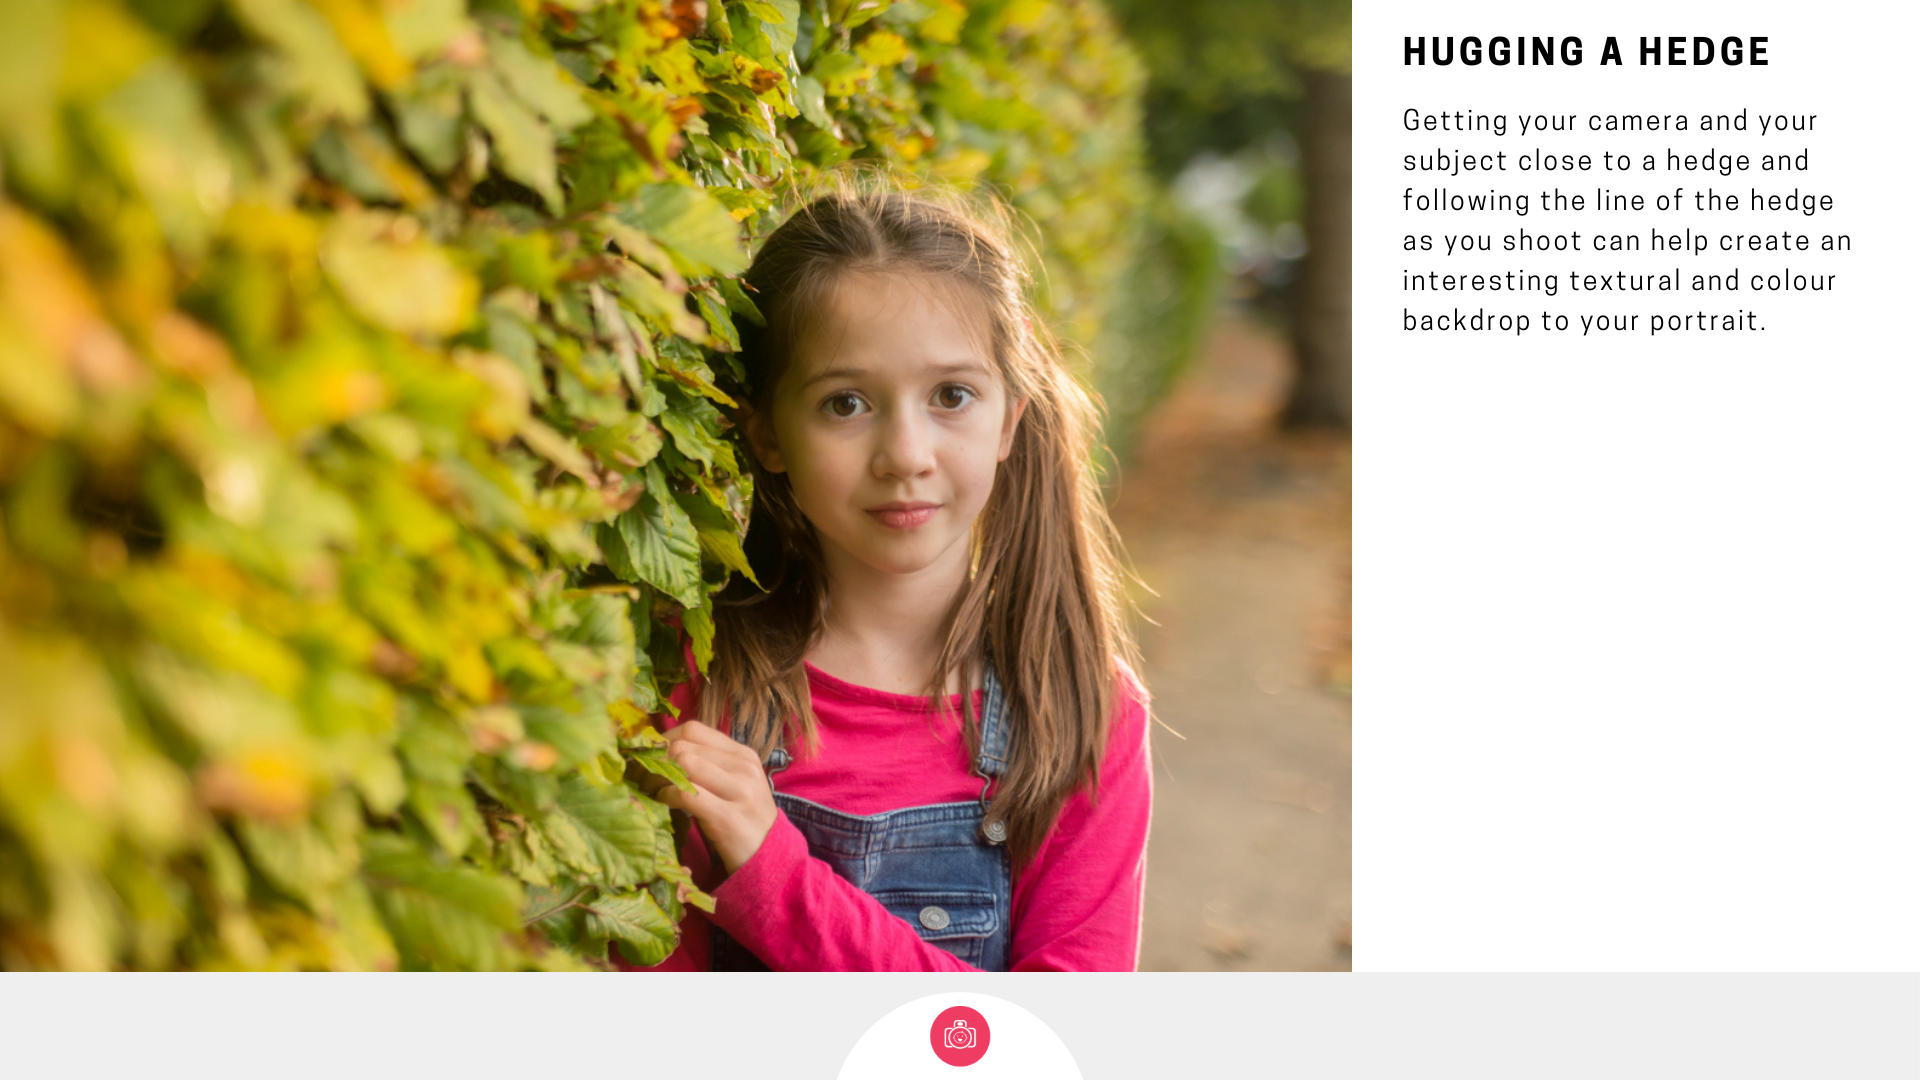
Use hedges to create a little textural variation and still fill the frame – getting your subject to ‘hug’ close to the hedge with one shoulder and doing the same yourself, will create a different kind of portrait, that’s still autumnal and fun.
And finally:
Please, PLEASE, please don’t tell your child to ‘smile for Mummy’ – those always look fake and forced and not what makes for a genuinely joyful background. You know what makes your child tick – make them laugh! When I photograph toddlers and pre-schoolers I often have a silly toy ‘assistant’ which I try to ‘sit’ on my shoulder or the top of my head and which inevitably falls down in spectacular fashion – making the little ones laugh. I also have a selection of silly ‘toilet’ jokes for the slightly older ones. Never fails. And if your child just wants to go with a bored, “I don’t want to be here” face – just go with that – I often try to replicate it with exaggeration and egg the on to look a little more bored which often makes them crack a smile. In short – find your inner clown and make him juggle.
If you have people with you who can help with the child entertainment, make them stand directly behind you – not to the side. Otherwise your child will be looking away, rather than towards the camera.
Lesson 4 Challenge
Could not be simpler - just capture a beautiful, autumnal portrait! Think about your zoom , proximity, crop, background and light. Use what you learned about colours and about using a prop or similar. If you have a camera, use your camera. If you just have a phone - use your phone on the portrait mode. Take your time, don't rush it.
Can't wait to see them!
So it your course just a collection of tutorials?
In the era of the internet, you could find a tutorial for nearly everything out there. For free. Why would you even consider paying for a course?
To put it simply, because that's not how learning a skill works.
Fun fact about me - before I set up Photography for Parents, I worked as a learning designer, crafting courses so that they best follow the way people learn!
You can watch a tutorial on how to set the shutter speed on your camera, but that won't necessarily mean you now can take a beautiful photo of something in motion. You only learned a fragment of a skill. You didn't consider all the other elements that make a difference. It's not how we teach.
To give you an example - we have a module dedicated to capturing movement. We teach about shutter speed, of course. But you also learn : how to make your focus follow your subject on the move, how to compose your photo to best illustrate the speed, whether to make your subject tack sharp or introduce a degree of blur to highlight the speed and how to apply it in common child-centred scenarios - swings, running etc . And then you go and try all this out and we give you feedback and advice on how to make things better, what you may have missed and to praise your efforts.
You don't get that from a random tutorial. YOU LEARN SO MUCH MORE

