We are starting our Christmas Photography Bootcamp with the one thing that I cannot imagine Christmas photos without - and that's Bokeh!
Wait, what’s bokeh?
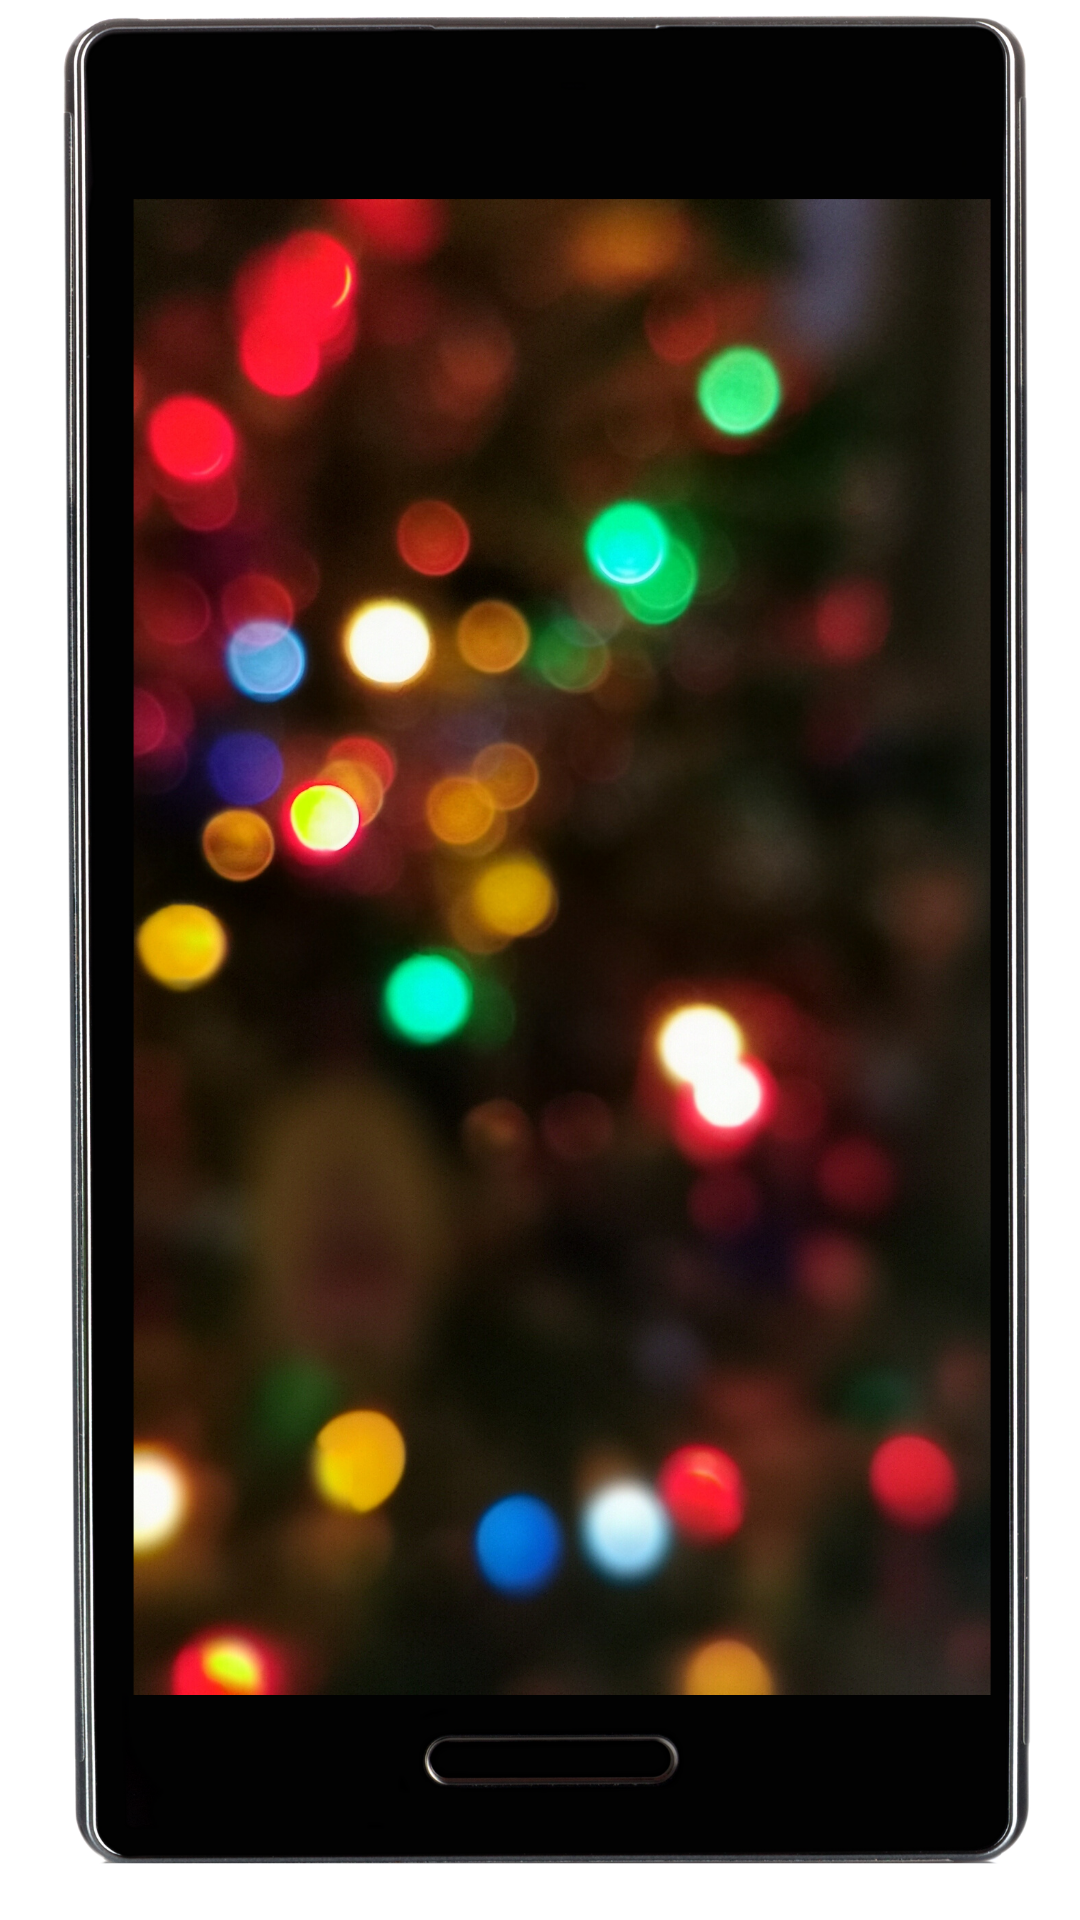
The term Bokeh comes from Japanese and is used to describe circles/spots of light which are created by blowing lights out of focus. Depending on the level of brightness of your lights, bokeh may be more or less pronounced. Fairy lights in general make for great bokeh sources as they tend to be multicoloured, the light is quite distinctive and there are usually multiple little light sources in small areas.

Bokeh in your camera

The basic principle is - the MORE out of focus you can blow you lights, the bigger, softer bokeh you’ll get. but there are a few variables. Here is how you do it :
4 step process:
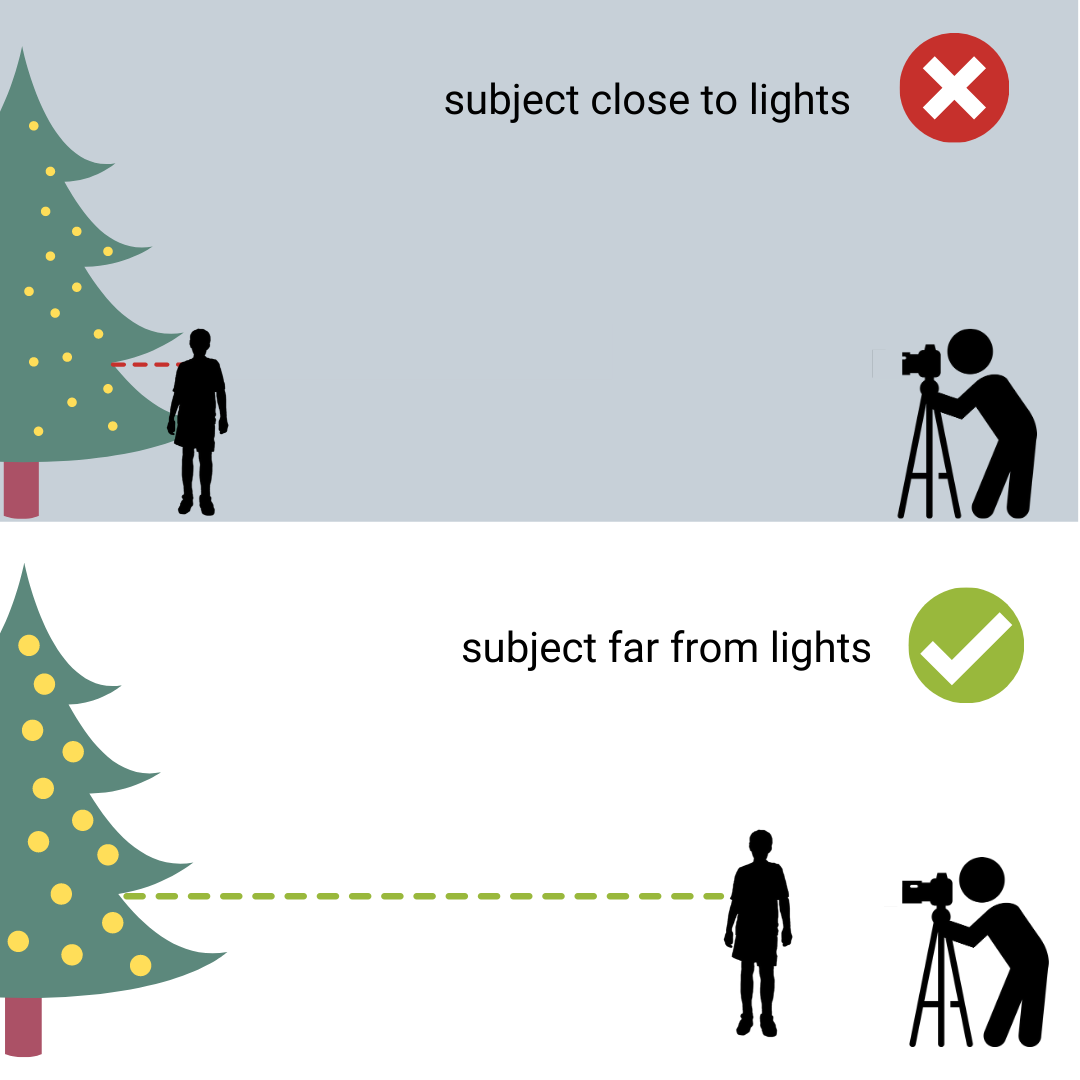
Step 1. Distance to the lights
If you place your subject right next to the lights you will not see much by way of bokeh. Bokeh is lights that are out of focus, and the more out of focus the better.
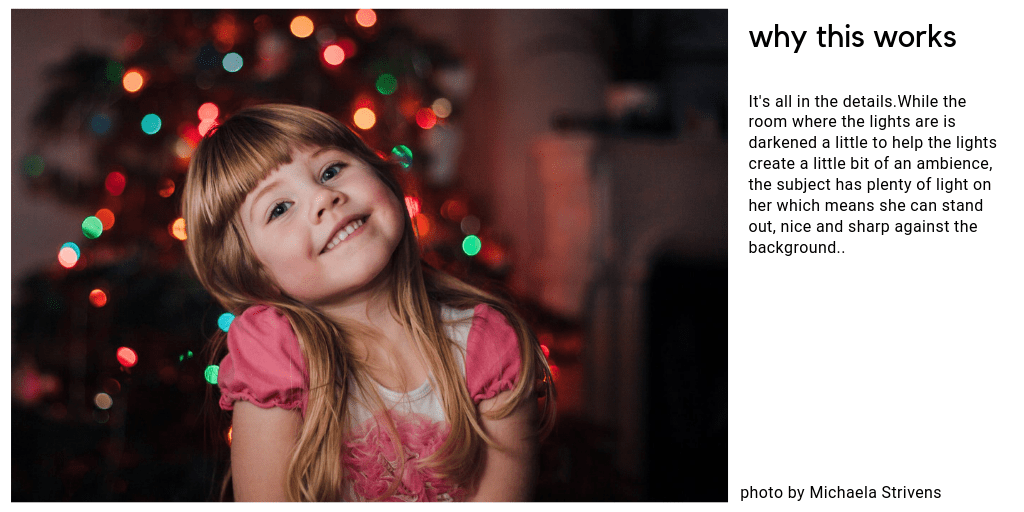
Here is what you need to know about focus - when you focus on something or someone, everything that is the same distance from the camera, will be equally sharp as your subject. So if you place your subject right next to the lights - the lights will be sharp, or sharp enough, resulting in little or no bokeh.
Instead, create a good distance between your subject and the lights!

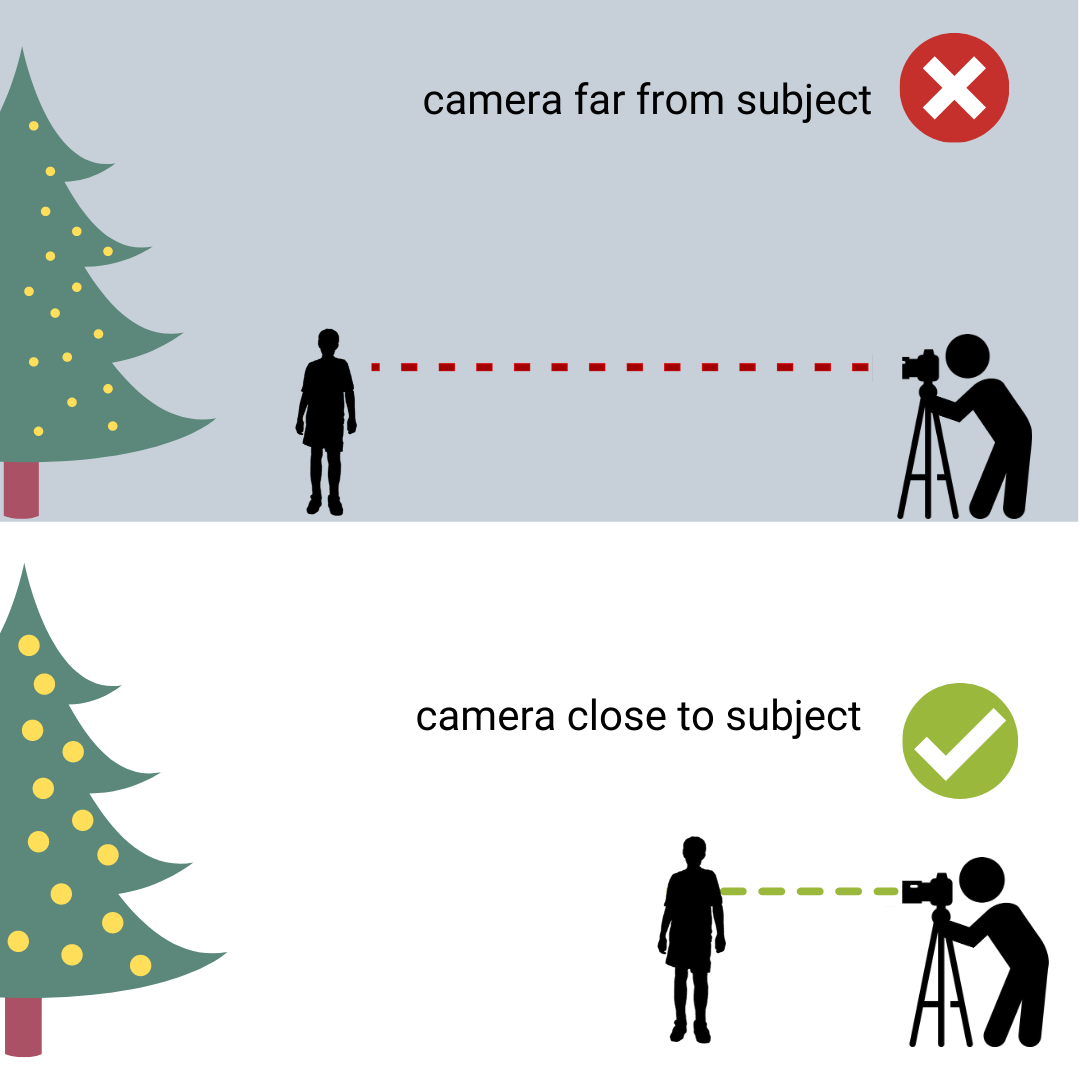
Step 2. Distance from camera to your subject.
The closer your are to the subject you are taking a photo of, the better, bigger bokeh you can create.
Without getting technical here, if you focus on something in a distance, unless you zoom in A LOT ( and more on that in step 3) you will struggle to make good bokeh.
You want to be nice and close - as close as you need to be to still make your desired composition, but closer is better.
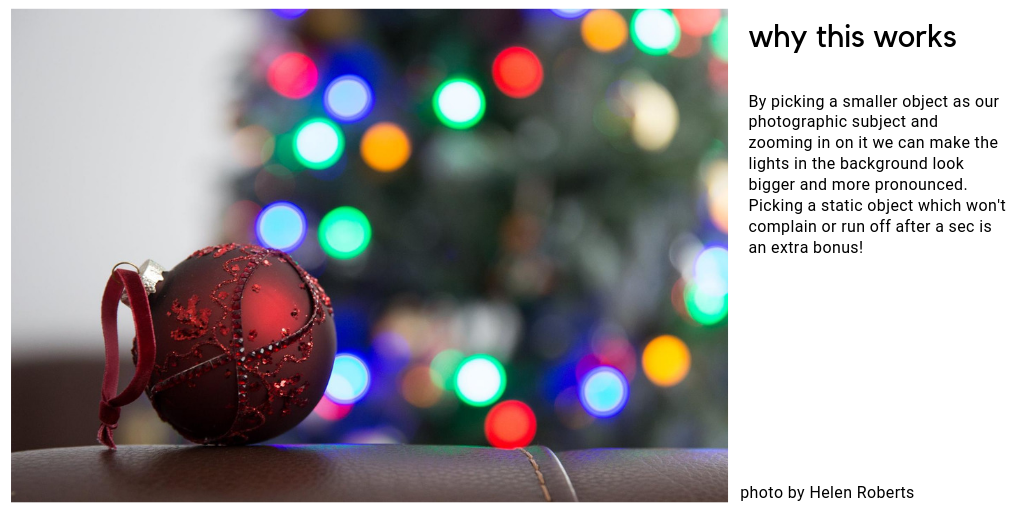
This is also why it's often easier to get big bokeh when you take photos of something quite small - to make your subject take up more space within the frame you actually need to get close or zoom in on the subject . To fit an entire person in the frame, you actually need to stand back quite a bit so if you're after a portrait with bokeh, you would do better aiming for a head and shoulders rather than a full body shot.

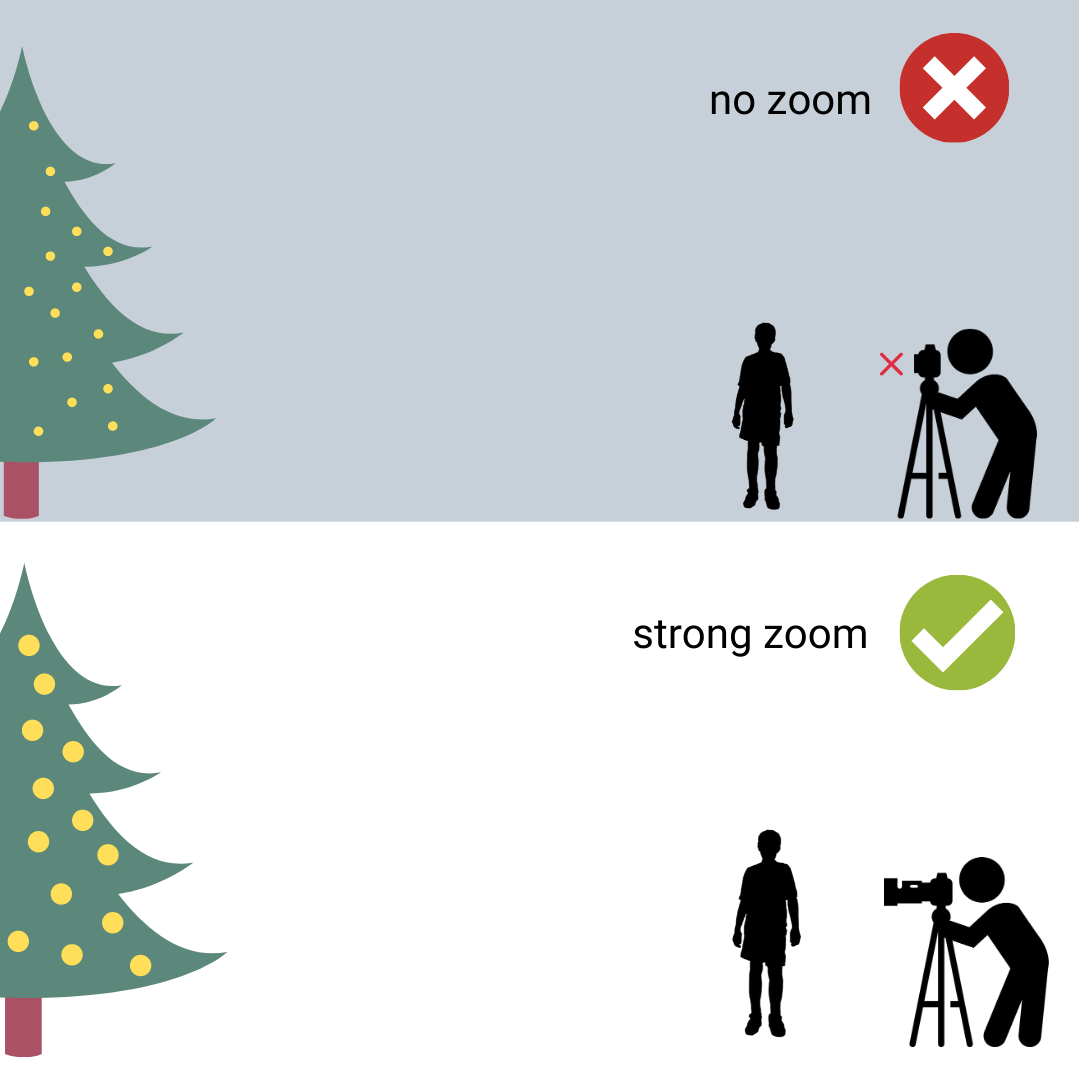
Step 3. Your Zoom (aka Focal Length)
Focal length describes how much you zoom your lens in with longer Focal length meaning longer zoom and shorter focal length meaning less zoom.
The more you zoom in on your subject, the more you compress the entire space in your frame ( trust us on it) and the more your lights will be thrown out of focus = big beautiful bokeh. Yes, even if your subject is already quite close.
Some lenses don't zoom in - we call them prime lenses. If you have multiple of those to choose from

Step 4. Camera setup - Aperture
This is the ONE slightly technical bit that we need to talk about - if you're familiar with it - great, but if you're not, here is ( in a nutshell) what it's all about.
When it comes to creating bokeh, being able to get a wider aperture ( which equates to a small aperture number value) in your lens will give you bigger bokeh.
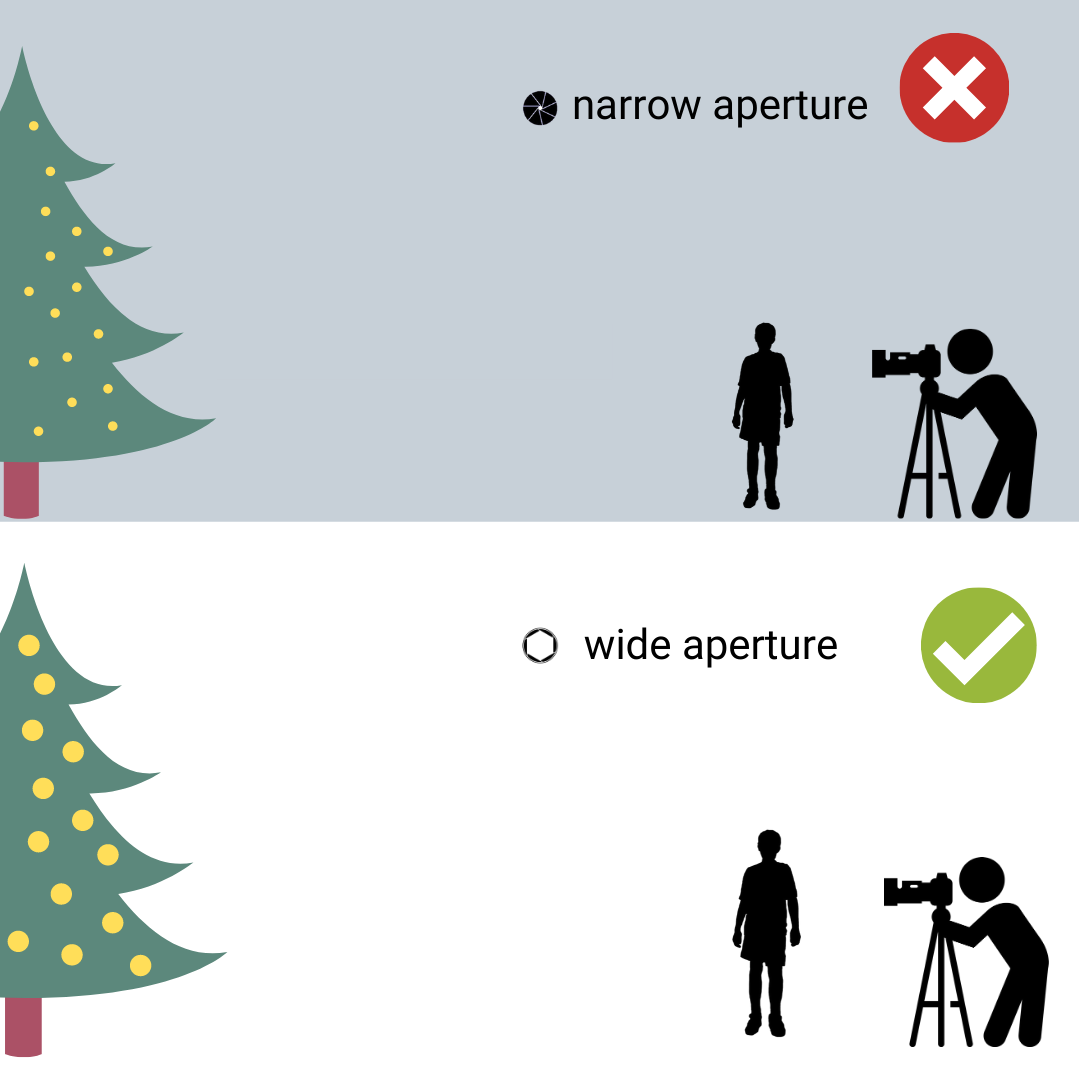
What is aperture?
Inside your lens you have a multi blade opening that can be set to be open wide or open just a little bit. When it's open wide, we can let lots of light all at once into the camera BUT ALSO it allows us to create that soft, blurry backgrounds which - when you add in lights - translates into big beautiful bokeh.
Unfortunately, not all lenses come with the same range of apertures - some lenses will allow you to open the aperture very wide, others less so. If you have a lens that does open wide - you will be able to create bokeh more easily and you may even be able to get great results without getting too close to your subject or zooming in much.
")

How do I find Aperture in my camera?
If you're shooting in auto modes on your camera, don't worry about setting the aperture to a specific value, and instead set your camera to Portrait or Macro - it will ensure your camera will prioritise this wider aperture set up.
If you’re shooting in priority or manual mode : set your aperture to the widest available setting (the smallest number you have available ) and ( unless you’re using tripod or something else where you can just set your camera steady by itself) up your ISO to 800 – 1600 ( or until you’re able to get a shutter speed above 1/60s).
Bokeh on your phone:
In recent years, phone camera manufacturers have begun to make the process of achieving that blurry background and with that - bokeh - on your phone relatively easy.
If you have a phone which has a portrait mode or aperture mode or a Pro mode where you can manipulate the aperture setting- you can do it.
Simply switch your phone to that mode, focus on your subject and hey presto.
But it's not the same as your 'proper' camera
I want to put a big caveat here - the bokeh and blurry background you get in your phone is not achieved in the same way as you would on the camera, and it often doesn't look quite the same. It is usually the effect of photo editing, not photo capture - effectively a simulation of what that blurry background could look like in camera. The phone creates it by detecting the edges of the subject you focus on, and applying that blur effect edit to the background.
My phone camera ( Huawei p30 pro) lets me change the level of blurriness or change where it goes even AFTER I had already taken the photo so I know for sure it's nothing to do with the lens! In some cases the blurry background is the effect of your phone camera taking 2 images - one focused and one de-focused and smashing them together to keep your subject sharp and your background blurry.
In many cases the effects look perfectly fine but often, they look a bit too exaggerated. Your phone camera might also struggle if your subject has 'blurry outline' - such as frizzy hair as it needs to detect that edge in order to know from which point onwards to get things blurred. I have even seen glasses that half disappear from the holders hands as the phone can't cope with their transparency.
Having said all that, give your phone good conditions to work with - create a good distance between your subject and the background you want to make soft, keep your subject nice and bright and you should get a great photo.
And once you’ve mastered the background bokeh…
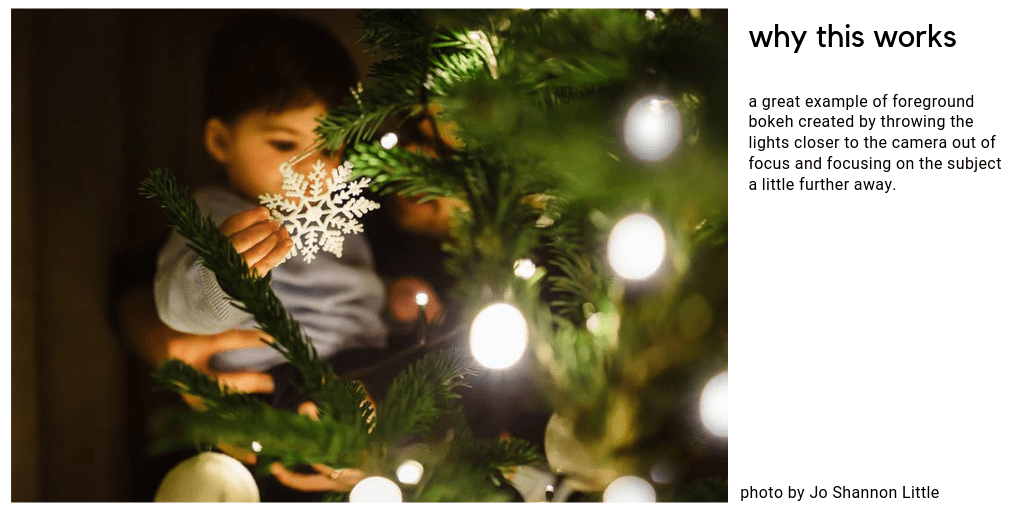
Have a go at placing them in the foreground instead( or as well! ) . Same principle applies – you want to throw the lights as much out of focus as possible. I achieved it in this image by holding some fairy lights close to my lens so that they show up on the fringes of the frame, but without showing too much of the cabling.
Settings wise, I’d yet again suggest a long zoom ( although if you have a shorter lens with a wide aperture) you can bypass that recommendation and use your widest aperture available.

a few more examples :

One other thing I want to point out before you go and shoot, and post on our Facebook group. Getting that lovely bokeh in the background is achievable on pretty much any camera. You can absolutely do it. But if you look at other people's photos and notice that their bokeh looks bigger, more defined - this will be down to the kind of lens they have. The last thing I listed on this 4 step process is setting the aperture wide. This is something that's linked to the lens and not the camera itself, and lenses with exceptionally wide aperture - f1.4, 1.8 - which give you the dreamiest bokeh, are a bit more specialised and can be pricy. Students on our courses often upgrade to those after the courses because they can make a big difference in other aspects of photography too, but I want to just reassure you - if your bokeh are not as big as someone elses, it is likely to be their lens.
Day 1 Challenge
Capture some bokeh!
If you’re new to photography, try having a go at the background bokeh first. Follow the steps we laid out and if you’re having any trouble, just ask on the Facebook group – we’ll be happy to help.
If you’ve already mastered the background bokeh, try placing it in the foreground.
Can’t wait to see everybody’s bokeh!
Remember to post your images to the Facebook group!
TOMORROW: In our second lesson ( on Tuesday) we will be exploring a few more ways with bokeh - including creating different bokeh shapes, starbursts and more!