Let's talk about light!
The number one request for what to cover in this minicourse that came from you was to do with summer light. And I was not surprised in the slightest. Summer light can be really challenging if you don't have a good understanding of its nature. On the upside, it can produce some really stunning images - when you know what to do with it!
So in part 1 of this lesson we will give you a crash course in the Facts of Light and in Part 2 we will look at harsh light specifically and see how you can work with it best.
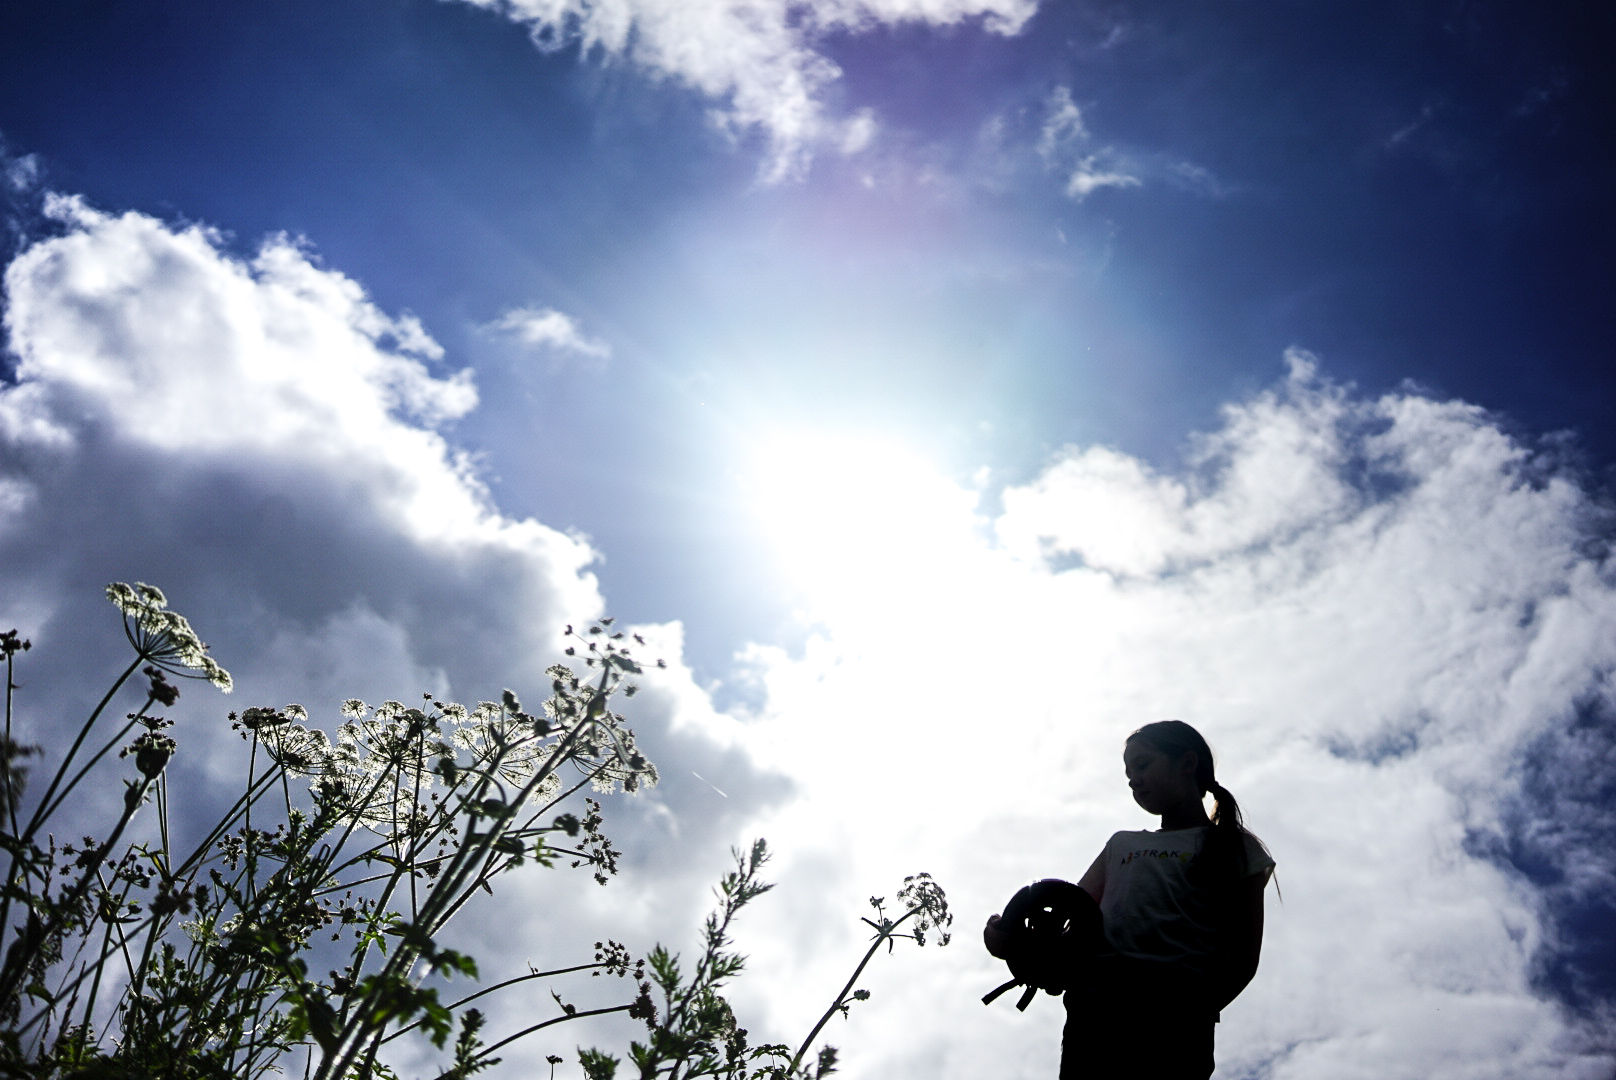
FACTS OF LIGHT
1. Soft or Hard?
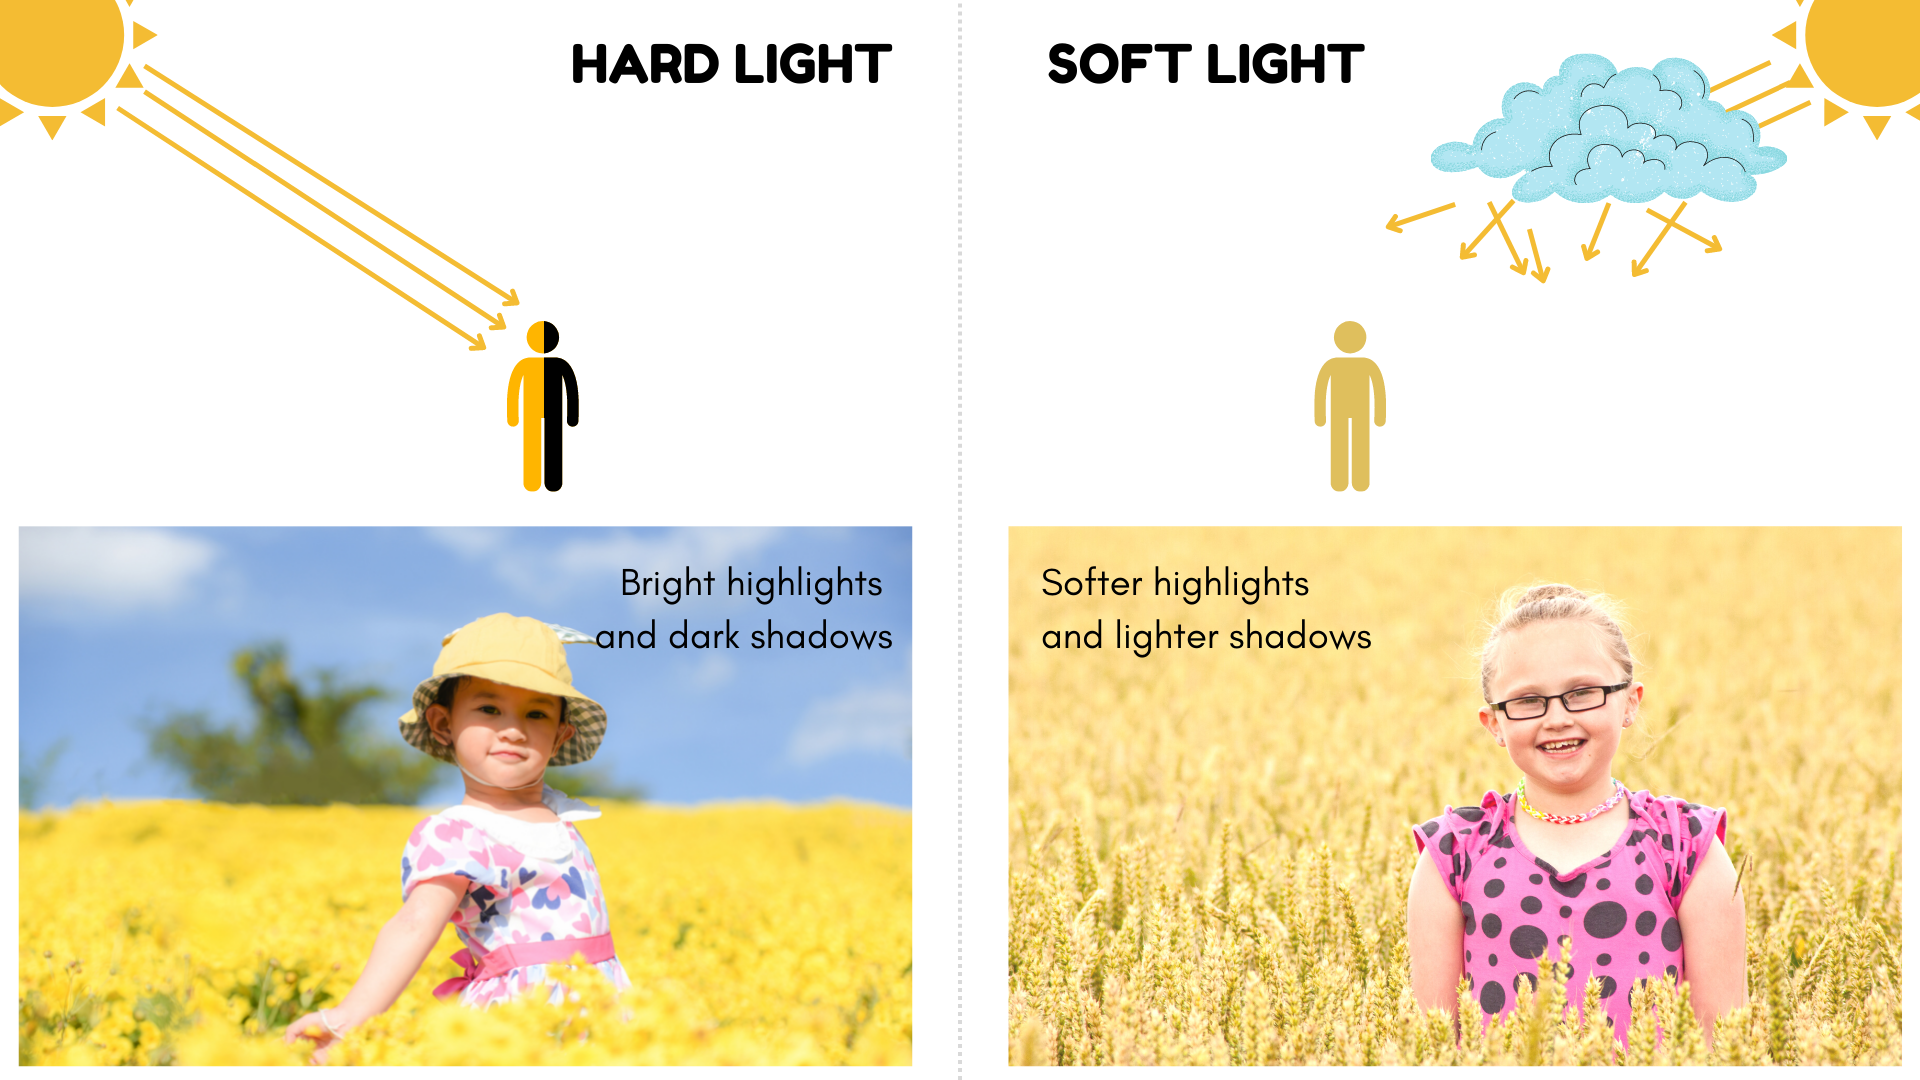
One of the things to determine when looking at your light is whether you are dealing with soft or hard light and it's all to do with how the light gets to your subject.
You get hard light when the light rays ( whether the source is the sun or any artificial light) hit your subject directly. You know you have a hard light when you can see well defined shadows with hard edges.
You get soft light when the light rays pass through something or are reflected by a surface and in doing so, the direction of the light rays becomes more scattergun which leads to softer, more diffuse light look with soft delicate shadows.
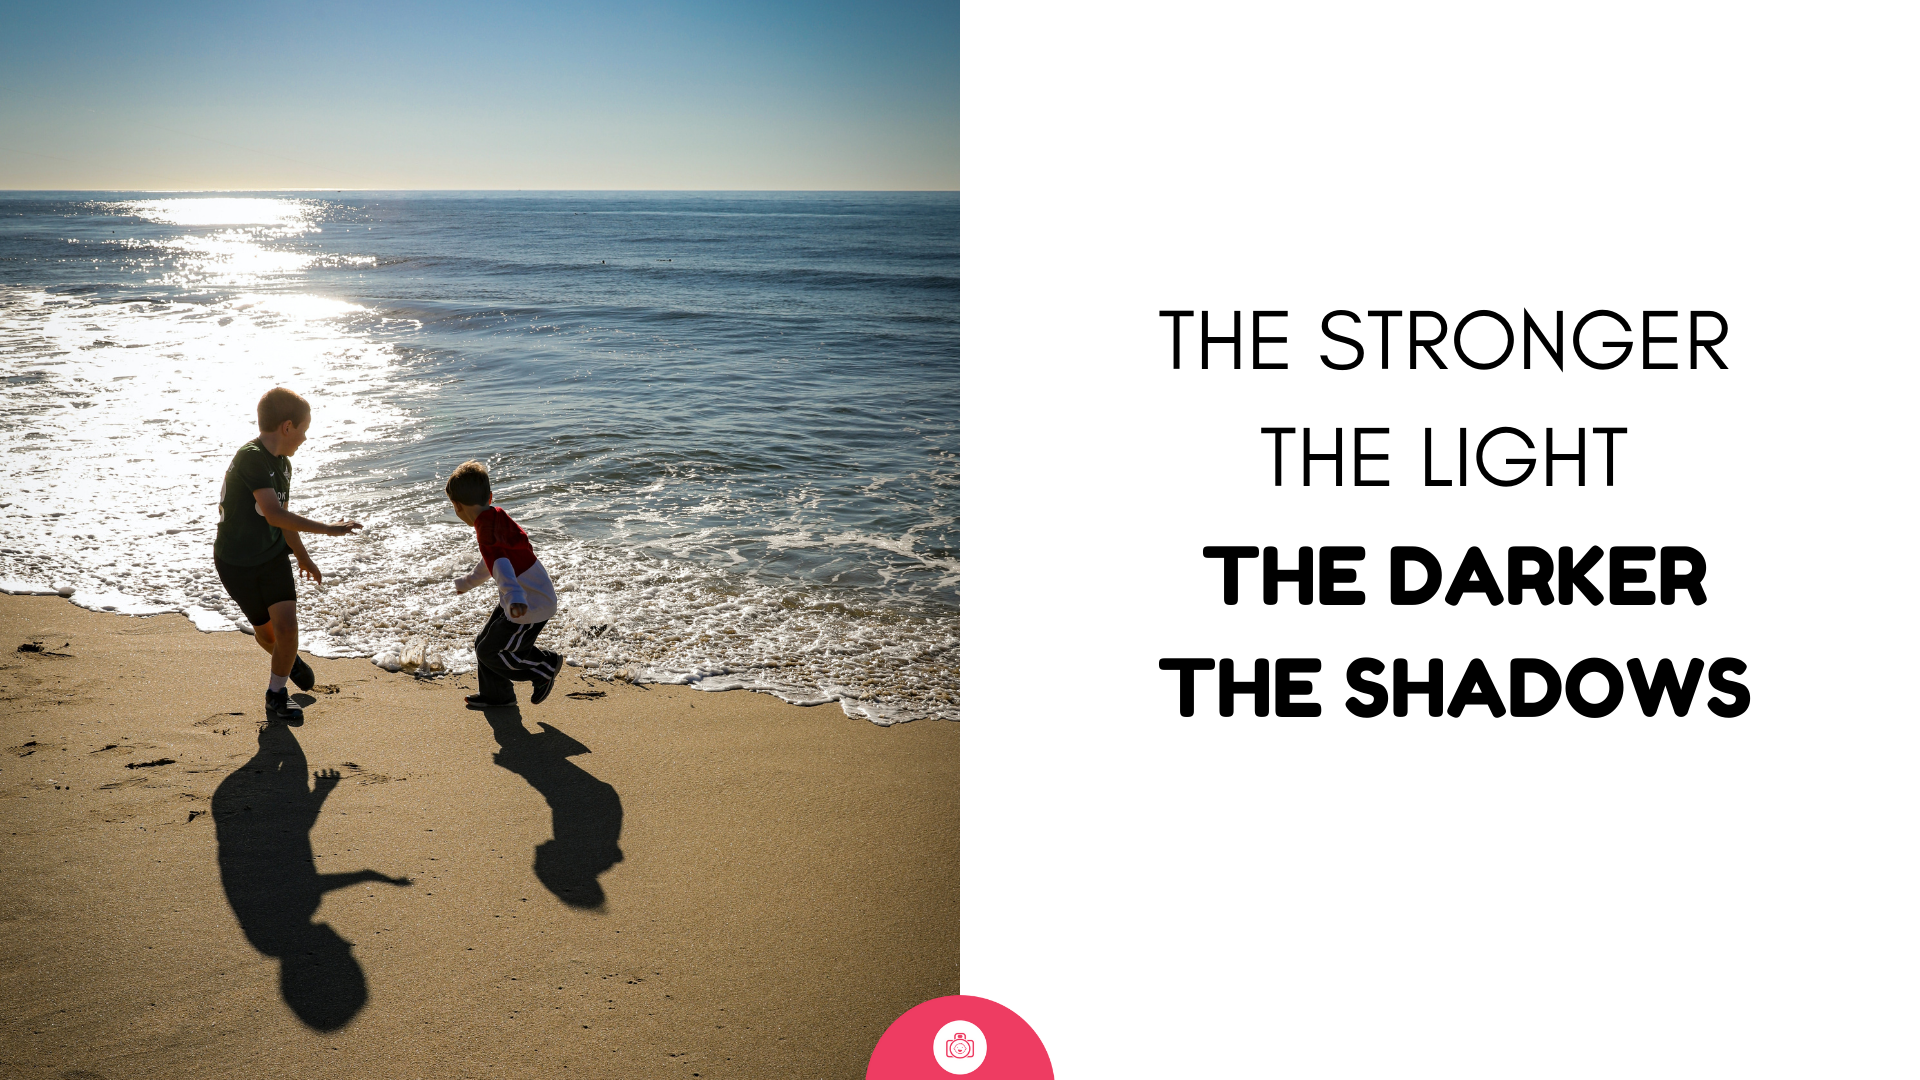
2. The stronger the light, the darker the shadows
Here is the problem with the summer light in a nutshell. We get plenty of light ( good) but with that we get really strong shadows too ( challenging). Which leads to really strong contrast that can be hard for your camera to cope with and images full of contrast that won't suit every subject and can be difficult for your camera to capture.
3. Light direction matters
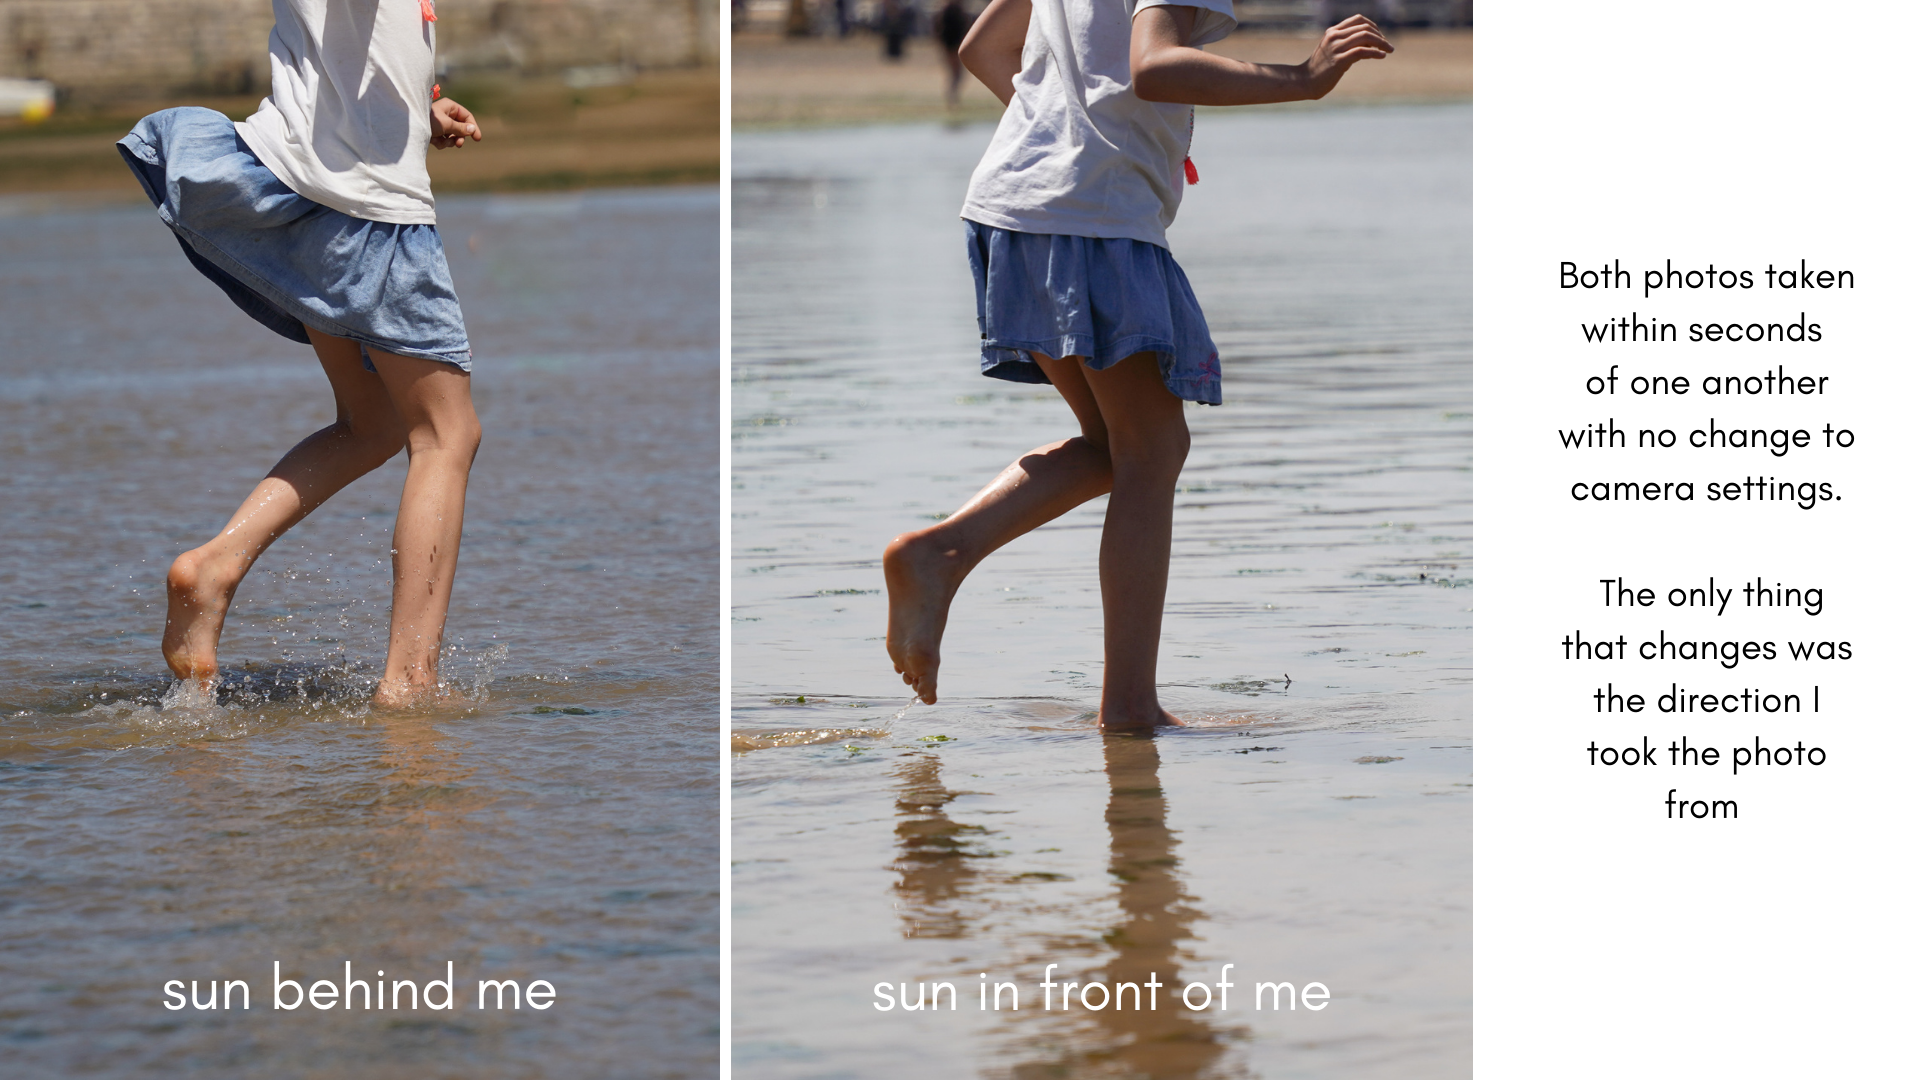
Light always travels in a straight line. All that talk about light 'wrapping around things' - that's purely metaphorical. When light hits an obstacle, light creates a shadow. And because of this, your light direction will matter - because depending on where the sun is on the sky and where you and your subject is in relation to the sun, your photos will look differently. Even on an overcast day, when the light is dispersed by traveling through the clouds, there is still a predominant direction to it and it will affect how your images are looking.
4. Light angle matters
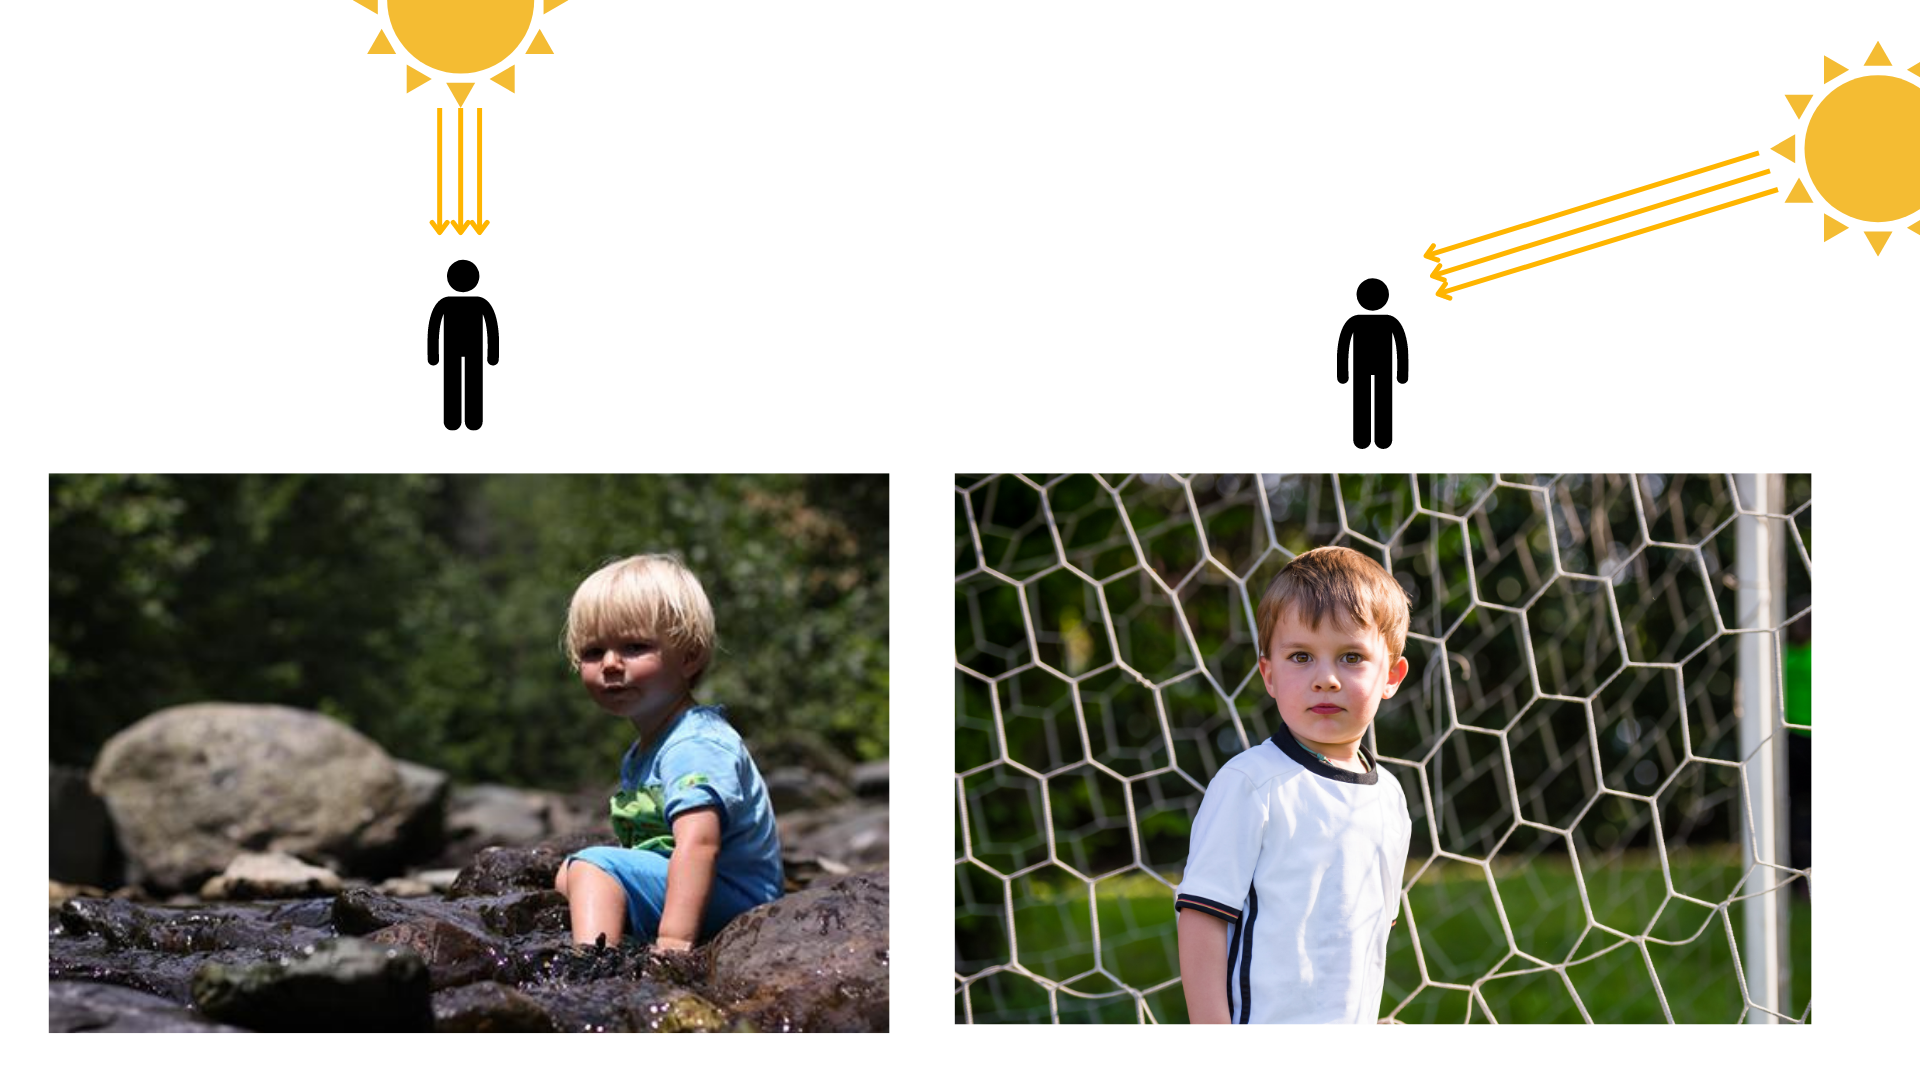
The reason we dislike the midday light so much is that the angle of light, being pretty much 90 degrees down, is deeply unflattering - it causes unpleasant shadows in the worst places : under the eyes ( aka Panda eyes), under the nose and under the chin, and at the same creating sometimes very harsh highlights on the top of a person's head, their cheeks, tip of their nose. But earlier in the morning and later in the afternoon, even if the light is still as naked and direct, the angle changes, and the shadows become more manageable because that shallower angle gives us more to work for.
4. Light colour depends on Light angle ( when the light is the sun)
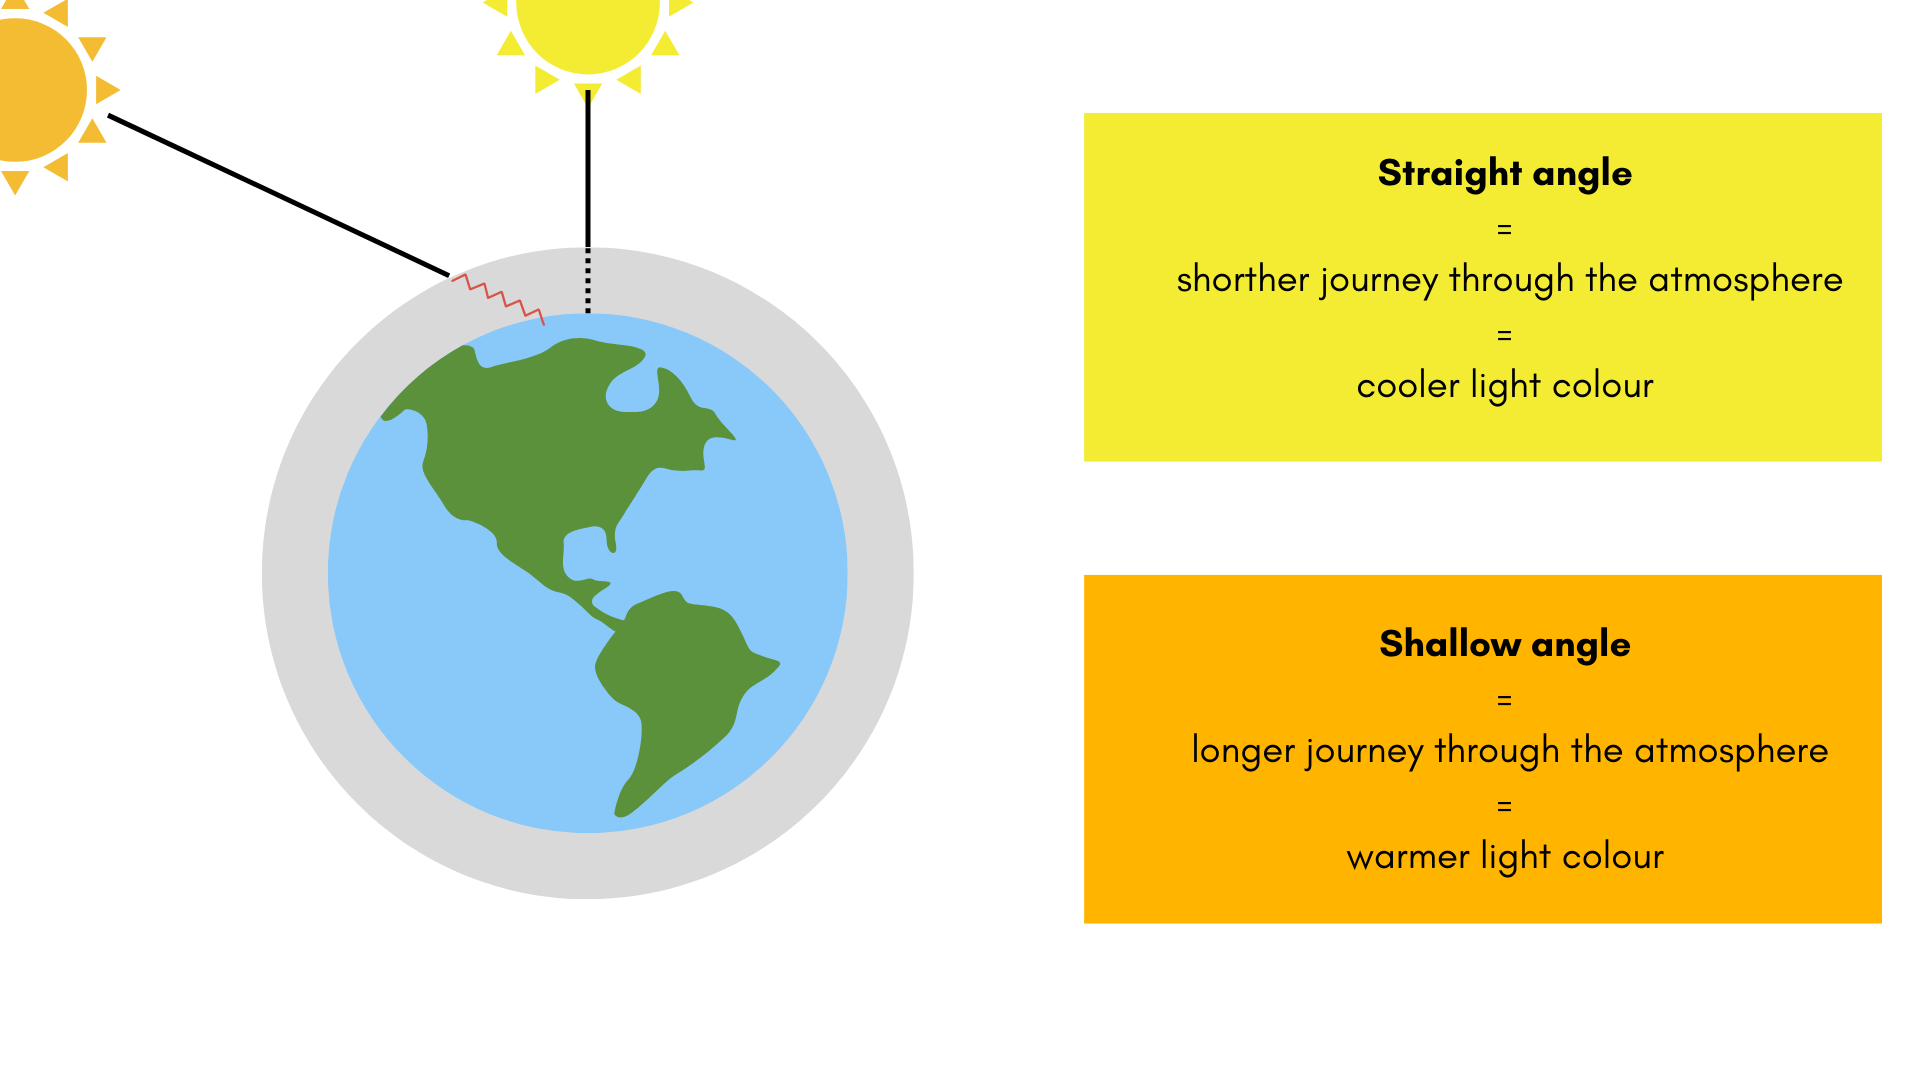
I'm sure you have observed how the late afternoon sun changes colour and everything starts looking properly golden? Let me tell you why that is and why you should use it. It's all to do with the angle the sun hits the Earth's atmosphere. AT midday, when the light is at it's highest point on our horizon, the light enters the atmosphere in a perpendicular angle, traversing the atmosphere in the shortest possible way. But towards the end of the day, the sun hits the earth at an angle and the light rays have a longer way to travel. This causes more resistance and changes the frequency of the wavelengths and with that, their colour.
BUT ALSO : Your camera sees light differently to you
There is a term photographers use when talking about their camera light capabilities - Dynamic range and it describes the distance ( in exposure stops) from the brightest part to the darkest part of the image.
With strong light / strong contrast images, that dynamic range is quite large - we go from deep dark black of the shadows, through all the shades of grey to the purest bright white of the highlights. The trouble is that however good your camera is, your eyes will ALWAYS be better at seeing detail in the shadows and in the highlights. So you may be looking at the scene and seeing a dark-ish shadow with things still visible in it, but your camera will capture pure black. Same with highlights and white. And the stronger the contrast, the harder it will be for your camera to deal with it. This is why looking at the photos captured in bright sunlight can be quite disappointing - your camera saw something else than you did!
BUT the good news is that you can also force your camera to make shadows darker or brighter that how you see them with the naked eye. We won't be going into it much as it really requires of you to have a bit of a stronger grasp of your camera ( which we do teach in our courses)
Facts of the Summer Light
So how does all that relate to our summer light?
In a nutshell
- we get more sunny, non overcast days ( we hope) - so that you're more likely to be out and about in the sun and taking photos in these conditions
- longer days, which means that comparatively, the sun is at its highest ( most challenging point) for a longer part of the day
- In summer holidays we re more likely to be out and about when the sun is at it's highest, and also be in wide open spaces or near water which can cause additional issues ( water reflects! = 2 x the light!)
All of the above adds up to potential trip hazards for your photos. But even the really challenging light can be turned from a problem to a stunning photo, you just need to know what to do with it. There are whole books written on the subject of shooting in challenging light and obviously, with us only having one day for it in this bootcamp, we are very limited in what we can teach you. Some of the techniques will also require you to have a good grasp on your camera and especially shooting in manual.
BUT, even with those limitations, we can still help. So let's move to part 2 of the lesson where we show you how to handle summer light in a number of situations.