Before we jump further into this lesson : 3 important things:
- LAST lesson , or is it? This is our final 'lesson' in this bootcamp BUT we have a couple more bonuses which will be coming your way tomorrow and day after - Bonus number 1 is going to be our advice and strategy for photographing the big event itself, Bonus number 2 is a little lesson in editing!
- Grand prize Draw - tonight! TONIGHT at 8pm we will be holding the grand prize draw - one lucky person's Christmas will get all that much better! If you've been active in our Facebook group, this could be you! Make sure you're on the FB live call though - if you're not, I'll move on to the next person! I created a FB event to make it easy to find - just follow this link and click 'Going' and it will pop a reminder for you when I'm about to go live!
- January course discount : Don't forget that our 30% discount (discount code xmas30) for our flagship Fundamentals of Photography for Parents will end on Sunday but the available spaces are now running into single digits. But if you book your course space before the class and then I pick your name in the big draw, you get that course refunded, PLUS another one of your choice free! BOOK YOUR COURSE HERE
Our today's lesson is less about the one thing or one technique to try and more about taking a different approach to photos - one that will serve you well as you try to simply capture your kids as they go about their day. Today we are going to help you capture photos that are unmistakably Christmassy, even if there isn't a roll of tinsel wrapped around your child at all times. Today, we're learning about contextual clues and storytelling.
How do we know it’s Christmas?
Have you noticed how the second December ( or let's face it, mid-November onwards) hits the shops, something audibly changes. Suddenly we forget all about the rich catalogue of music that humankind has produced and instead, everywhere is filled with Christmas music.
Songs that are immediately recognisable as such.
Some of these songs have been around for long enough for us to get used to their ’timing’ but every year brings a new batch of Christmas songs. And those too, even if you hear them for the first time, can be associated with Christmas immediately.
All these songs have one thing in common, and even if they don’t specifically mention Christmas, they contain audio clues for us to recognise and help us build an association with Christmas. Perhaps it's the sound of bells, or the sound of a children’s choir or even - as some say - a ‘secret chord' weaved into the fabric of the song.
Whatever it is, it is filed in our brain under “Christmas” and when we hear it, it results in an immediate and strong association.
In the same way, when you take Christmas season photographs, you want them to be instantly recognisable as Christmas photos.
And we do that by building in visual clues, things that have that unmistakable Christmassy look / feel to them.
IDEALLY Without putting a Santa hat on your child in every photo.

Christmas Iconography – visual clues
Think for a moment. When you give your brain Christmas as a ‘topic’ what kind of images start flashing through your brain?
For me they fall into a few categories:
COLOURS – in my mind I see deep crimson reds, white, gold, silver.
LIGHT – to me, a sea of fairy lights, usually turned into that lovely out of focus bokeh look, is something I immediately link to Christmas.
MOOD – Christmas to me translates into more moody, darker images ( brightened up by the fairy lights) rather than this breezy, airy bright pictures.
PROPS – the tree – obviously, shiny baubles, Christmas bakes, Santa hats and accessories, tinsel – I could go on. And then there is all the food!

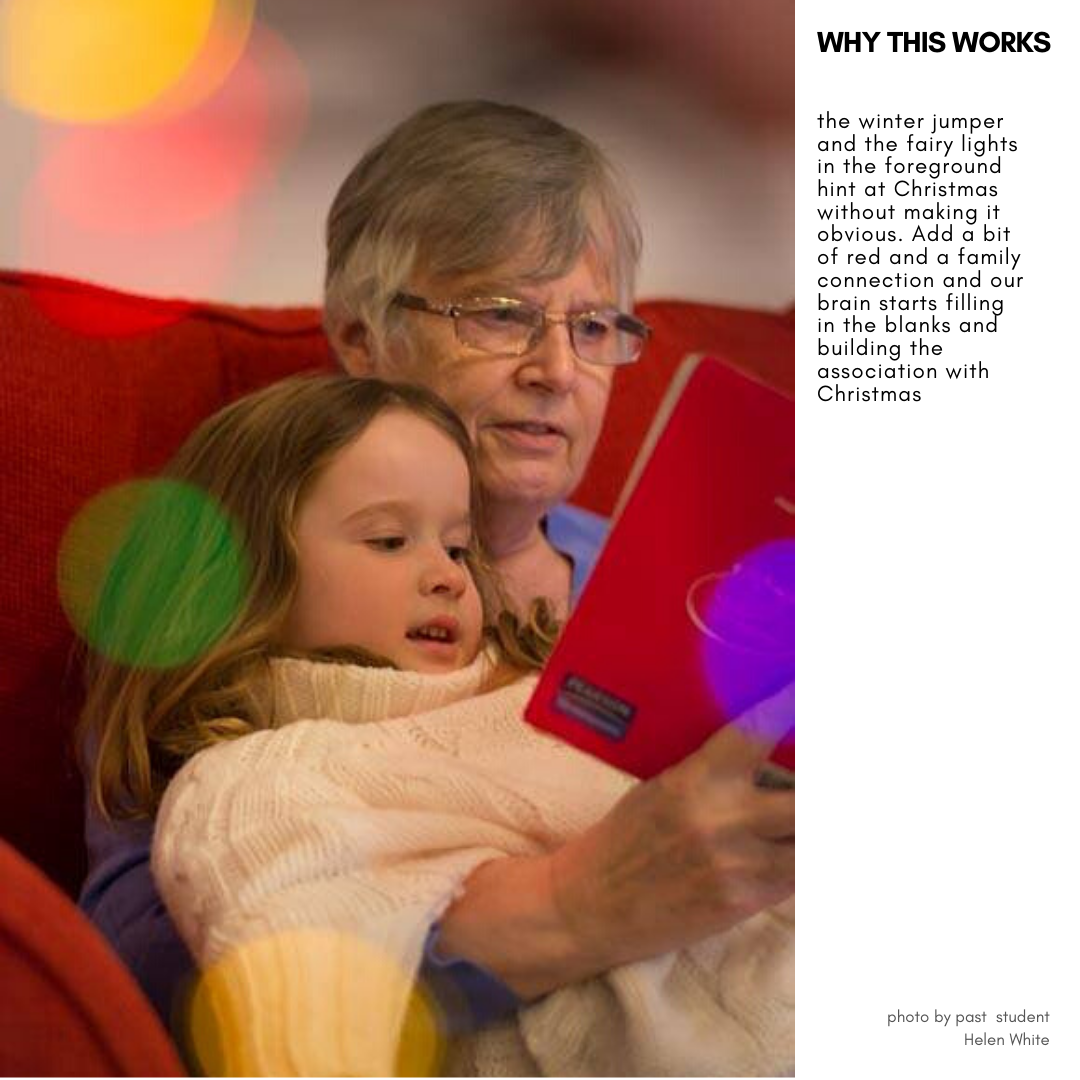
WHY THIS WORKS: We get a hit of the 'Christmas Red' and a more subtle Tree clue, both of which build an immediate association with Christmas. Photo By Sarah Gibson

WHY THIS WORKS: out of focus lights in the background and warm tones instantly transport un into Christmas territory. Photo by Rebecca Walls

WHY THIS WORKS: Certain scents and aromas bring us instantly to Christmas - orange, cloves and cinnamon certainly do. Here with the addition of a candle which brings an extra hint of Christmas with it. Photo by Sarah Gibson
But these are my associations, and the thing about visual clues is that it’s a deeply cultural, and to a degree personal phenomenon.
If you grew up in Britain, the visuals which bring your mind to Christmas may be different than if you grew up in Scandinavia, or Australia or South America. Some things will be common ( or near enough) but others will make sense to you and not someone else. That’s OK. You don’t have to ( and shouldn’t really) try to incorporate someone else’s vision of Christmas into your images. But you should think about how to bring these clues meaningfully to you into your images so that when you look back at the pictures in years to come, you don’t have to guess when they were taken.

WHY THIS WORKS: the only 'real' Christmas connection is the branch of the pine tree in front of the child, yet the image is undeniably Christmasy. The combination of colours, clothes, the story we get from the image plus that tiny bit of pine is all we need for our brain to build the connection. Photo by Jenn Thomas
Incorporating visual clues into your photos
There is a balance to be mastered when it comes to incorporating visual cues into your images.
A sprinkling of fairy lights in the background – great.
A bright red santa hat providing the focal point in a see of other colour – fantastic.
Seeing your child through the pine needles of the tree – beautiful.
A family portrait in front of the tree, with everybody wearing their matching Christmas jammies and santa hats topped with reindeer antlers, holding shiny baubles and tied together with fairy lights – maybe a bit of an overkill.
Subtlety always wins. You want to hear delicate jingle bells sound when you look at the photo, not a full volume blast of “and I wish it could be Christmas everyday” if you know what I mean.
But WHERE do I put these clues?
Let’s talk about depth in photography
Look around you and consider what you see before you in a 3 dimensional way.
After all, when we take a photo, we squeeze a rich, 3D reality into a flat, 2D rectangle. How do you make someone understand the depth of your scene? How do you make them understand what’s the most important element of the image? What should be in focus and what can be more or less subtely blurred?
Consider your photograph as if it had 3 plans or layers if you will : First, Second and Third plan.
One of these will contain your subject, and the other two will be there to set the story up, to prop it up and to enhance your visual story. Your background and your foreground is typically where you can place your visual clues to make the story, the time and the place abundantly clear.
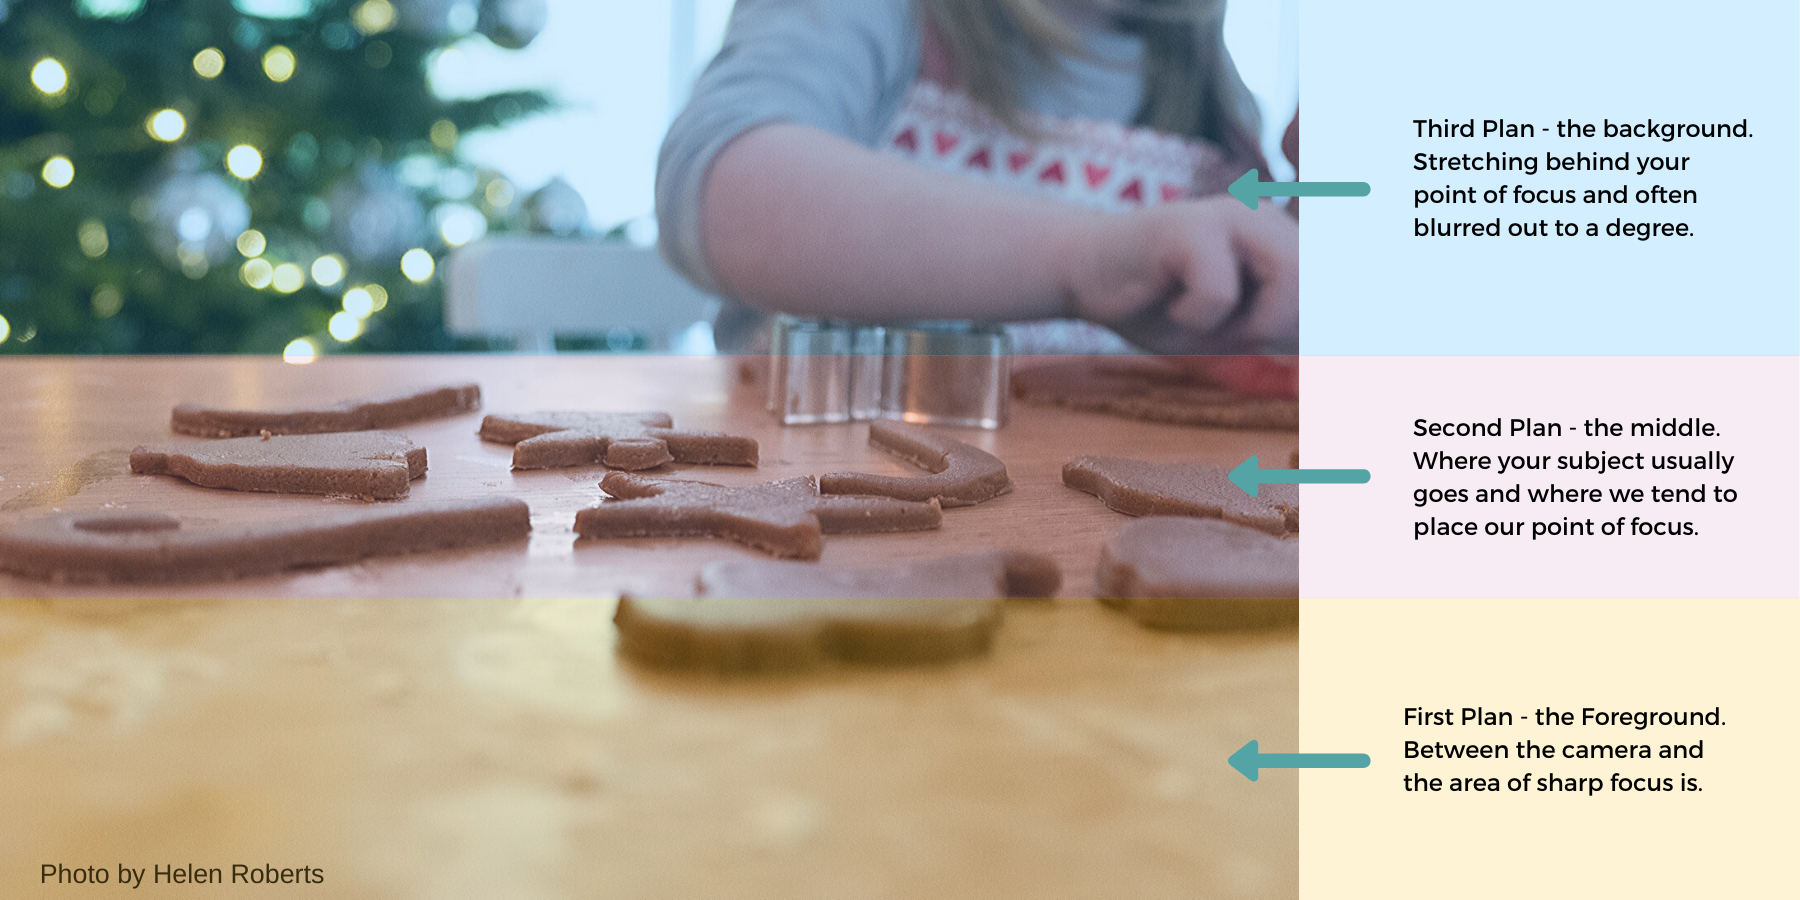
Your first plan – the foreground contains elements that are in front of the subject – you will only ever notice it if you choose for the elements in font of your subject to be visible – if they’re not, and you’re shooting through thin air only, you will only have 2 plans to work with in your picture. If it is visible, you can use it to include elements that will lead us to your subject or that will obscure it a little, to make the depth of the scene and it’s 3D quality more apparent.
The second plan is typically ( though not always) where your main subject will be – you want your subject to be sharp, to make it clear to the viewers that their eyes should go directly there, so you need to keep an eye on where your camera puts your focus.
The third plan is your background – you may choose to blur it out more or less, you may want it to take a larger or a smaller proportion of your photograph, you may choose for it to provide the crucial context clues for your photo or be as good as invisible, simply being a blank canvas, which offsets the main subject. Whichever option you choose, try to understand what it’s there for and what it’s bringing or taking away from the story.

Photo by Andrea James
Foreground or background?
When you try an incorporate Christmas clues into your images, think about which of the 3 plans do they belong in. The one that tends to come to mind most naturally will be the background – your child “in front’ or the christmas tree/ stockings etc, but using your foreground may give you a more interesting perspective, a more candid look and a more subtle outcome.
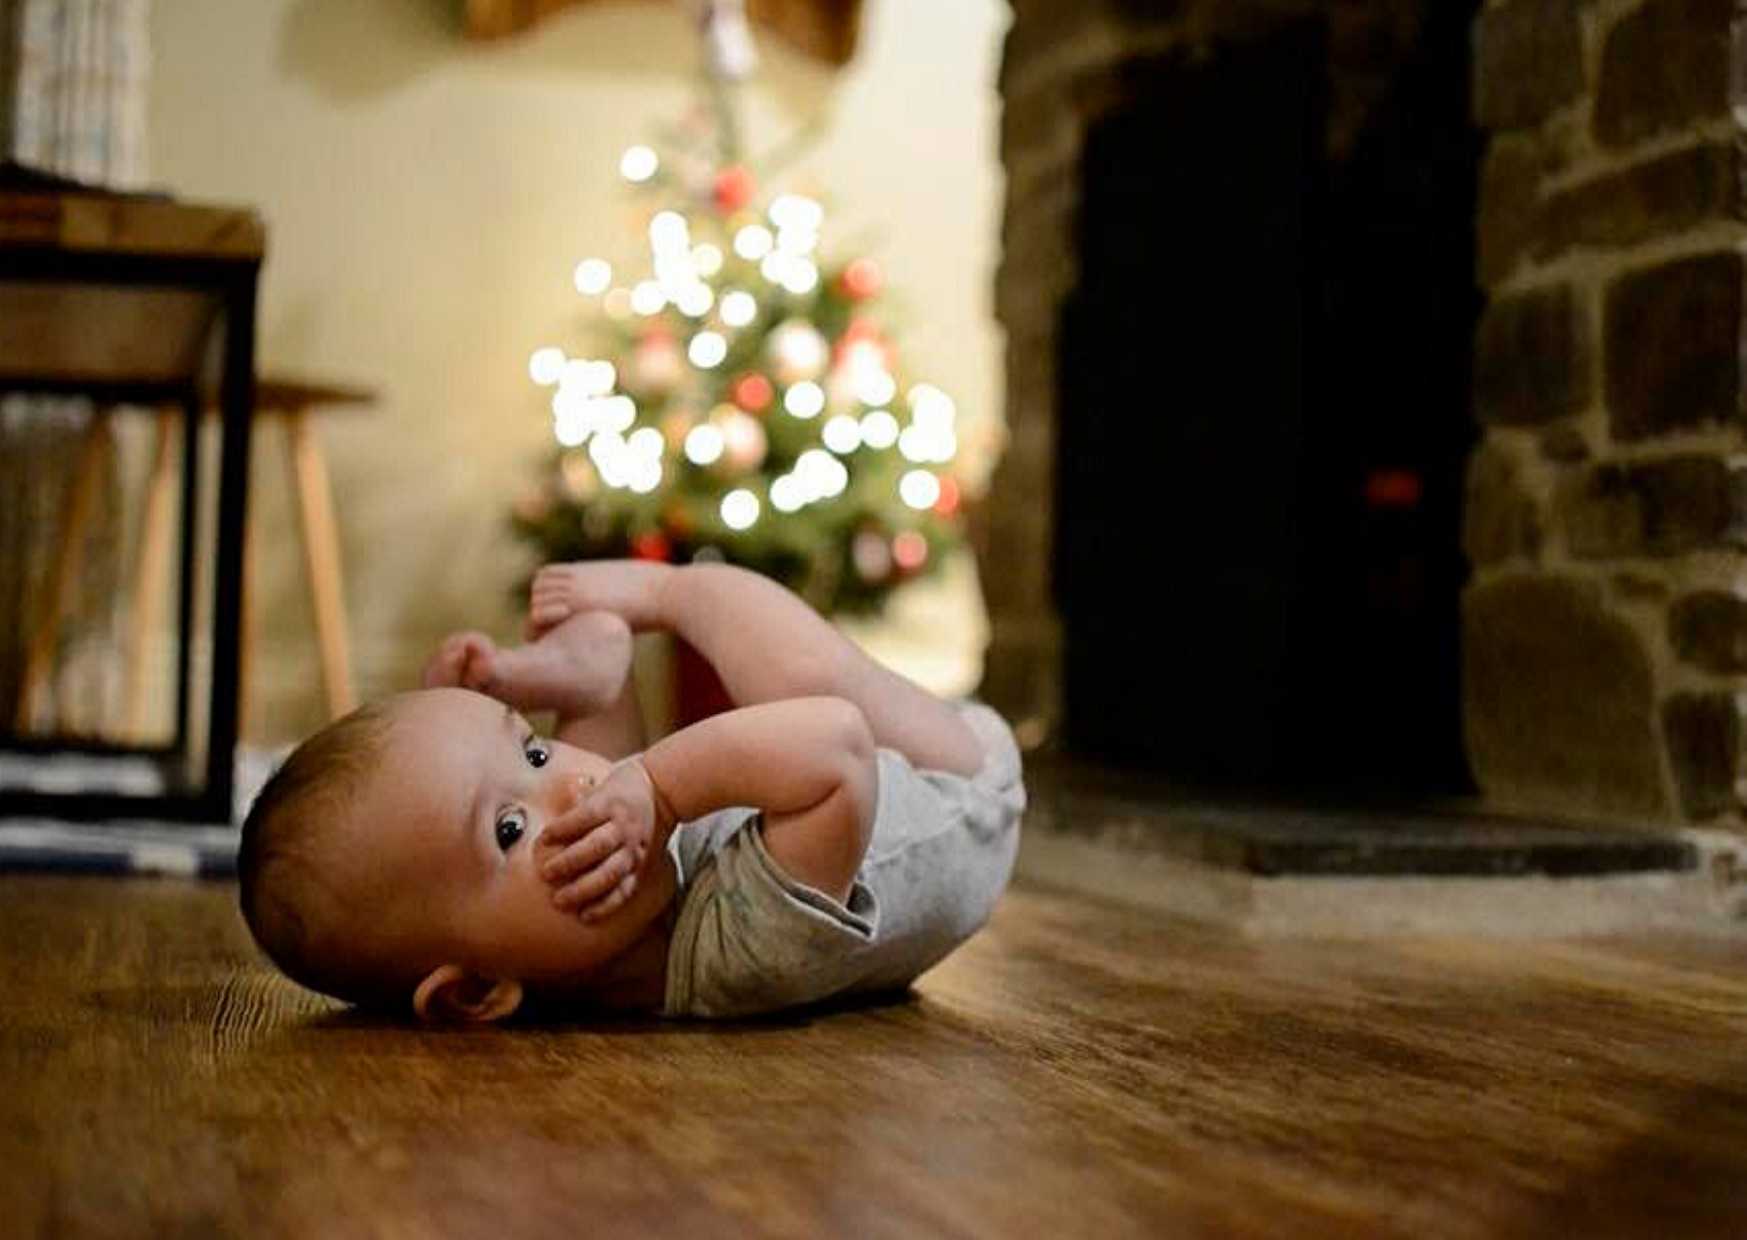
Photo by Lorna Wall

Photo by Morgan Wallace

Photo by Robin Nicola Marshall
INCORPORATING VISUAL CLUES IN YOUR FOREGROUND
The key in creating a foreground that supports the context of the image but doesn’t become the main subject is to make it look out of focus. And the easiest way to do that is to just get really close to it but make sure your camera’s autofocus doesn’t actually ‘grab’ it. If you keep it to the side of the frame, it should’t, but just worth mentioning it.
Day 5 Challenge
Your final Christmas Photo Bootcamp challenge is twofold.
1. Think about what Christmas looks and feels like for you – the colours, light, objects, activities etc. Then think about how those things could help you contextualise your images.
2. Take a couple of images with one or more of those visual clues inserted either into the background or foreground. If you’re more used to putting things into the background, try using the foreground for a change – you may be surprised at the results!
It's not just the courses - we are a community
You may have spotted that our FB group was full of people tagging their images #pfpgrad - that's because our students stay with us for a long time after the courses are finished, continuing to grow and improve their photos. Our community is so important to us - we are not one of those online courses that sell you on a programme and leave you to your own devices - we support and nurture even beyond the courses are fully over through our alumni photo groups, local meetups and more!
Use discount code xmas30 for 30% off


