It's out last week together! We have taken you through quite a lot in the past 4 weeks and I thought that this week, we'll wrap it all up together with a somewhat different module.
First thing you need to know - there is no bingo this week. INSTEAD I want you to take ALL that you have learned in the last 4 weeks and turn photo-journalist for the day to capture a 'Day in the life' of your family.
And secondly, and definitely just as importantly - I know from painful personal experience, how overlooked actually gathering all those pictures together can be and actually doing something with them, so part 2 and 3! of our lesson will be all about that - gathering, selecting and printing! You have worked hard on capturing this summer's memories - time to bring them to life!
Remember, there is still a prize to be won?
Somebody will be winning a place on our flagship fundamentals Photography for Parents course! You have until Sunday to get your entries in - remember you need to post et least 1 photo for every week of the course and each completed Bingo counts as an extra entry. We will announce the winner next week in a Facebok Live ( we need a little time to tally up all the entries). I will be posting the time and date in the FB group.
Also, just in case you might not win, if you do want a place on our September course, you need to add your name to our waiting list! We are working on increasing the capacity for the September course, but for any additional spaces, booking priority will be given to the waiting list.
Ready to go? Let's get started!
The day in the life project
Before you start, I want to give you my absolute favourite quote by an esteemed photographer Aaron Siskind:
Photography is a way of feeling, of touching, of loving. What you have caught on film is captured forever… It remembers little things, long after you have forgotten everything.”
This, right there, is why doing this 'day in the life' project is worthwhile.
Just picture it: 10 years from now, you'll be able to go back to those images and just remember so vividly what yours and your family's life and a normal day had been. Things your kids liked to do, liked to eat, got grumpy with, were amazed by. From the most mundane ( brushing their teeth) to the emotionally charged (being cross with a sibling).
We're on summer holidays so your daily routines may be different than what might be happening in November, but it's worth recording a summer routine too! Even if it's somewhat different to you normal-normal. Plus there's nothing that stops you doing this more than once! In fact, I would highly recommend it!
So how do you go about it? Here are our tips:
1. Pick a strategy
There are broadly speaking 2 approached to this project:
- one where you set a timer to remind you ever so often ( every hour, half an hour?) to take a photo of whatever is happening at the moment. The simplicity of this approach means you don't need to plan all that much, simply pick up your camera whenever the timer chimes in the hope of capturing something different each time as you go through the day.
- one where you aim to simply photograph key stages and events ( and non-events) of the day - from breakfast through putting on their shoes and washing their hands. This approach usually requires a bit more planning and paying attention to what's happening, noticing it both as a big story ( we're going out to a park) and details ( we're putting on wellies) but you are more likely to actually capture the essence of the day - with the first approach things can be a bit hit and miss.
Whichever strategy you choose, just stick with it. You can always repeat the exercise another day.

Breakfast - Amanda Vickers
2. Involve your subjects
There is no hiding that on that day you will be waving your camera about more than on other days. This is almost certainly going to produce some resistance. So talk to your kids about it. Ask them what they think should / could be included in the day, and share the images with them as the day goes on and afterwards. Perhaps commit to making a mini photo-book out of the day ( you can create them really inexpensively through a variety of printers - more on that in Part 3 of this module). You will need your kids buy-in for this project!

Upside down - Amber Parker-Wilson
3. Pick a day - or days?
The general idea is that 'A day in the life' project simply covers a single day, recording what might be occurring in the space of that day. But if your goal is to record routines, typical things your kids would do, you may want to consider spreading the project over the course of more days. There are pros and cons to both approaches and even if purists might scoff at the idea of a 'day in the life' lasting a week - well, frankly who cares, it's your life and your project.

Teeth-brushing - Lisa Godfrey
4. A typical day?
Another decision you need to make is just how 'normal' of a day you want to see. Sure, we all have our general routine: breakfast, getting dressed, brushing teets, going out etc but there will be days where some things will be different or omitted ( maybe it rained and you got stuck with no plans) and others where a special thing would be planned (visit to grandparents? a trip out? ) - if you're doing this project this week, you can choose which day may be most 'typical' OR decide that there is no such thing as typical and that you will record whatever comes on that chosen day, whether it's representative of your normal routines or just that day. Nothing wrong with either approach, you just need to decide which appeals more to you.

At the playground - Alannah Hebbert
5. The level of detail
Every action, activity or stage of the day consists of many micro actions - having cereal for breakfast might mean choosing a bowl, selecting cereal, pouring in milk, putting on a bib, spilling milk, eating the cereal, empty bowl, dirty face...
Which of these would be the most representative of 'breakfast'? Which one thing, or things you want to record?
In some cases you will want to record a bigger picture, in others just focus on a detail. having a variety of those through the day will help you create a great rich tapestry of the day.
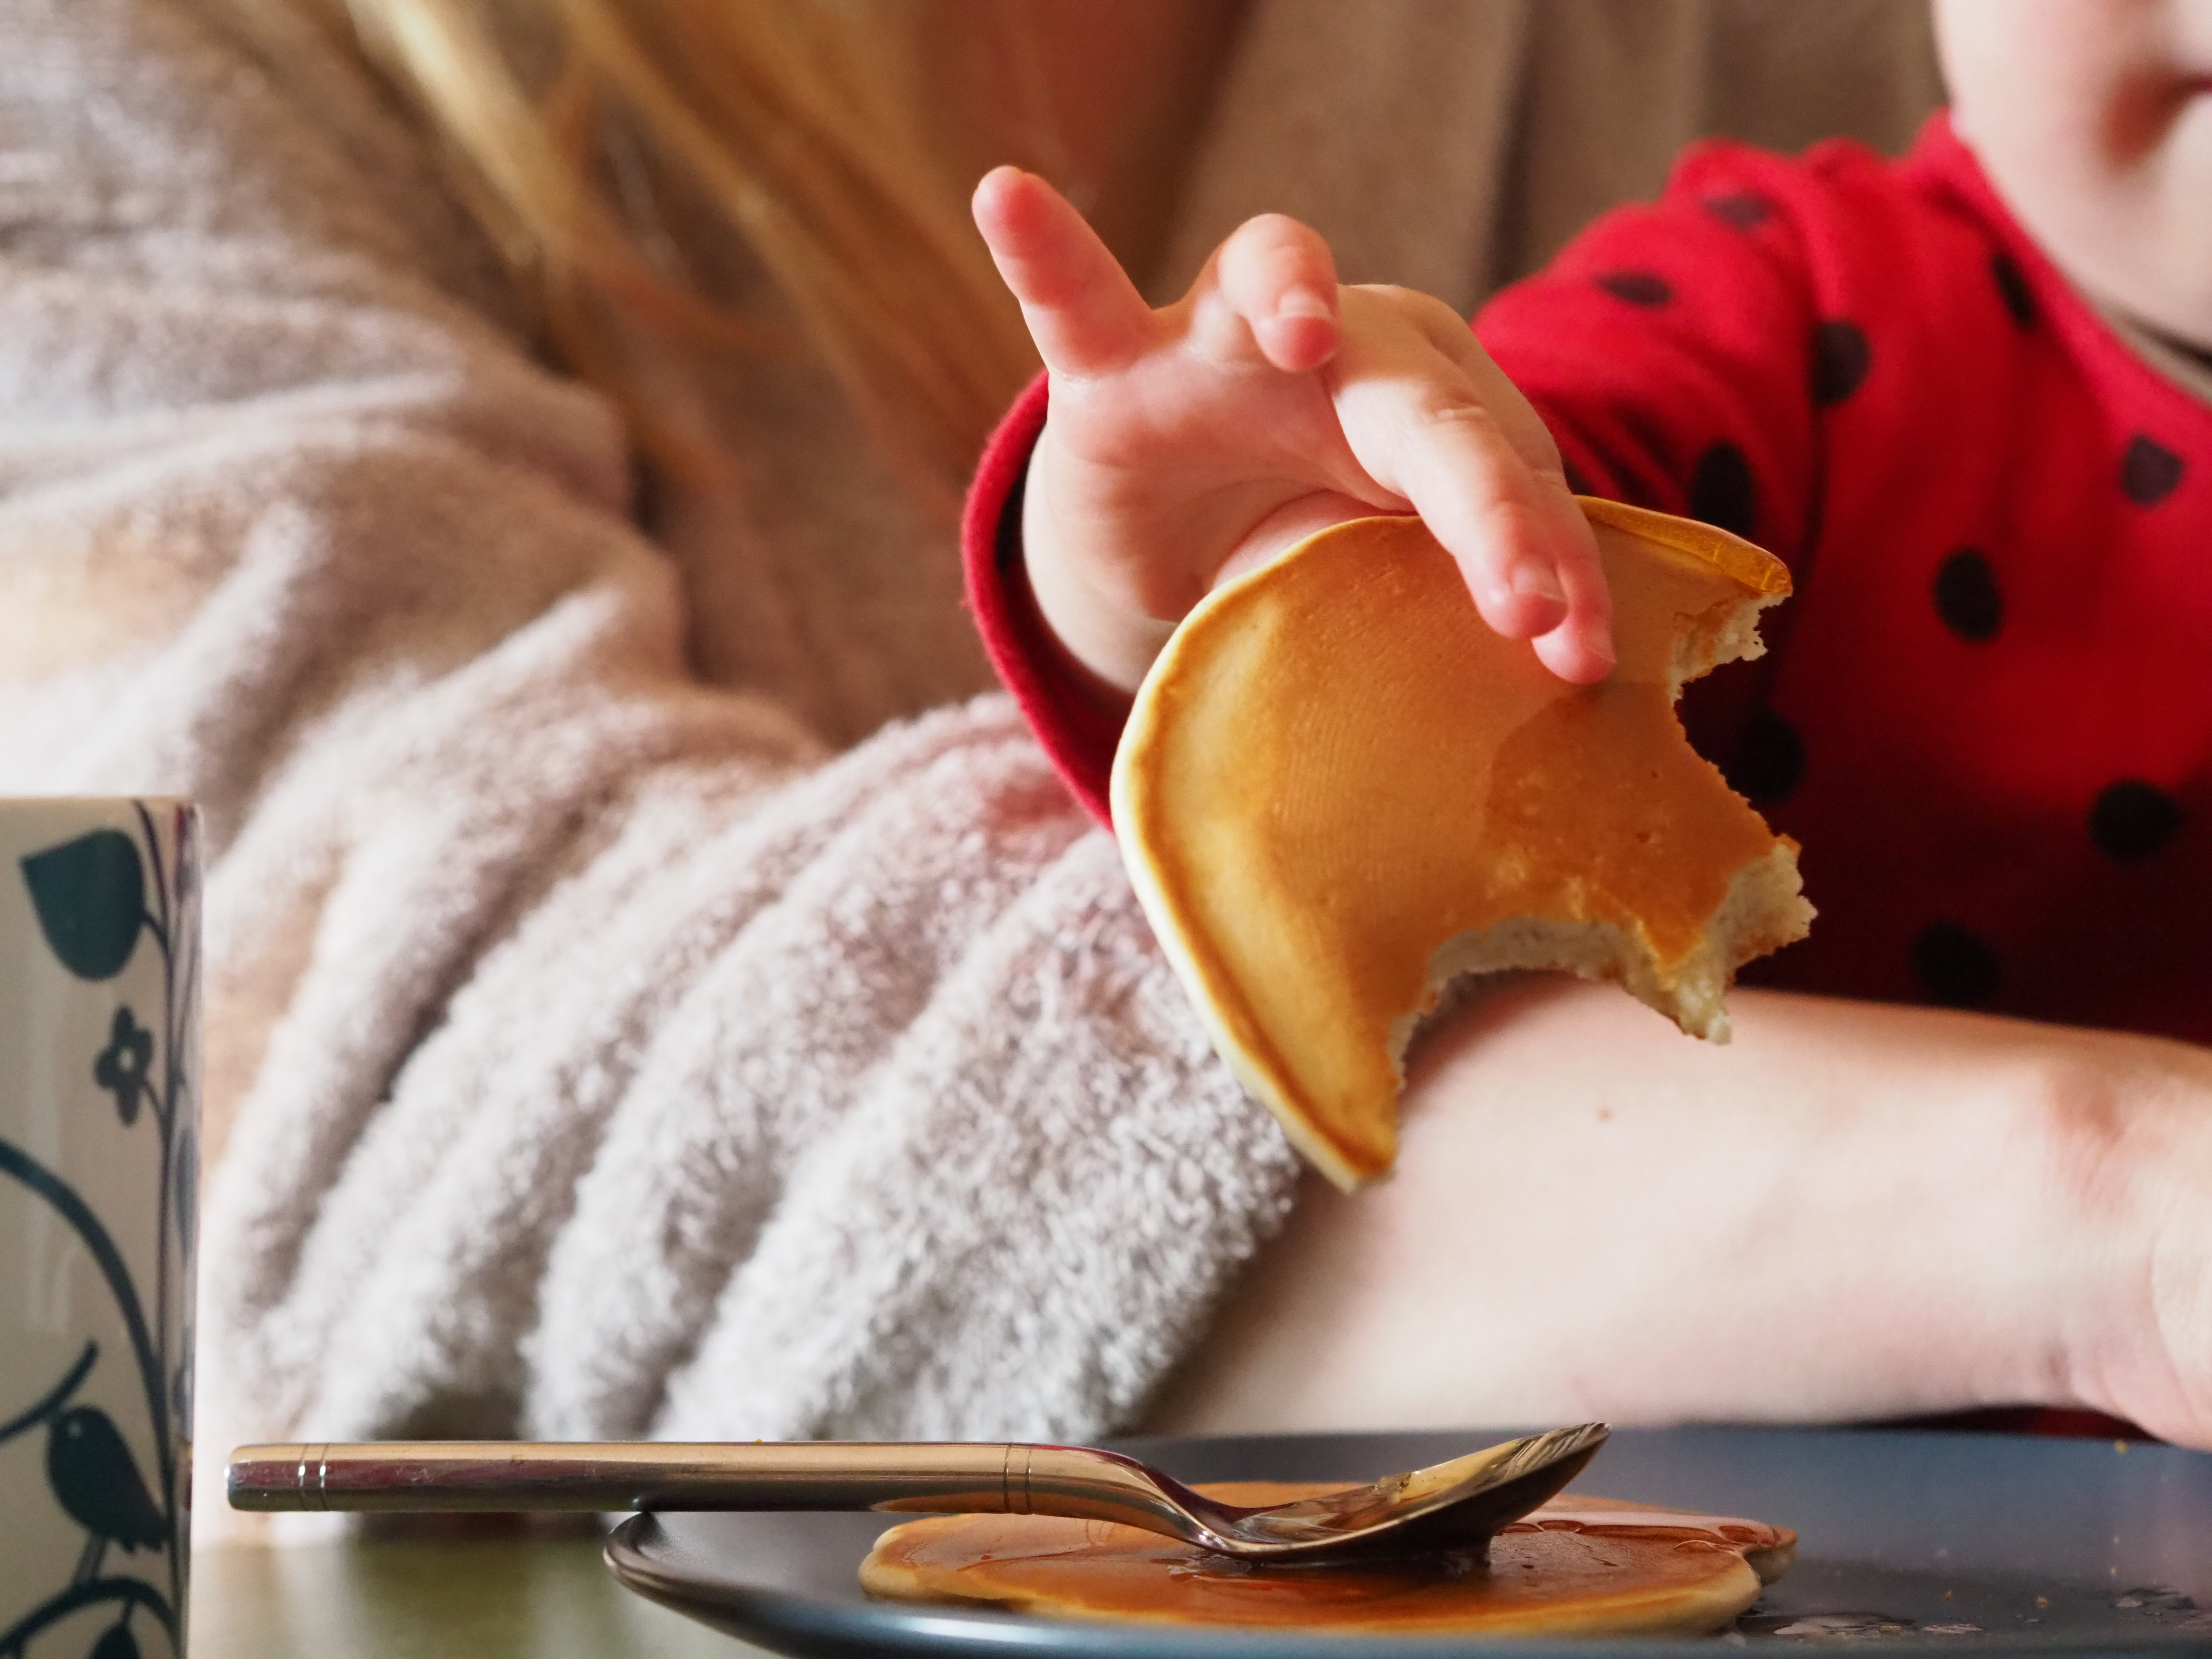
Pancakes - Kirsty Fordham
6. How many photos?
As you can see from the breakfast example above, there is scope in this project to end up with eleventy million pictures from just one day. Resist that urge. It will exhaust you, your subjects and your camera battery. This is a marathon not a sprint of a photo project. Give yourself a limit of how many photos you want to take of each thing and make yourself walk away and stop. I know the lure of 'just one more angle' all too well but this project is not about perfection. If you're confident enough with your camera and storytelling - one photo of each 'thing' may be what it takes. If you're not there yet, maybe limit yourself to 3-5-10 images provided they give you different angles and perspectives. You know yourself, you know what will work for you.

Playtime - Ronni Evans
7. PREPARATION
Once you have decided on a strategy, the next thing is to prepare. And that bit is CRUCIAL.
- Prepare your gear:
Goes without saying but, make sure your camera battery is full ( and/or have a fully charged spare). Make also sure that your memory card has plenty of space on it - I like to format a card afresh before approaching a new project ( more on that on the next page) - beware, formatting your card will delete all images on that card so only do it after safely copying and ideally backing up elsewhere.
- Prepare your space:
Kids mean clutter and while I'm all for keeping things real and capturing your space as it is, too much clutter can distract from what you actually want to capture. What I mean is - a cereal box and bottle of milk on the table where your child eats brekfast is great storytelling. But add a bowl of fruit, a discarded book, a broken crayon and a shopping bag in the picture will take away from the story.
If you know what you will be photographing ( and you know your family's routines) you should have a good idea of where you will be taking the photo. So take a little time before things kick off to make that space how you want to see it in your images. Which leads me to the next point:
- Prepare your mind:
And by that I mean - know WHAT you want to photograph!
Grab a pen and paper and before you do anything, answer some questions. Unless you are opting for the first 'Day in the Life' strategy ( setting a timer to prompt you ever so often to take a photo), I would highly encourage you to prepare by writing down things that you would like to see captured. That's not to say that this needs to be your final shot list, but it will help you have a calmer, more focused, less scatty approach to this task. Doing this together with your kids - if they're old enough can help you secure their cooperation too!
My suggestion would be to break the day into time blocks and consider what happens in each block so that you can prepare for shooting. We created a helpful mini worksheet which you can fill out by yourself or with your kids to help you decide what to capture and which includes some simple prompts to help you focus. You can download it below
[modula id="19828"]
Lesson 5 Challenge
Capture a Day in the Life of your family.
Plan and capture your familys routines, trying to use all the lessons we have given you over the last 4 weeks.
Post a max of 10 images of your day into one post onto our Facebook group - this will count as your Bingo entry for this week and your weekly challenge entry.
ITS PERSONAL
Let’s face it. There is a myriad of photo courses out there.
So what makes OUR students progress so well and give us the glowing reviews we get from them?
It's that we don't just sell you a course and bid you goodbye. All classes are instructor-led and limited in size so that we can give you personal, video feedback on your images every week. So you get advice tailored to you and your level.
We also go live with you through weekly live classes and we support you through a dedicated Facebook group.
And after the course, we invite you to our Alumni group where you can connect with other like-minded parents and take part in weekly and monthly shooting challenges as well as get help and advice.
WE ARE A COMMUNITY


