You've done the hard work.
You have taken the photos! You have gone through your photos, culled and starred and picked your best of the best. You have mayve even edited them.
Now it's time to show them to the world.
Of course you may be posting them to your social media or simply sharing with your family, but I am a big big proponent of printing your photos.
Not just for you, but most of all for the kids that star in them.
Printing photos makes all this camera bother into something tangible, something they can cold in their hand or look at on their wall.
We forget that while we can open our computer, phone or online gallery any time we want, our kids can't really do that. So having that print in a great reward for them for all this putting up with the camera in their face. All those bingo entries you so patiently tried to hit - let them see the results! and let it remind them of this summer.
So that leaves a question - print - yes, but in what format? Are you going to go for good old fashioned single prints? Or put them together as a photo book? Or something else entirely?
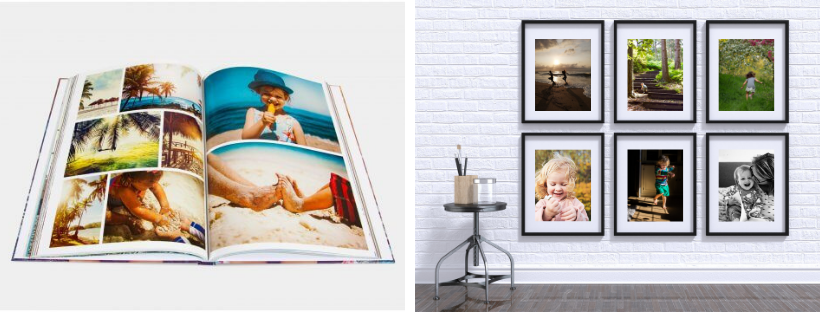
Let's talk simple print basics first:
Print sizes and quality:
There are a few terms bandied about when it comes to printing and photo quality etc so let's get to the bottom of what those terms actually mean.You will also have heard of megapixels - most likely when buying your camera - you may have spotted, listed among the other technical data, some information on the number of Megapixels in your image ( 16MP, 24mp, 36MP)
But do you know how those Megapixels relate to your humble pixel and why does it matter for print?
A megapixel is one million pixels ( actually just a little over 1 million bu for the sake of simplicity everybody keeps it to 1 million)
If your camera is capable of 24MP, it means that when it takes a photo at its largest size ( you can select those in your camera settings) it can create an image that will comprise of 24 million of those little guys. This means that if you capture an image at its full size, it will be 6 000 MP on the wide size and 4000 MP on the narrow side ( 6000 x 4000 = 24 000 000 aka 24 Mega Pixels)
If you have an 8MP camera, it will be capable of an image that will comprise of only 4 000 0000 pixels ( 3264px x 2448px)
Why does it matter?
I will simplify here a bit because not all pixels are created equal, but in general, the more of those tiny pixels you can cram into your image, the better your image will look as you will be able to create a more detailed image.
BUT it also depends on how big you want to see your photo.
If you just want a simple 4 x 6 print, you will have a great print with your 8MP camera and your 24MP camera. But if you want to blow your photo up and turn it into an enlarged print - you will see the difference between these two files
Why photo size is important when printing?
If you go to a reputable print service, you may find they will be mentioning terms such as ppi - no, they don't want to refund your insurance, ppi here stands for pixels per inch.
Those printing services, will need a certain density of pixels in the image (ppi) to be able to give you a print that looks good, sharp and smooth without that pixelated quality to it. 300 pp is what's considered a golden standard for photo printing.
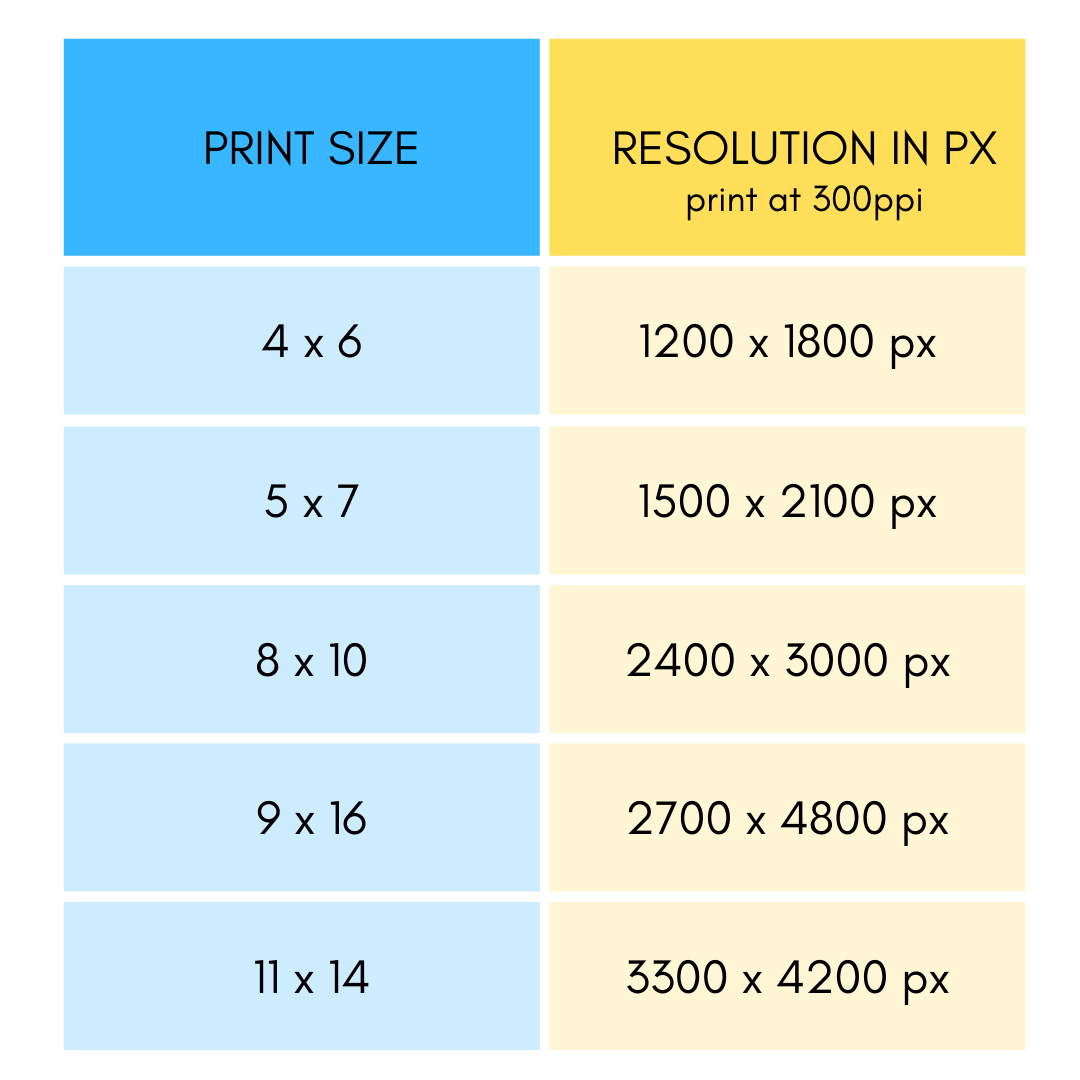
So, for example, if we take typical printing sizes - a modest 4 x 6 inches print, then at 300 ppi, you will need a file that has at least 4 x 300px (1200) pixels along its short side and 6 x 300px (1800) pixels on the long side. So, it needs to be at least 1200 x 1800 pixels in size.
But what if you tried to take that 1200 x 1800 image and print it larger?
Well, you still could, but the image would begin to lose it's crisp, sharp lines, and especially when viewed from up close, would show some pixelation.
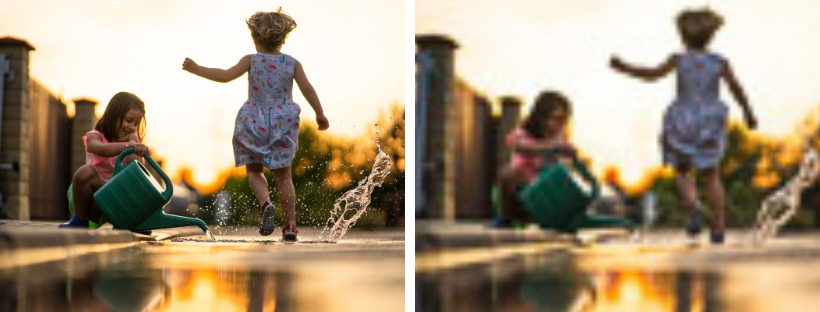
So let's go back to our two megapixel examples: your 24MP camera which is capable of producing an image that's 4000px x 6000px large will be able to give you a print that's 13inch x 20 inch in size in its best possible quality. Your 8MP camera will be able to give you a print that's 8 x 10 inch at its best possible quality.
Can you try to print them larger - yes, but especially when viewed from up close, you will start losing those crisp edges and smooth transitions.
Cropping photos
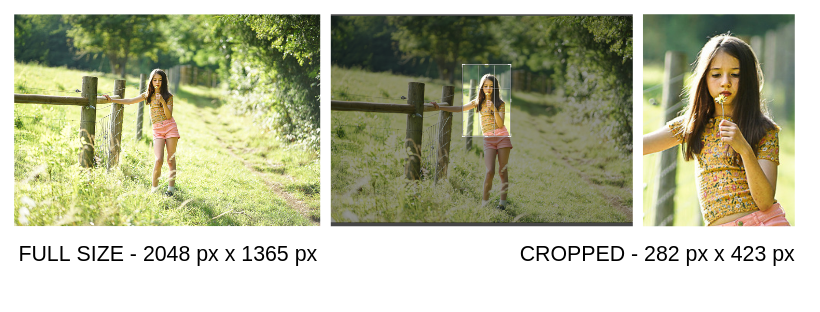
But what happens to your pixel sizes when you crop a photo?
Well, to put it bluntly, you lose pixels and lose size. And if you reduce the actual pixel size of your image, you will only be able to print it in good quality in a smaller size.
This is why it's always better to get your composition right in camera rather than relying on cropping afterwards.
Aspect ratios
Before I give you a reference chart for how big a file you need to print in a particular size, let's talk those sizes for a sec.
When you take photos with your camera, you take them at a particular size, but also particular shape and those can vary a bit between cameras and you can also change them in your camera settings.
Yes, it's still a rectangle, but whether it's more on the longer, skinnier side or a chunkier side will depend on your aspect ratios.
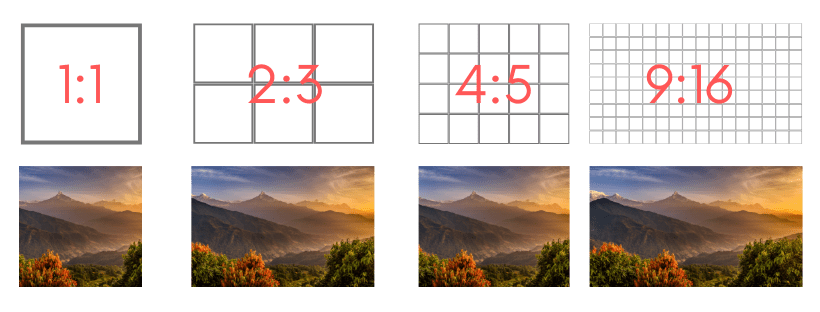
Your aspect ratio describes the relationship between the length of the longer size of your image and the shorter side in any unit. They don't describe the size, merely the shape.
Here are some commonly used aspect ratios:
1:1 Ratio
A 1:1 ratio means that an image’s width and height are the same, giving us a square. It's not a size that most cameras really shoot, mostly something you crop to.
3:2 Ratio
The 3:2 ratio has roots in 35-millimetre film and photography and is still widely used for print sizes. If you want a 6 x 4 inches print, you need your camera to be shooting at this ratio or you will have to be cropping parts of your image.
4:5 Ratio
A slightly 'chunkier' rectangular shape is created when you shoot at 4:5 ratio. You need this ratio when you want to print your images at 8x 10 inch or
16:9 Ratio
This ratio didn't use to be used much before the advent of mobile phones but as it's the default shape of photos taken with a mobile camera it has now become available to print as well.
So how big a file do you need to print your chosen sizes?
Here is a handy guide to help you set your printing sizes.
True to life colours
Now that we have the print sizes and resolutions all set, let's talk about colours. Ever sent some photos to print only to find that when they come back, the colours look nothing like the ones on your screen? The greens look nuclear or completely faded, the skin tones are weirdly yellow or pink, the photos overall too dark or too bright?
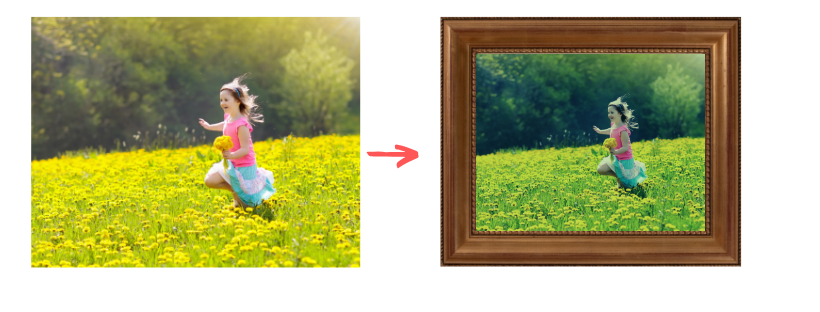
That's because, between your camera and that final print, there are several variables that can play a part, especially if you edit your image.
Let's start with the camera: the way that colours are treated in each camera if it's not treated afterwards in any way will subtly vary. Some cameras will err on the warmer side, others on the cooler.
Then comes your monitor - depending on how your monitor is set - whether you have it bright or dim it down, whether you like to turn up your colour saturation up or down, will affect the way your images will LOOK on the screen.
So if you then decide to edit your images, you may be altering brightness unnecessarily, because perhaps your laptop screen was tilted in a particular way or had its colour set to 'vivid'.
Then you have the printer profile - without going into details, essentailly a way that it treats and renders colours in print - different printers will have subtly different ways of how they make them look. Add to that auto adjustments that most of the high street printers apply to your photos and suddenly it makes sense why your photos might not be looking quite identical to what you see on your screen.
But please do not let it freak you out.
Professional photographers get around this issue by calibrating their screens and setting their editing profiles to the printer profile of the printing service they use.
But unless you are a pro, or aspire to be or it's of the utmost importance that the skin tone is rendered JUST RIGHT, you will most likely be happy with just a photo that is simply well printed, without some wild green / blue / yellow colour casts.
And the first step towards it is to send your photos to a good quality, reputable printer.
When you send your photos to a professional printer, yes, the individual prints will cost a bit more, but you will get a better quality print, that will have been checked by a human, rather than just churned out on auto-tuning machines as most of the cheap printing services do.
Recommended Printing services
The two I use and highly recommend are Loxley colour and DS Colour Labs - if you have a bigger print job they will even let you have a free test print to see how your image compares to what you see on the screen, so you can adjust it accordingly.
They print on variety of medium so it's not just individual prints, but canvas, metal, glass etc
If you want to supersize your print, create a big poster or larger artwork, but also if you want a slightly different medium such as foamboards, canvas, lightboxes etc I highly recommend SupersizePrint - having used them personally, the quality was great.
Photo Books
I love printing and framing individual photos. But the medium which I feel really stands out when it comes to making the most of a summer worth of photos is definitely a printed photo album.
You get to put more in, but you also get to create a narrative, tell a story of your family and shiny a light on both the big picture and details of what you captured.
It all depends on how you approach it. And frankly, there is no right or wrong way. The only wrong way is the one when you want to create a photo book so large and so complicated that it takes over your live and then you never finish it.
But there are other ways!
Your photo book strategy:
1. Simplest : one photo a page
Forget what I said about creating a narrative with your photos. Sometimes, when time is at a premium, a photo book that simply contains your photos, one per page, maybe with some helpful comment or date for future reference is all you need. It's fine, and it's a great way of keeping those memories together, even if they may not be meticulously ordered and grouped.
2. Summer's worth of memories - chronological
This is the photo book that we tend to see most - ordered chronologically, with photos grouped together across pages to highlight a particular event. They could be made into a story or simply letting the viewer move in time as they turn the pages. This book is going to be definitely the most time consuming to put together, but the result will no doubt be impressive.
3. Multiple books - event by event
I know a few mums who favour this type of a book as it takes a pressure off and can be really fun for the kids to go back to. Rather than trying to cram w summer's worth of photo in just one book, think about doing mini books for just a particular event - trip to the seaside, camping weekend, etc. This means that you can create them faster because you're not poring through as many photos on the go ( after you organised them all, remember? ), but also, they tend to be inexpensive enough so that you can print multiples and hand them to your kids as a tangible result of their hard summer's posing.
Whichever option you go for, just make sure you do it!
Creating your photo book
Once you've picked your photo book strategy, it's time to pick a printing company.
There are SO MANY companies specialising in those it can be a headache trying to even decide which ones to go for. In some ways, the kind of book you decide to create, will dictate the best company for it.
Pretty much all photo book printing companies come with their own software and templates for creating the photobooks, but if you want something more bespoke and own Lightroom, you can design and create a book inside it and then either save the files as jpgs or send to the printing service assiciated with it which is Blurb.
Having used Blurb before, I can definitely confirm the quality of the print is really good.
Other photo book companies used by professional photographers or worth considering are:
CEWE books, Whitewall, Saal Digital, Milk Books
Cheaper options, if you don;t want to splurge for premium print are :
MixBook, BonusPrint, Snapfish, Photobox, Chatbooks
I should add that I did have mixed reviews when it comes to photo colour fidelity in the cheaper options, but they are often open to reprinting if you're not fully satisfied.
Designing your photo book:
Depending on your strategy, your photo books can take on loads of shapes and designs. If you are using softwareand templates provided by the photo book printers, it may do a lot of the heavy lifting for you , from making sure your photos are ordered chronologically, to fitting specific shapes on a page. But ot's worth taking a little care to make it your own so here are a few of my suggestions for achieving a beautiful photo book.
1. Less is more
Just because you can fit 20 photos on a page or make a 200 page book, doesn;t mean you should. Picking carefuly to find your best photos, means the ones that make it will get more attention and stand out more than if you are picky with what you put in.

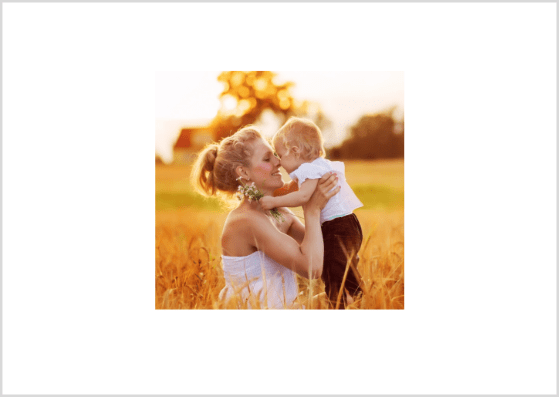
2. Don't be afraid of white space.
There is a reason why art galleries will often display a small print on a big blank wall - it really helps to make it clear it's something special. Dittow with your book design. Give some pages just a single photo with plenty of room to breathe.
3. Don't overdo on embellishments
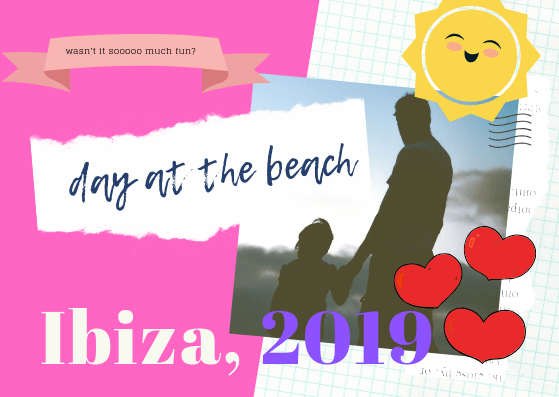
Many photo book designs come with a variety of fun photo decorations - from ribbons, flowers, fun lettering etc. They can work really well with a design, but it's easy to overburden the page with unnecessary add ons and take the focus away from your photos. My advice is - use sparringly.
4. Be consistent with your themes and fonts
Pick two fonts and use them consistently through the book - one simple one for thext, captions etc, one bolder, possibly more creative one to highlight things.

5. If you have wide designs or panoramas , consider creating double page speads - they are striking to look at and will make a strong statement in your photo book.

6. Pair big with small
If you're placing several images on a page, consider creating a little narrative that takes you from a wider view of the scene to smaller detail. That way you can create more of a narrative on a single page and since that's the way our brain processes visual information, you're likely to make a big impact that way

7. Stop motion frames
If you took a sequence of images showing an action, consider putting them side by side on one page, as if you wanted to create an old fashiones stop-motion animation frames.

8. Play with colour
Remember how we played with colour in our week 4? You can create a pretty collage featuring a single colour or a rainbow of colours, or an actual rainbow!

9. Date and name your people and places - if any people in the photos are not your immediate family, make sure they get named in your photo book - your grandchildren will thank you when they look through them in years to come as they wonder who the smiling older lady in the picture is.

10. Consdider adding non photo elements that add to the story - like a map of the place your went to or a picture of a brochure etc

AND JUST LIKE THAT, WE'RE ALL DONE!
Thank you to everyone who participated in in our Summer Project with us! Hope you filled your cameras with memories and have photographed your best summer to date.
And if you would like some help with your further photography learning - you know where to find us!