Welcome to your first lesson in our Summer Photo Project!! Before we dive straight in, there is something I wanted to address.
First I want to talk about YOU.
Yes YOU.
Here is the thing - there are quite a few of you here and you all come from very different points iny our photo journeys - you have different levels of knowledge, different gear, you may be more active in your photography or a bit rusty. I don't know where YOU specifically sit on that spectrum, but I promised you something that will help you get great summer photos, and I intend to deliver. Here is how.
I already mentioned that the topics we cover are - on purpose! - non technical. So even if you know nothing ( or indeed - everything!) about your camera, you can still apply this. I want to focus on retraining your eye, your senses, to give you prompts to take with you and quickly apply those to capture that image that might have otherwise have escaped you or that you may not have even thought about. I want you to expand your range. Variety is the key word here.
With that in mind, I designed this week to be a sort of a 'warm-up' week. Lets limber up and give those shutter fingers a workout!
This week is about taking LOTS of photos, seeing new angles and perspectives and having a little fun with your camera. In short, no rocket science, but capturing your kids in lots of different ways to put you in good stead for weeks to come.
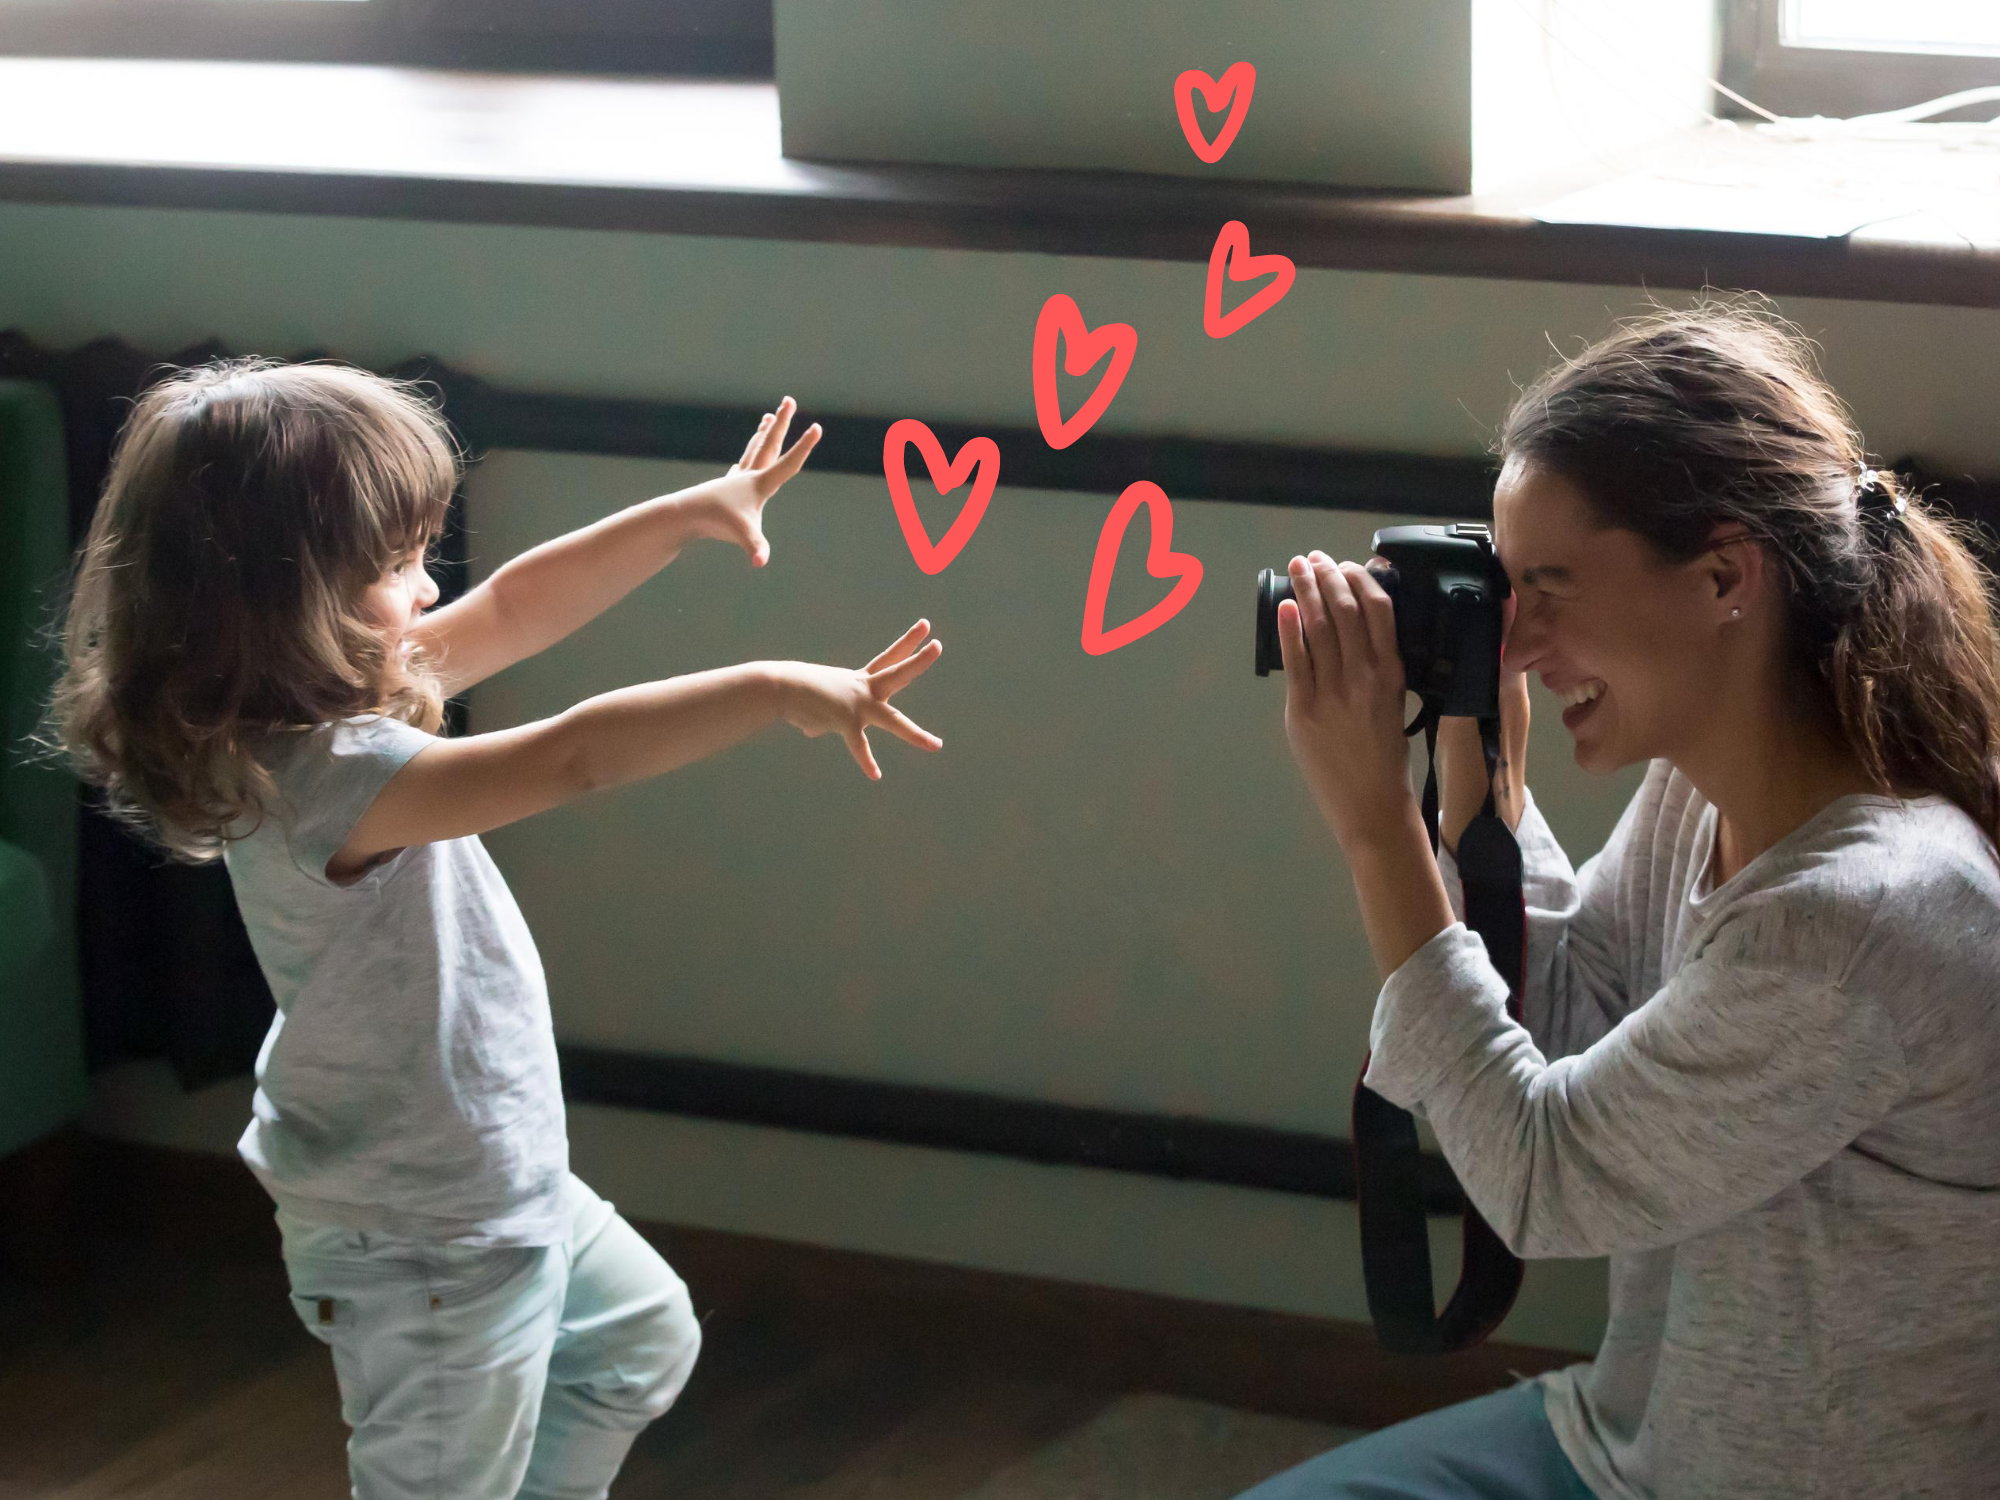
Importance of variety :
Scroll through your photos on your phone - how many of them are almost exact replicas of erlier images - just in a different place and time.
WE ALL DO IT
We all have a preference towards a certain kind of shot that's comfortable to capture from our comfortable position, just whip out your camera or phone and click. And all too often we stay rooted in that one position capturing a series of photos with minimal differences between the images. BOOOOORING.
This week I am banning this - I want you to move around, to consider lots of different angles and perspectives, because when you learn to see the world in many different ways, your world - and your photography - becomes richer.
How to have varied photos - a story of angles, position and distance
I strongly believe that anything and everything can be photographed well. There is ALWAYS and angle. We just sometimes don't work had enough to find it. I'm here to give you a framework to help you find those.
And it's as easy as 3 x 3
When we talk about changing angles, there are actually a few different components to this and recognising what they are and how they can affect your images is going to help you get more, varied photos.
I enlisted my daughter for a 10 min session to help show you that even within a very short period of time, if you apply the formla you can get a number of varied images. You just need to remember the 3 x 3 principle!
Step 1: 3 positions
So as the first step in our Summer Project, and to help us limber up and stretch our photography muscles, I want to change that. I want to widen your range.
Position in photography is about WHERE in relation to the ground, you are holding your camera.
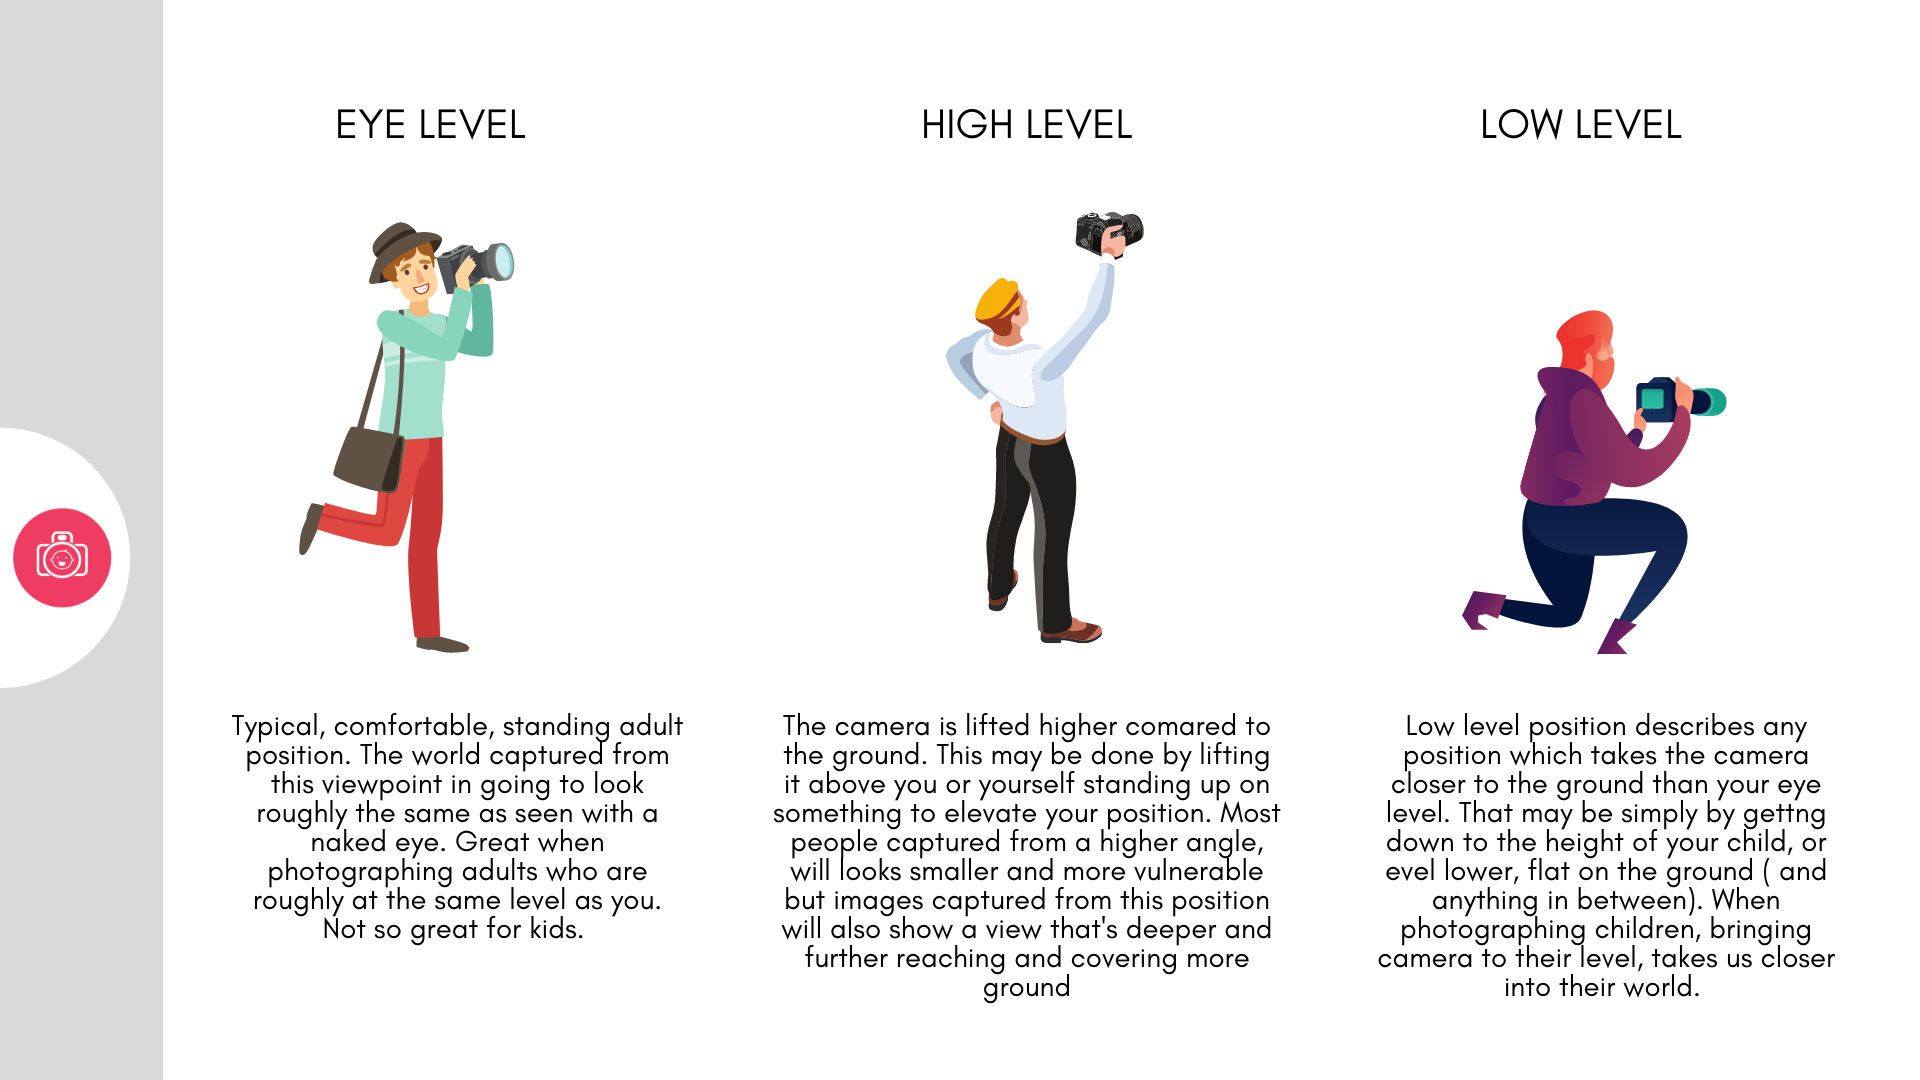
If you do nothing else, but simply move your camera height up and down, you will already be making a difference here. It will change how much you see, what you emphasize, how an image is perceived.
To take the images below I used 3 different camera positions. First - High Level - I raised the camera above my head and pointed towards my daughter. Notice how much more ground it covered and it seems to be as strong an element on the image as my daughter. In the second image I lowered the camera to about hip height, which was her eye level - the ground no longer plays such a strong role, and the background became blurrier as we put more distance between the point of focus and the back of the scene. Finally, I placed the camera on the ground, tilted slightly towards my daughter - because it grabs more of that lawn she's sitting on and blurs it out ( as your camera is simply incapable of rendering it sharp in this position) it feels like it grounds the image a bit more. All of these positions are just as good as each other, they are just different and focusing on different elements.
But we're not done yet.

Step 2 : 3 angles
In step 1 we were mostly concerned about where the camera way. When we talk about angles, we are talking about the way the camera can be tilted, up or down. Again, we have 3 main varieties:
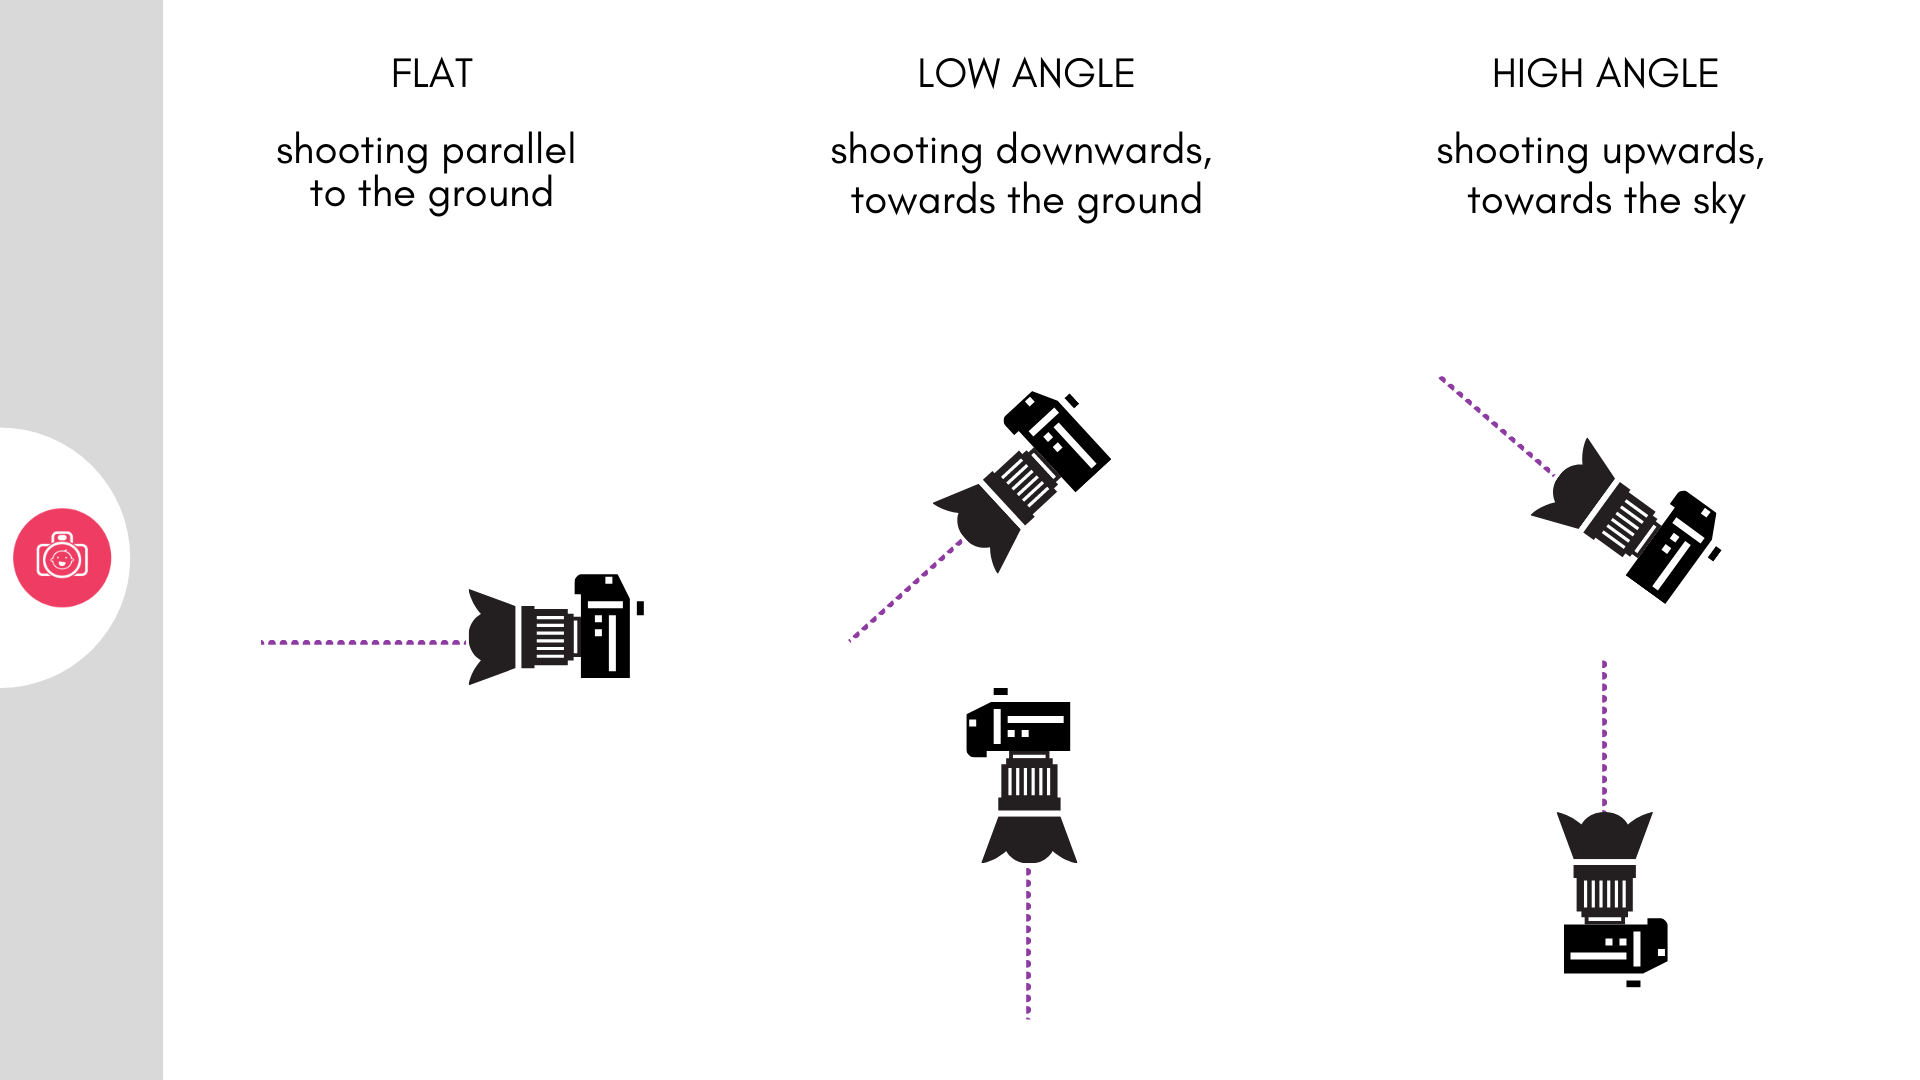
Within a single position of your camera ( remember - high / low / eye level) you can find multiple shooting angles and they can all lead to different photos.
Your shooting angle can have a significant impact on how an image will turn out.
1. Flat angle:
If you observe a professional photographer at work, you will see that while they move a lot - up, down, sidewise etc, their camera position stays at that flat angle the majority of the time. That means - if they go to photograph something smaller - like a child - they will lower their position, but maintain a flat angle for majority of the shots. There is a good reason for it. By shooting at a flat angle, we create the least distortion ( more on that in the next two points), mimic the naked-eye view, but also are able to build in a lot of depth in the image. Because the line of sight goes far ( towards the horizon) you are able to bring a lot into the image and stagger how sharp or blurry things will be.
2. Low angle
We have two main variations here - you can either shoot pointing your camera down at an angle ( as we often do when shooting kids) or point your camera straight down ( akin to birds eye view). In general, shooting down creates an illusion of your subject beaing smaller, weaker, more vulnerable. Shooting fully down-down ( at a 90 degrees angle to the ground) can create images that can seem almost flat - as if the relative heights don't matter. Depending on how close or how far you are from the subject, how how zoomed in you are, you can bring in a level of size distortion where parts of your subject closer to the camera will have a capmparatively larger size ( lollipop headed people). Shooting down, also allows you to bring more ground into the frame which means that you may be able to cut out a lot of clutter everywhere else
3. High angle
Essentially shooting upwards - as with low angle, it can be angled more or less. We use it to achieve the opposite effect - things shot from a high angle appear bigger, stronger, higher ( as we are seeing them from a position below, looking up). Because of that it's often used when capturing portraits of men but this upwards pointing angle can be really useful when capturing kids on the move. I use it a lot in combination with low position when capturing kids climbing and jumping and swinging as it both helps exaggerate the height of things, but it also helps create a gap between the ground and their position which makes those shots seem all that much more dramatic. If you try to photograph a child jumping up from an adult eye level position ( in other words, standing comfortably) , you will have to point the camera down and as far as the camera is concerned, your child's feet might as well be still down on the ground, because it will see no difference there.

So that's two parts of our photo warmup done - you can now move up and down, and you can angle your camera to achieve different outcomes.
Now for step 3.
Step 3: Distance to subject
So far we have been moving almost entirely in vertical direction, time to change our distance to the subject a bit. Let me just caveat one thing here - when I talk about distance / proximity to subject here, I actually mean both physically getting closer and further away from them, and zooming in and out. We will be talking about zoom some more in the next few weeks, but this week, I want you to feel free to use both.
Even without changing angles and positions, this step is one of my favourite start-up composition exercises for newbie photographers because it helps them get started in considering a storytelling potential of their images.
From Big to Little and the In-between.
When I observe my daughter, I often linger on the details. The little bits which always grab hold of my heart, the little quirks that are uniquely her, the little ways in which she does things that might change completely in a week, but that I don't want to forget.
But I also want the bigger story - the where we are? The what's going on? Time of the day? People they connect with?
Photos, where you can somehow fit both the detail and the context, are amazing. But they can also be a challenge to visualize and when you are only just starting in photography, it can feel daunting.
So I would like to invite you to try one of my favourite storytelling exercises. This exercise helps you tell that story in 3 simple takes.
How it works:
Rather than just taking the one shot, that you would normally take, you take 3 at different proximities to your subject. 3 specific ones.
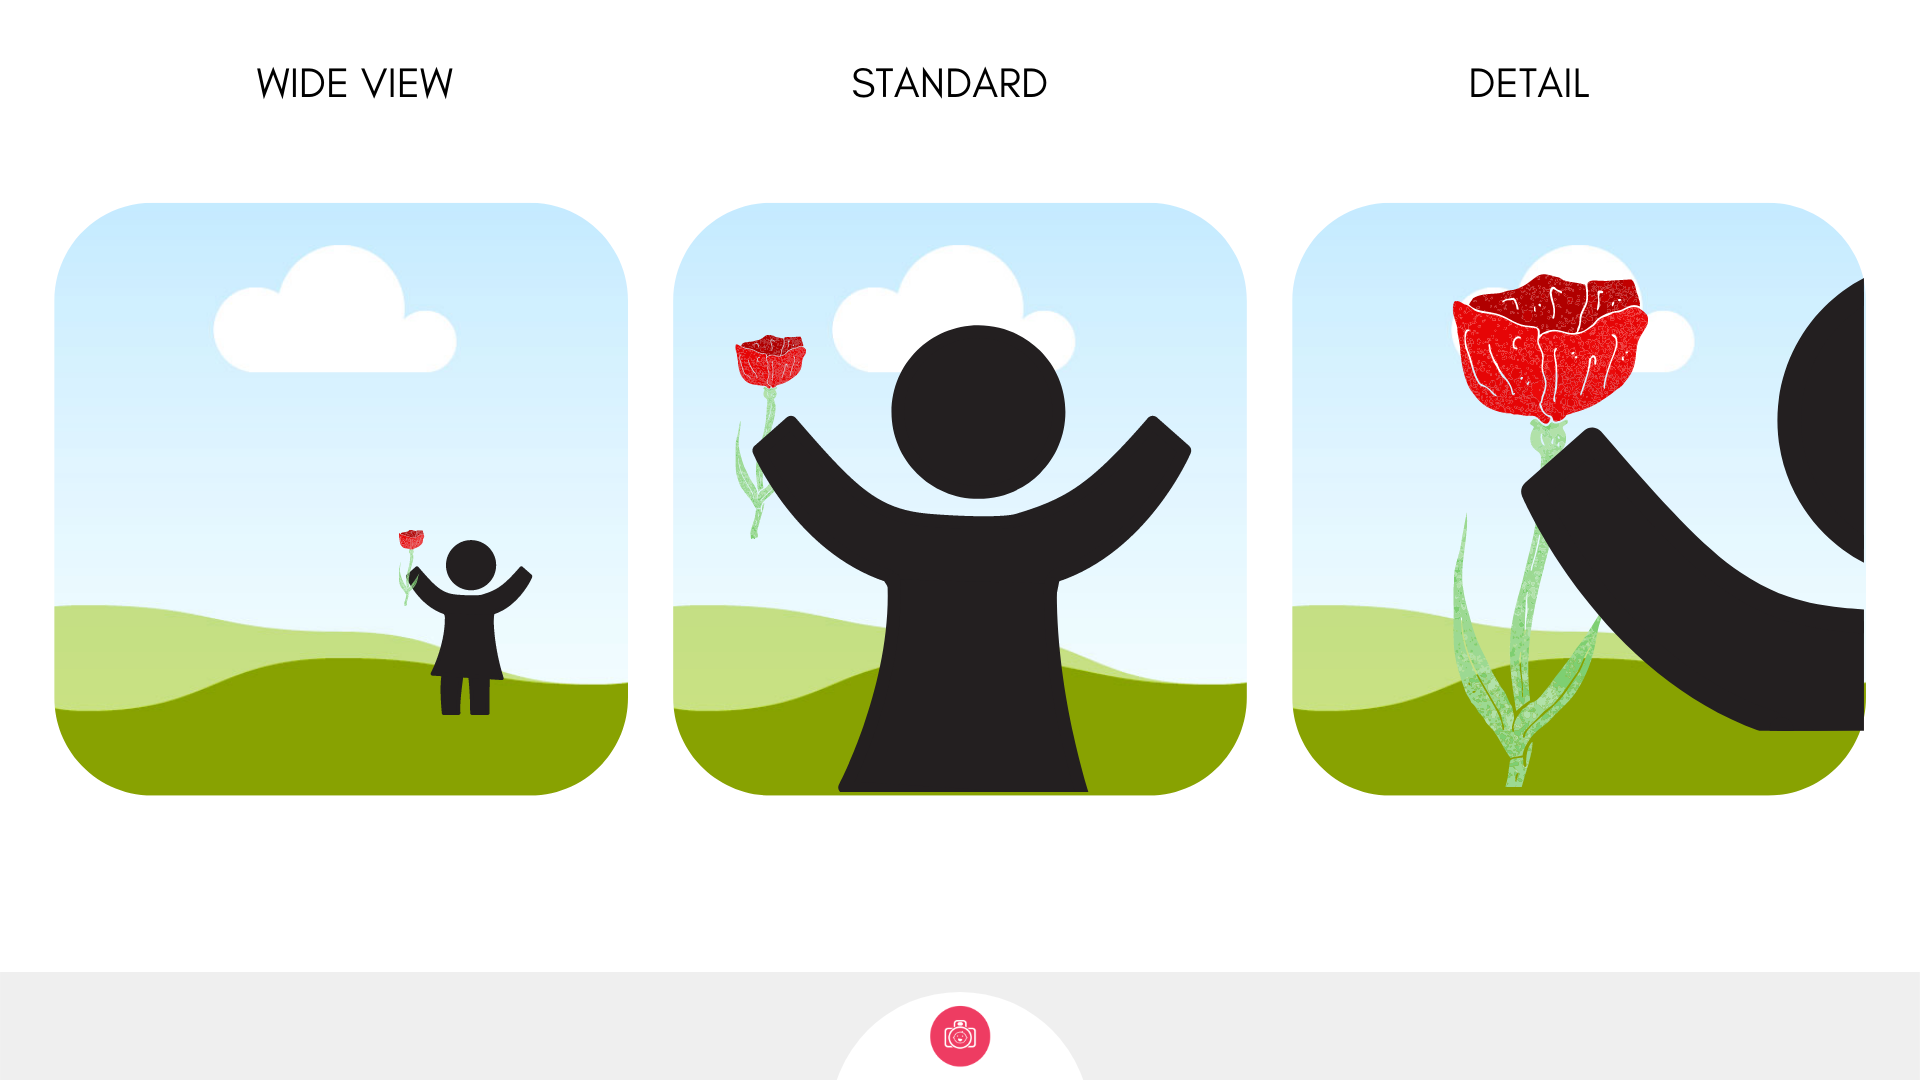
Photo 1 : The ‘middle’ or your 'standard'
I find that for most people it’s usually the “head and shoulders crop” with your kid looking straight into the camera. It could be different for you - it doesn’t matter, this is essentially the “get it out of your system” photo. You know you’ll like it, it’s safe, so start here. Even if you hate the other two, you know you have that one, so it's OK
Photo 2: Go further away
By moving backwards or zooming out you get to include more of what’s going on. If somebody who wasn’t there with you shooting it were to come across this photo, they should be able to glimpse from it things like where it was taking place ( park? your living room? playground?) and what’s actually happening ( is your child playing with something? talking to someone? running? eating?). The reason to take that shot is that if you’re not used to think about your photo in terms of the overall “story” this is making you do it. Making you pause and compose a bit more carefully.
Photo 3 : Go closer
Go the exact opposite way. This one is all about the details. Pick one small thing that is interesting about what’s in front of you - this could be your child, but also something in the environment - and take a pretty tight, detail photo of it. Devil may be in the details, but so is human interest - our brain likes having something highlighted that it can focus on. By switching your attention this way, you're also forcing yourself to look at what's in front of you from yet another angle, with a different focus.
Now put these three photos together. You have the wider story, focus on your child and focus on detail. Together, they give you a really nice set that really tells the tale of what you’ve been up to and gives you a couple more angles to explore.
You can always remember : 'Normal' - Bigger - Smaller

So this is your photo workout complete: 3 different positions, 3 different angles, 3 different proximities to your subject. All of that equals A LOT of different photos. easy as 3 x 3 x 3
On the next page, you will also get lots of examples of clever positioning and angles from our students to get your creative juices flowing.
And here is your challenge for this week - I would love for you to share it on our Facebook group:
Lesson 1 Challenge
Set 10 minutes aside while your child is engaged in an activity ( or willing to be photographed)
Capture a series of images from all 3 positions in combination with different angles and distances to your subject.
Aim to capture at least 5 different photos - more if you can!
With each position and angle, think about how it's affecting what you see and your subject. Are you seeing any size distortion? Is it working better for wider shots or details?
Do you know about us?
When you join Photography for Parents courses , we give you all round photo skills with a focus on photographing children.
We do a lot on camera know-how, but we also spend lots of time on the softer side of things - like composition and storytelling and learning how to capture and express emotions through your photos.
You already know that you can win a place on one of our course just for taking an active part in this summer project, but just in case Lady Luck is not on your side, I want to let you know we will have a rather wonderful offer for you at the end of this course...
Just saying...
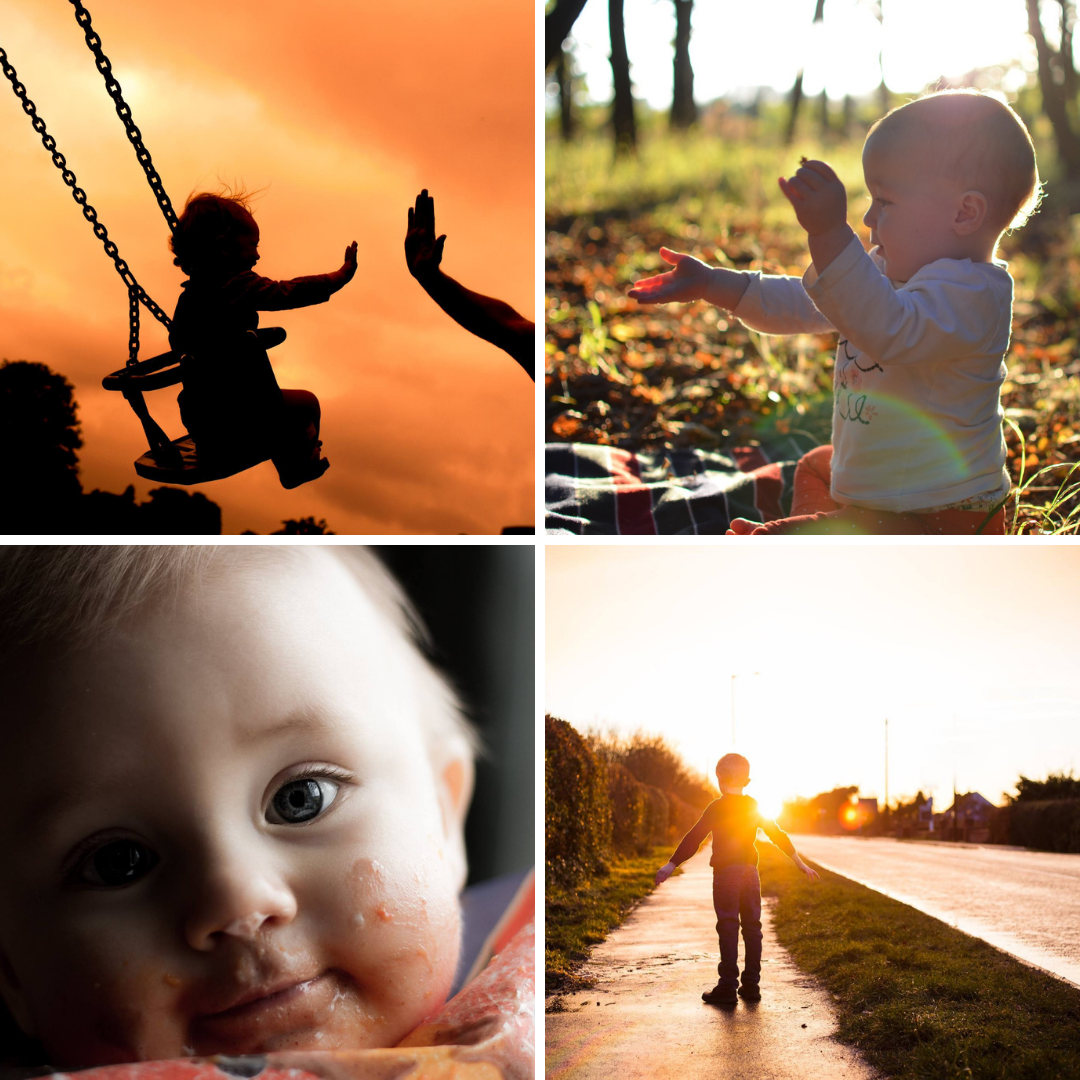
Welcome to your first lesson in our Summer Photo Project!! Before we dive straight in, there is something I wanted to address.
First I want to talk about YOU.
Yes YOU.
Here is the thing - there are quite a few of you here and you all come from very different points iny our photo journeys - you have different levels of knowledge, different gear, you may be more active in your photography or a bit rusty. I don't know where YOU specifically sit on that spectrum, but I promised you something that will help you get great summer photos, and I intend to deliver. Here is how.
I already mentioned that the topics we cover are - on purpose! - non technical. So even if you know nothing ( or indeed - everything!) about your camera, you can still apply this. I want to focus on retraining your eye, your senses, to give you prompts to take with you and quickly apply those to capture that image that might have otherwise have escaped you or that you may not have even thought about. I want you to expand your range. Variety is the key word here.
With that in mind, I designed this week to be a sort of a 'warm-up' week. Lets limber up and give those shutter fingers a workout!
This week is about taking LOTS of photos, seeing new angles and perspectives and having a little fun with your camera. In short, no rocket science, but capturing your kids in lots of different ways to put you in good stead for weeks to come.

Importance of variety :
Scroll through your photos on your phone - how many of them are almost exact replicas of erlier images - just in a different place and time.
WE ALL DO IT
We all have a preference towards a certain kind of shot that's comfortable to capture from our comfortable position, just whip out your camera or phone and click. And all too often we stay rooted in that one position capturing a series of photos with minimal differences between the images. BOOOOORING.
This week I am banning this - I want you to move around, to consider lots of different angles and perspectives, because when you learn to see the world in many different ways, your world - and your photography - becomes richer.
How to have varied photos - a story of angles, position and distance
I strongly believe that anything and everything can be photographed well. There is ALWAYS and angle. We just sometimes don't work had enough to find it. I'm here to give you a framework to help you find those.
And it's as easy as 3 x 3
When we talk about changing angles, there are actually a few different components to this and recognising what they are and how they can affect your images is going to help you get more, varied photos.
I enlisted my daughter for a 10 min session to help show you that even within a very short period of time, if you apply the formla you can get a number of varied images. You just need to remember the 3 x 3 principle!
Step 1: 3 positions
So as the first step in our Summer Project, and to help us limber up and stretch our photography muscles, I want to change that. I want to widen your range.
Position in photography is about WHERE in relation to the ground, you are holding your camera.

If you do nothing else, but simply move your camera height up and down, you will already be making a difference here. It will change how much you see, what you emphasize, how an image is perceived.
To take the images below I used 3 different camera positions. First - High Level - I raised the camera above my head and pointed towards my daughter. Notice how much more ground it covered and it seems to be as strong an element on the image as my daughter. In the second image I lowered the camera to about hip height, which was her eye level - the ground no longer plays such a strong role, and the background became blurrier as we put more distance between the point of focus and the back of the scene. Finally, I placed the camera on the ground, tilted slightly towards my daughter - because it grabs more of that lawn she's sitting on and blurs it out ( as your camera is simply incapable of rendering it sharp in this position) it feels like it grounds the image a bit more. All of these positions are just as good as each other, they are just different and focusing on different elements.
But we're not done yet.

Step 2 : 3 angles
In step 1 we were mostly concerned about where the camera way. When we talk about angles, we are talking about the way the camera can be tilted, up or down. Again, we have 3 main varieties:

Within a single position of your camera ( remember - high / low / eye level) you can find multiple shooting angles and they can all lead to different photos.
Your shooting angle can have a significant impact on how an image will turn out.
1. Flat angle:
If you observe a professional photographer at work, you will see that while they move a lot - up, down, sidewise etc, their camera position stays at that flat angle the majority of the time. That means - if they go to photograph something smaller - like a child - they will lower their position, but maintain a flat angle for majority of the shots. There is a good reason for it. By shooting at a flat angle, we create the least distortion ( more on that in the next two points), mimic the naked-eye view, but also are able to build in a lot of depth in the image. Because the line of sight goes far ( towards the horizon) you are able to bring a lot into the image and stagger how sharp or blurry things will be.
2. Low angle
We have two main variations here - you can either shoot pointing your camera down at an angle ( as we often do when shooting kids) or point your camera straight down ( akin to birds eye view). In general, shooting down creates an illusion of your subject beaing smaller, weaker, more vulnerable. Shooting fully down-down ( at a 90 degrees angle to the ground) can create images that can seem almost flat - as if the relative heights don't matter. Depending on how close or how far you are from the subject, how how zoomed in you are, you can bring in a level of size distortion where parts of your subject closer to the camera will have a capmparatively larger size ( lollipop headed people). Shooting down, also allows you to bring more ground into the frame which means that you may be able to cut out a lot of clutter everywhere else
3. High angle
Essentially shooting upwards - as with low angle, it can be angled more or less. We use it to achieve the opposite effect - things shot from a high angle appear bigger, stronger, higher ( as we are seeing them from a position below, looking up). Because of that it's often used when capturing portraits of men but this upwards pointing angle can be really useful when capturing kids on the move. I use it a lot in combination with low position when capturing kids climbing and jumping and swinging as it both helps exaggerate the height of things, but it also helps create a gap between the ground and their position which makes those shots seem all that much more dramatic. If you try to photograph a child jumping up from an adult eye level position ( in other words, standing comfortably) , you will have to point the camera down and as far as the camera is concerned, your child's feet might as well be still down on the ground, because it will see no difference there.

So that's two parts of our photo warmup done - you can now move up and down, and you can angle your camera to achieve different outcomes.
Now for step 3.
Step 3: Distance to subject
So far we have been moving almost entirely in vertical direction, time to change our distance to the subject a bit. Let me just caveat one thing here - when I talk about distance / proximity to subject here, I actually mean both physically getting closer and further away from them, and zooming in and out. We will be talking about zoom some more in the next few weeks, but this week, I want you to feel free to use both.
Even without changing angles and positions, this step is one of my favourite start-up composition exercises for newbie photographers because it helps them get started in considering a storytelling potential of their images.
From Big to Little and the In-between.
When I observe my daughter, I often linger on the details. The little bits which always grab hold of my heart, the little quirks that are uniquely her, the little ways in which she does things that might change completely in a week, but that I don't want to forget.
But I also want the bigger story - the where we are? The what's going on? Time of the day? People they connect with?
Photos, where you can somehow fit both the detail and the context, are amazing. But they can also be a challenge to visualize and when you are only just starting in photography, it can feel daunting.
So I would like to invite you to try one of my favourite storytelling exercises. This exercise helps you tell that story in 3 simple takes.
How it works:
Rather than just taking the one shot, that you would normally take, you take 3 at different proximities to your subject. 3 specific ones.

Photo 1 : The ‘middle’ or your 'standard'
I find that for most people it’s usually the “head and shoulders crop” with your kid looking straight into the camera. It could be different for you - it doesn’t matter, this is essentially the “get it out of your system” photo. You know you’ll like it, it’s safe, so start here. Even if you hate the other two, you know you have that one, so it's OK
Photo 2: Go further away
By moving backwards or zooming out you get to include more of what’s going on. If somebody who wasn’t there with you shooting it were to come across this photo, they should be able to glimpse from it things like where it was taking place ( park? your living room? playground?) and what’s actually happening ( is your child playing with something? talking to someone? running? eating?). The reason to take that shot is that if you’re not used to think about your photo in terms of the overall “story” this is making you do it. Making you pause and compose a bit more carefully.
Photo 3 : Go closer
Go the exact opposite way. This one is all about the details. Pick one small thing that is interesting about what’s in front of you - this could be your child, but also something in the environment - and take a pretty tight, detail photo of it. Devil may be in the details, but so is human interest - our brain likes having something highlighted that it can focus on. By switching your attention this way, you're also forcing yourself to look at what's in front of you from yet another angle, with a different focus.
Now put these three photos together. You have the wider story, focus on your child and focus on detail. Together, they give you a really nice set that really tells the tale of what you’ve been up to and gives you a couple more angles to explore.
You can always remember : 'Normal' - Bigger - Smaller

So this is your photo workout complete: 3 different positions, 3 different angles, 3 different proximities to your subject. All of that equals A LOT of different photos. easy as 3 x 3 x 3
On the next page, you will also get lots of examples of clever positioning and angles from our students to get your creative juices flowing.
And here is your challenge for this week - I would love for you to share it on our Facebook group:
Lesson 1 Challenge
Set 10 minutes aside while your child is engaged in an activity ( or willing to be photographed)
Capture a series of images from all 3 positions in combination with different angles and distances to your subject.
Aim to capture at least 5 different photos - more if you can!
With each position and angle, think about how it's affecting what you see and your subject. Are you seeing any size distortion? Is it working better for wider shots or details?
Do you know about us?
When you join Photography for Parents courses , we give you all round photo skills with a focus on photographing children.
We do a lot on camera know-how, but we also spend lots of time on the softer side of things - like composition and storytelling and learning how to capture and express emotions through your photos.
You already know that you can win a place on one of our course just for taking an active part in this summer project, but just in case Lady Luck is not on your side, I want to let you know we will have a rather wonderful offer for you at the end of this course...
Just saying...
